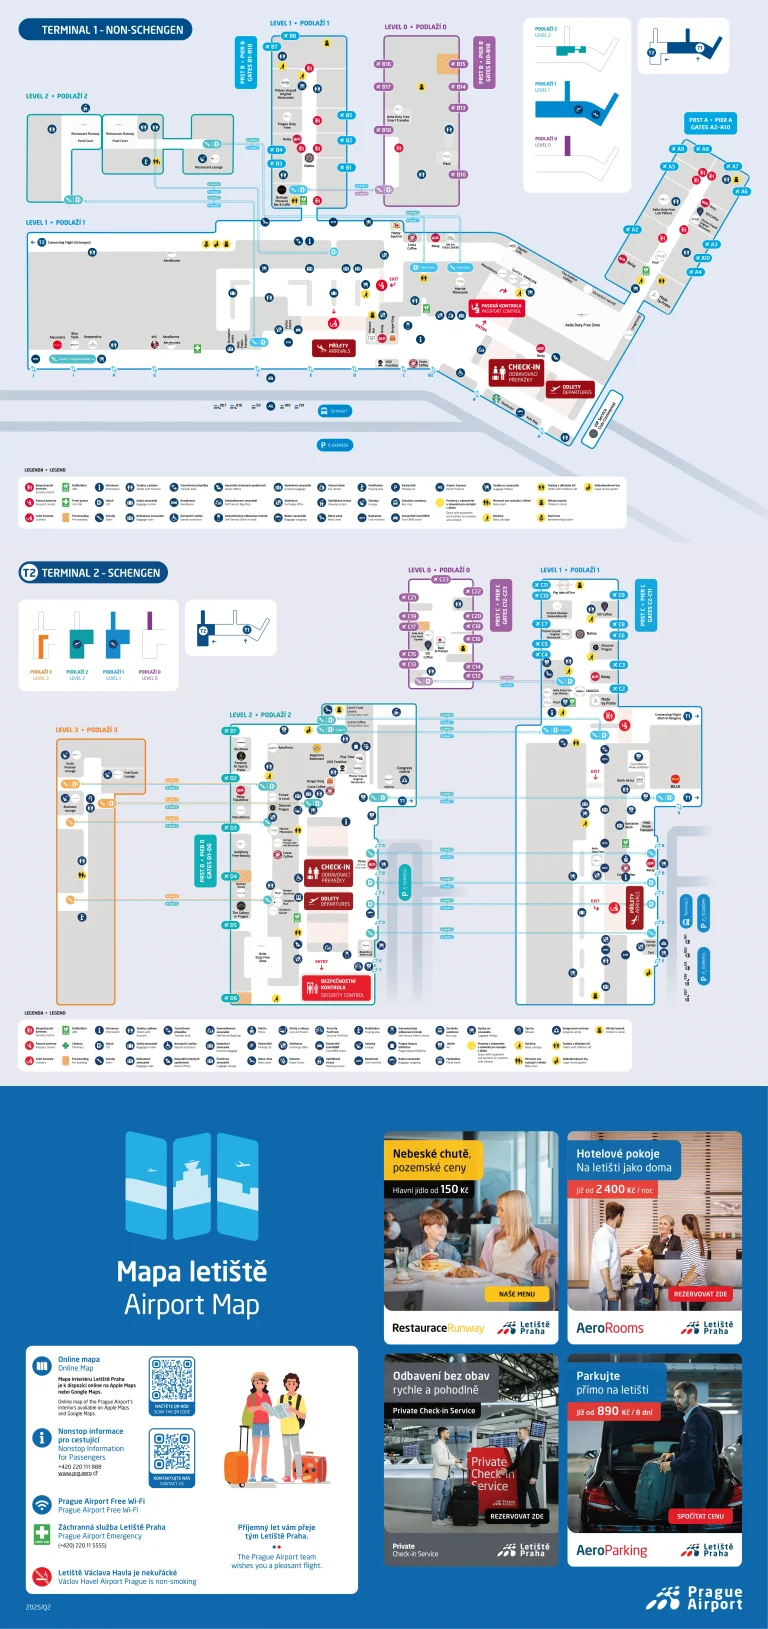
San Francisco Bay Oakland International Airport Map (Most Up-To-Date)
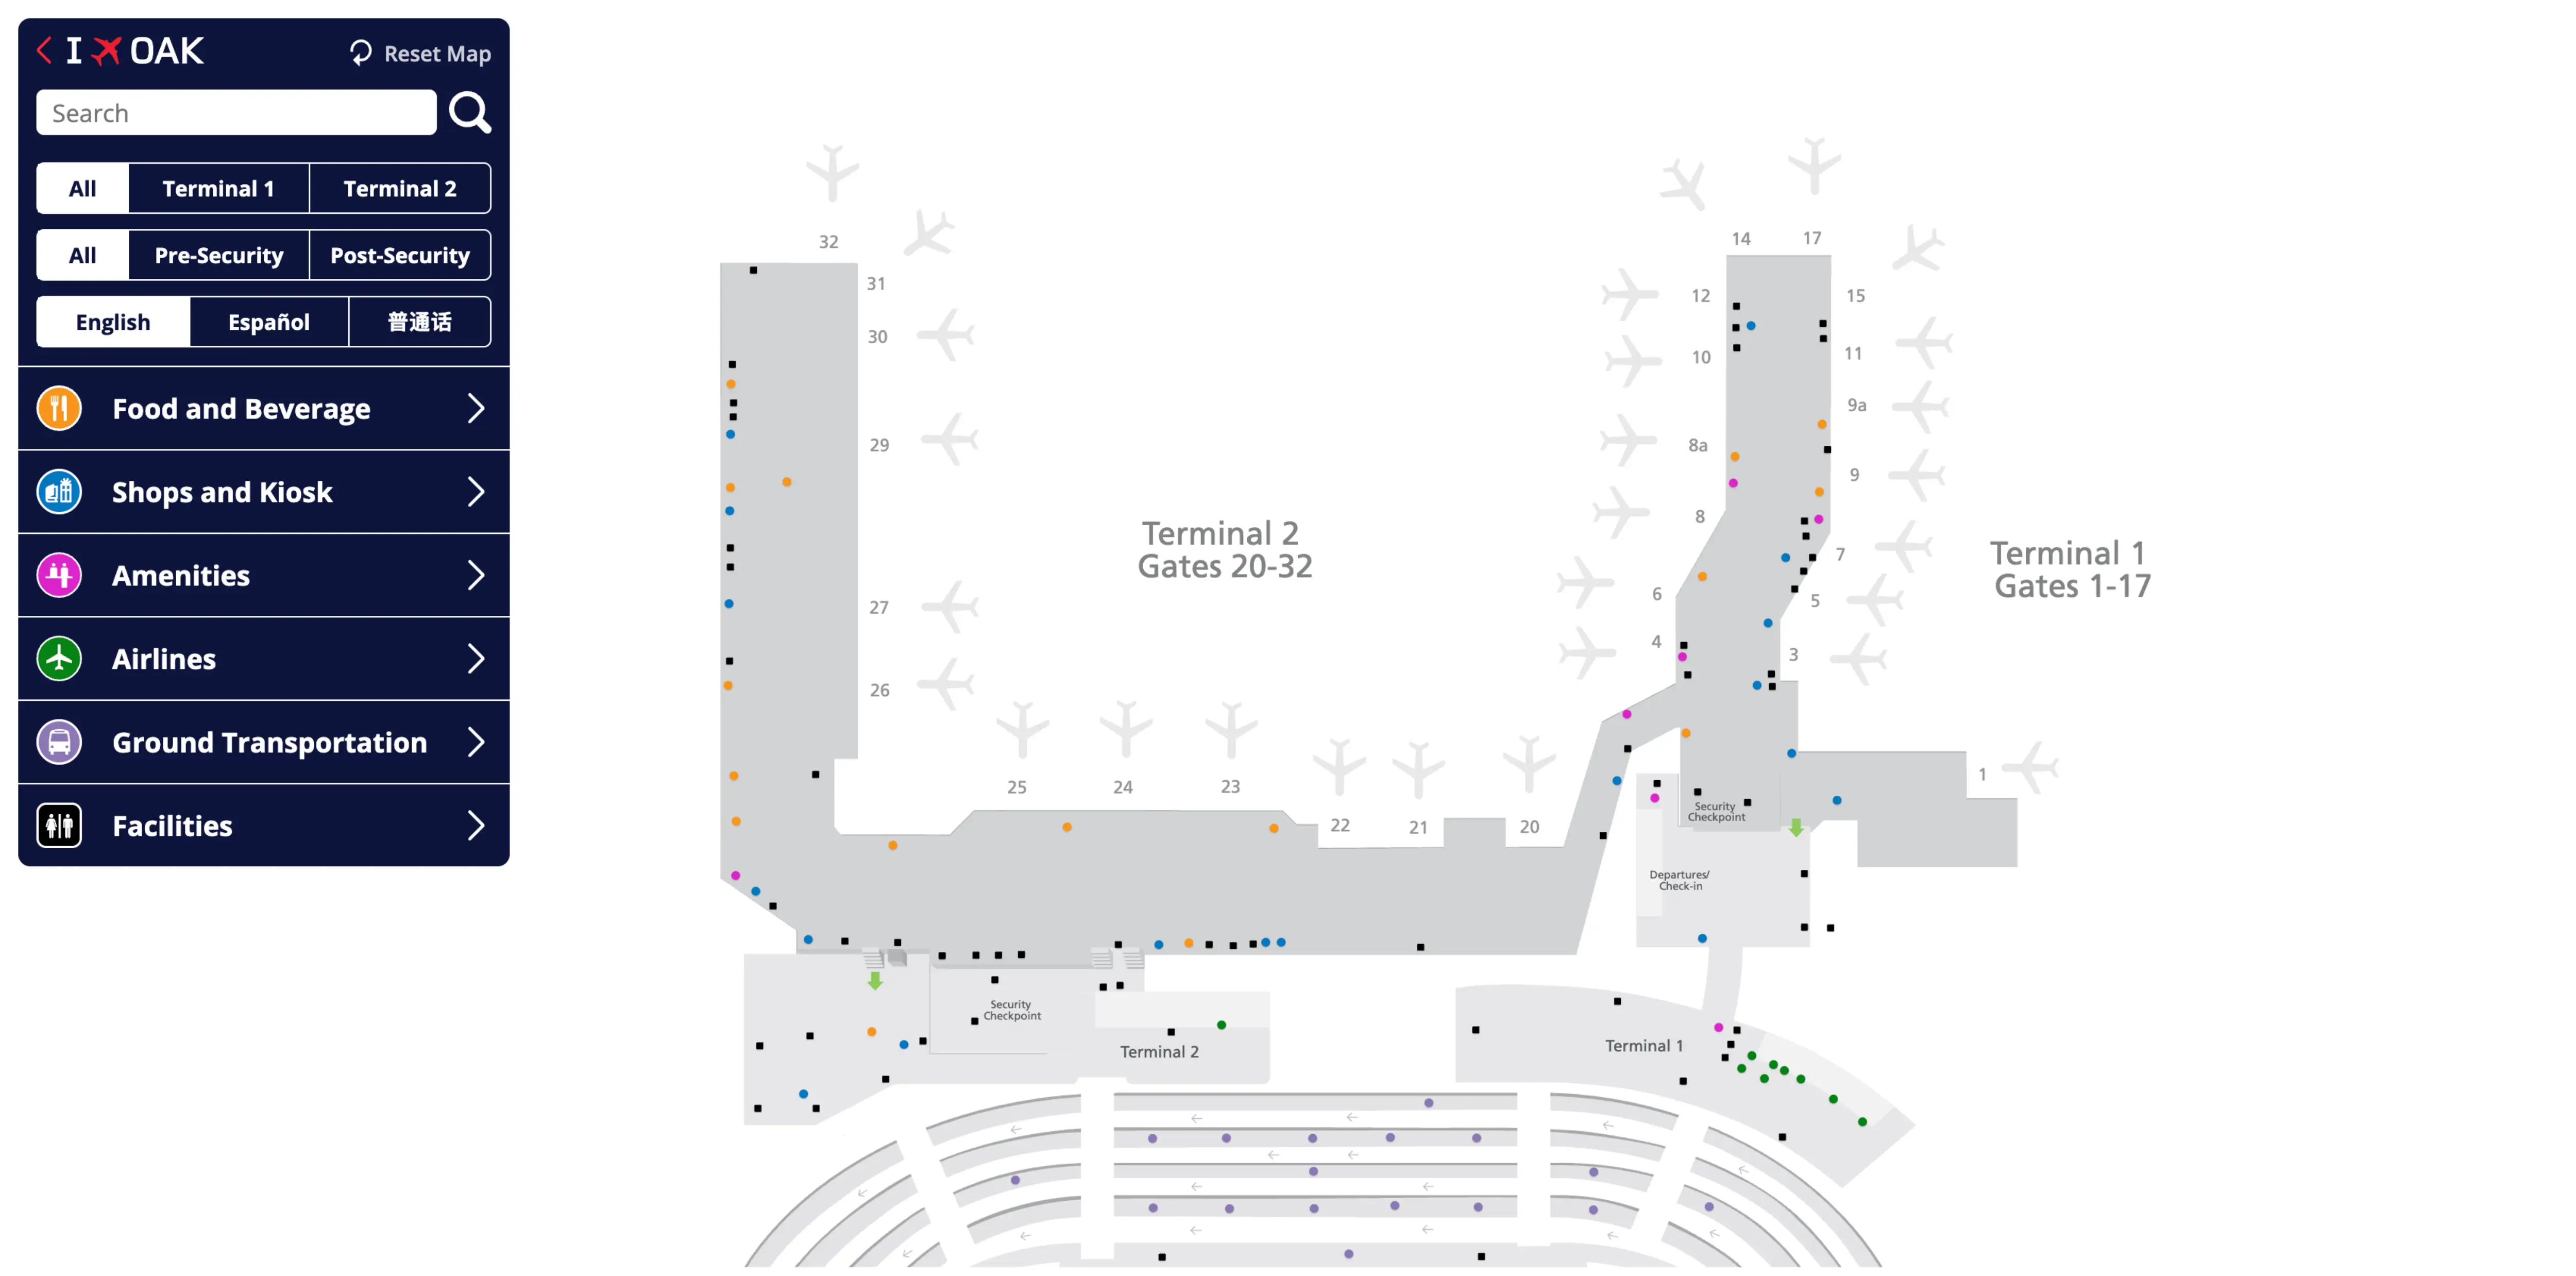
Oakland’s terminal area runs as a tight, counter-clockwise loop with two side-by-side terminals and a “Third Curb” outer pickup island that drives most wayfinding errors. The airport rail link is a separate AGT system that ends across the loop road from Terminal 1, forcing an outdoor crosswalk transfer into the terminal frontage. Within the East Bay air-travel hub, your primary orientation cues are the Terminal 1 vs Terminal 2 lane split and the airside connector corridor.
Map Table
| Terminal | Key Airlines | Primary Function | Transfer Mode |
|---|---|---|---|
| Terminal 1 | Alaska, Delta, Spirit, Hawaiian, others | Non-Southwest departures, arrivals, baggage claim | OAK Connector crosswalk, curb 1–3 islands |
| Terminal 2 | Southwest | Southwest-only check-in, gates, arrivals | Airside connector to T1, curb 1–3 islands |
Oakland International Airport Map Strategy
- At Coliseum Station, ignore street-level “Exit” flow and move up to Platform 3 for the Connector; the wrong descent creates a 5–10 minute confusion loop.
- Treat Terminal 1 vs Terminal 2 as a one-shot driver decision at the Y-split; a wrong lane costs a full loop and adds 5–7 minutes.
- For Uber/Lyft, walk straight to the Third Curb (3C2–3C9) immediately after exiting baggage claim; pickups at inner curbs fail due to geofencing.
- When connecting between terminals, stay airside via the Gate 20 ↔ Gate 4 corridor; exiting to baggage claim triggers full TSA re-screening.
2026 San Francisco Bay Oakland International Airport Map + Printable PDF
Current Oakland International Airport operations still hinge on three “hard-rule” zones: the BART Coliseum → Platform 3 handoff for the OAK Connector, the Terminal 1 vs Terminal 2 lane commitment on Bessie Coleman Drive, and the geofenced rideshare pickups at the Third Curb. Terminal 1 and Terminal 2 remain airside-connected, so gate-to-gate transfers can stay inside security.
2026 San Francisco Bay Oakland International Airport Map Guide
What is the exact on-foot route (including the correct exits) from BART Coliseum Station to the Oakland Airport Connector boarding platform?
The correct route is to stay inside the paid area and go up to Platform 3 for the Oakland Airport Connector, not down to the street-level exit. From the BART train, walk along the platform toward the south end, follow “Oakland Airport Connector / Trains to OAK” signs, then take the escalator or elevator up to Platform 3 and pass through the dedicated Connector fare gates.
Follow the “Platform 3” and “Oakland Airport Connector” signs while you remain on the elevated BART platform level. Use the transfer escalator/elevator that goes up (the key landmark is signage directing you to Platform 3 rather than “Exit”). After you reach the separated Platform 3 concourse, tap through the Connector-only fare gates and proceed to the platform doors for boarding. Avoid descending to the concourse/street exit, which breaks the transfer and creates a 5–10 minute re-orientation penalty.
What is the exact walking distance from the Oakland Airport Connector drop-off to the Terminal 1 security checkpoint entrance?
Walking distance is approximately 350–400 feet (about 110–120 meters) from the Oakland Airport Connector station exit to the Terminal 1 security checkpoint approach, excluding any crosswalk signal wait. The path runs from the station down to ground level, across the terminal loop crosswalks, into the Terminal 1 lobby, then up one level to the security area.
Exit the Connector station through the fare gates and descend by escalator/elevator to the base. Use the marked pedestrian crosswalk straight toward Terminal 1 (the station sits across the loop road from the Terminal 1 baggage claim facade). Enter the landside lobby doors, walk to the central escalators/elevators near the check-in hall, go up to Level 2, then walk into the security queuing zone. A conservative plan is ~5 minutes door-to-queue when crosswalk timing and escalator ride time are included.
What is the exact airside walking distance from Terminal 2 Gate 20 to Terminal 1 Gate 8 (Escape Lounge area) without re-clearing security?
Do NOT exit to baggage claim, because leaving the secure area makes this transfer impossible without full TSA re-screening. The airside walking distance from Terminal 2 Gate 20 to Terminal 1 Gate 8 is approximately 500–700 feet (about 150–200 meters) using the secure connector corridor.
Start at Terminal 2 Gate 20 and enter the airside connector corridor located by that gate area. The corridor delivers you into Terminal 1 near Gate 4, still inside security. From Gate 4, continue down the Terminal 1 concourse past Gates 5, 6, and 7 to reach Gate 8, where the Escape Lounge area is located. The walk is typically 3–5 minutes at a brisk pace, and it stays entirely within the sterile (post-security) zone as long as you never cross the “No Re-entry” boundary at the baggage claim exits.
Where are the exact Uber/Lyft pickup curb segments (3C2–3C9) located relative to the Terminal 1 Arrivals exit doors (which door/section is closest)?
Uber/Lyft pickups are at the Third Curb on segments 3C2 through 3C9 directly opposite Terminal 1, with the closest access from the Terminal 1 baggage claim/arrivals doors serving Carousels 1–3. From those doors, the most direct path is straight out and across the two inner curb islands to the outermost pickup island marked “3C.”
Exit Terminal 1 at the baggage claim doors aligned with the earlier carousels (the doors commonly used for Carousels 1–3), then walk straight ahead to the marked crosswalk. Cross the first roadway to the first island (Curb 1), cross the next roadway to the second island (Curb 2), then cross to the outermost island (Curb 3). On that third island, look for the “Smartphone App Rideshare” signage and the stop markers labeled 3C2 through 3C9 along the length of the curb opposite the Terminal 1 facade; lower-numbered 3C stops sit nearer the Terminal 1–Terminal 2 interface.
What is the exact walking route and distance from Terminal 1 baggage claim to the OAK BART station/Connector station entrance (including the crosswalk you must use)?
Walking distance is approximately 250–300 feet (about 75–90 meters) from Terminal 1 baggage claim to the Oakland Airport Connector station entrance using the marked pedestrian crosswalks across the terminal loop road. The route is a straight, outdoor transfer from the Terminal 1 doors that face the elevated station structure.
Exit Terminal 1 baggage claim through the doors directly facing the Connector station (the doors on the curbside that look out toward the parking/roadway and the elevated guideway). Walk forward to the marked pedestrian crosswalk that spans Airport Drive/terminal loop traffic. Use that crosswalk to cross the pickup lanes and islands toward the station footprint, then continue to the base of the escalators/elevators that lead up to the station fare gates and platform. The key landmark is the elevated station structure across the roadway; do not follow curb traffic laterally along the terminal face.
What is the exact walking distance from Terminal 2 baggage claim to the Rental Car Shuttle pickup point on the 3rd curb (Terminal 2 at 3D)?
Walking distance is approximately 150–200 feet (about 45–60 meters) from Terminal 2 baggage claim exit doors to the Rental Car Shuttle pickup at Stop 3D on the Third Curb. The route is a direct, perpendicular walk straight out from Terminal 2 to the outermost curb island.
Collect bags at Terminal 2 baggage claim and exit through the Terminal 2 arrivals doors. Head straight toward the marked crosswalk and cross past the inner curbside lanes and islands (Curb 1 and Curb 2) to reach the outermost island (Curb 3). Once on the Third Curb, look for the column/sign labeled “3D,” which is the terminal-specific rental car shuttle stop for Terminal 2. Waiting at Curbs 1 or 2 is a common failure mode because the shuttle buses are routed to stop on the outer lane at the Third Curb.
On the terminal loop road, where exactly do the lanes split for Terminal 1 (right lanes) vs Terminal 2 (left lanes), and what is the first decision point drivers must commit to?
The lanes split on Bessie Coleman Drive just before the roadway curve that aligns you with the terminal buildings, at the first large overhead gantry signage for “Terminal 1” and “Terminal 2.” The first commit point is the lane choice before that curve, because late weaving is blocked by traffic flow and physical separation.
As you approach the terminal complex on Bessie Coleman Drive (Airport Drive), watch for the overhead signs that appear immediately before the loop tightens and the terminal facades come into full view. Move into the right lanes if you need Terminal 1 curb access (these lanes feed the first curb frontage). Move into the left lanes if you need Terminal 2 (Southwest), which bypasses the Terminal 1 frontage and deposits you downstream closer to Terminal 2 check-in. Missing the correct lane forces a full recirculation of the loop, typically adding 5–7 minutes.
From I-880 Exit 98th Ave, what is the exact in-airport driving path to reach the correct terminal curb without passing through non-airport commercial stops along the Hegenberger corridor?
The safest direct path is I-880 Exit 98th Avenue straight onto 98th Avenue, then stay on the same roadway as it transitions into Bessie Coleman Drive/Airport Drive until the terminal Y-split. This approach avoids the Hegenberger commercial strip by keeping you on a single continuous arterial into the airport loop.
| Step | Driver action | Landmark cue |
|---|---|---|
| 1 | Take I-880 Exit 98th Ave | Overhead freeway sign for “98th Ave” |
| 2 | Turn onto 98th Ave (left from I-880 North, right from I-880 South) | Signalized intersection at end of off-ramp |
| 3 | Continue straight west on 98th Ave with no commercial detours | Road continues toward airport/bay; stay on mainline |
| 4 | Stay straight as 98th Ave becomes Bessie Coleman Drive/Airport Drive | Road name change; airport-bound traffic flow |
| 5 | Follow terminal overhead signs to the Y-split | Large gantry signs immediately before terminal curve |
| 6 | Commit: right lanes for Terminal 1, left lanes for Terminal 2 | Lane separation begins before the curve into the loop |
| 7 | Continue to the correct departures/arrivals curb on the loop | Terminal facade ahead; curb levels posted at entrances |
What is the exact walking time/distance from the furthest Southwest gate area to the rideshare pickup zone on the 3rd curb (worst-case gate-to-curb walk)?
Walking distance is approximately 1,200–1,600 feet (about 0.25–0.30 miles) and typically takes 10–15 minutes from the furthest Southwest gate area (Terminal 2’s far end, e.g., Gate 32) to the Uber/Lyft pickup zone on the Third Curb (3C2–3C9). The longest penalty comes from traversing the full Terminal 2 concourse, then shifting curbside toward the Terminal 1–centered rideshare “3C” zone.
Start at the far Terminal 2 gate area and walk the entire length of the concourse back toward the Terminal 2 central hub where the exits to baggage claim are located (the key landmark is the Terminal 2 security/baggage claim core). Exit to landside at baggage claim, go out the Terminal 2 arrivals doors, then cross to the Third Curb and walk along the outer island toward the 3C stop markers opposite Terminal 1. Calling a rideshare from the far gate usually mis-times the pickup because the driver can reach 3C faster than you can walk there, triggering cancellations or missed connections.