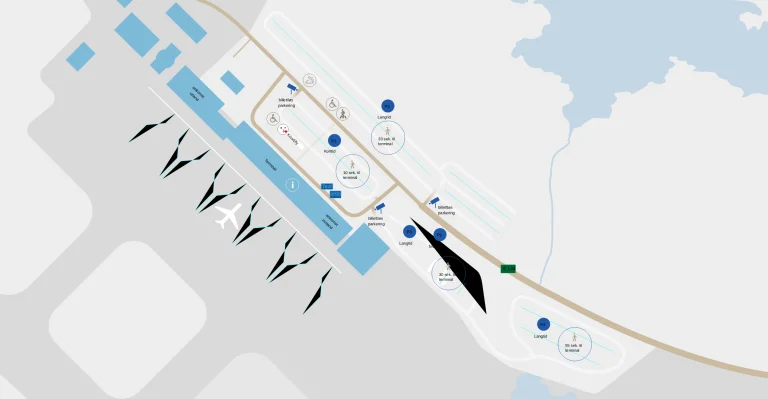
Keflavik International Airport Map (Most Up-To-Date)
Keflavík’s passenger layout is a compact, single-terminal complex with a north-to-south commercial spine on Level 2 that feeds a vertical split: Schengen gates on the upper level (A/C) and the Non-Schengen Gate D zone on Level 1 below. Most wayfinding stress concentrates at Iceland’s main Reykjavík-area gateway where the south end of the spine funnels into passport control and the down-escalators into Zone D, creating last-minute surges and tight holding areas.
Map Table
| Terminal | Key Airlines | Primary Function | Transfer Mode |
|---|---|---|---|
| Leifur Eiríksson Air Terminal | Icelandair, PLAY, transatlantic carriers | Schengen Level 2 spine; Non-Schengen Level 1 Gate D | Walk-only, vertical descent via escalators/stairs |
| North Building | Icelandair feeders, Schengen short-haul | Check-in, Security, Arrivals, baggage reclaim | Walk corridors |
| South Building | Transatlantic bank, UK/US/CA flows | C Gates (Level 2), D Gates (Level 1) | Passport control + escalators/stairs |
Keflavík International Airport Map Strategy
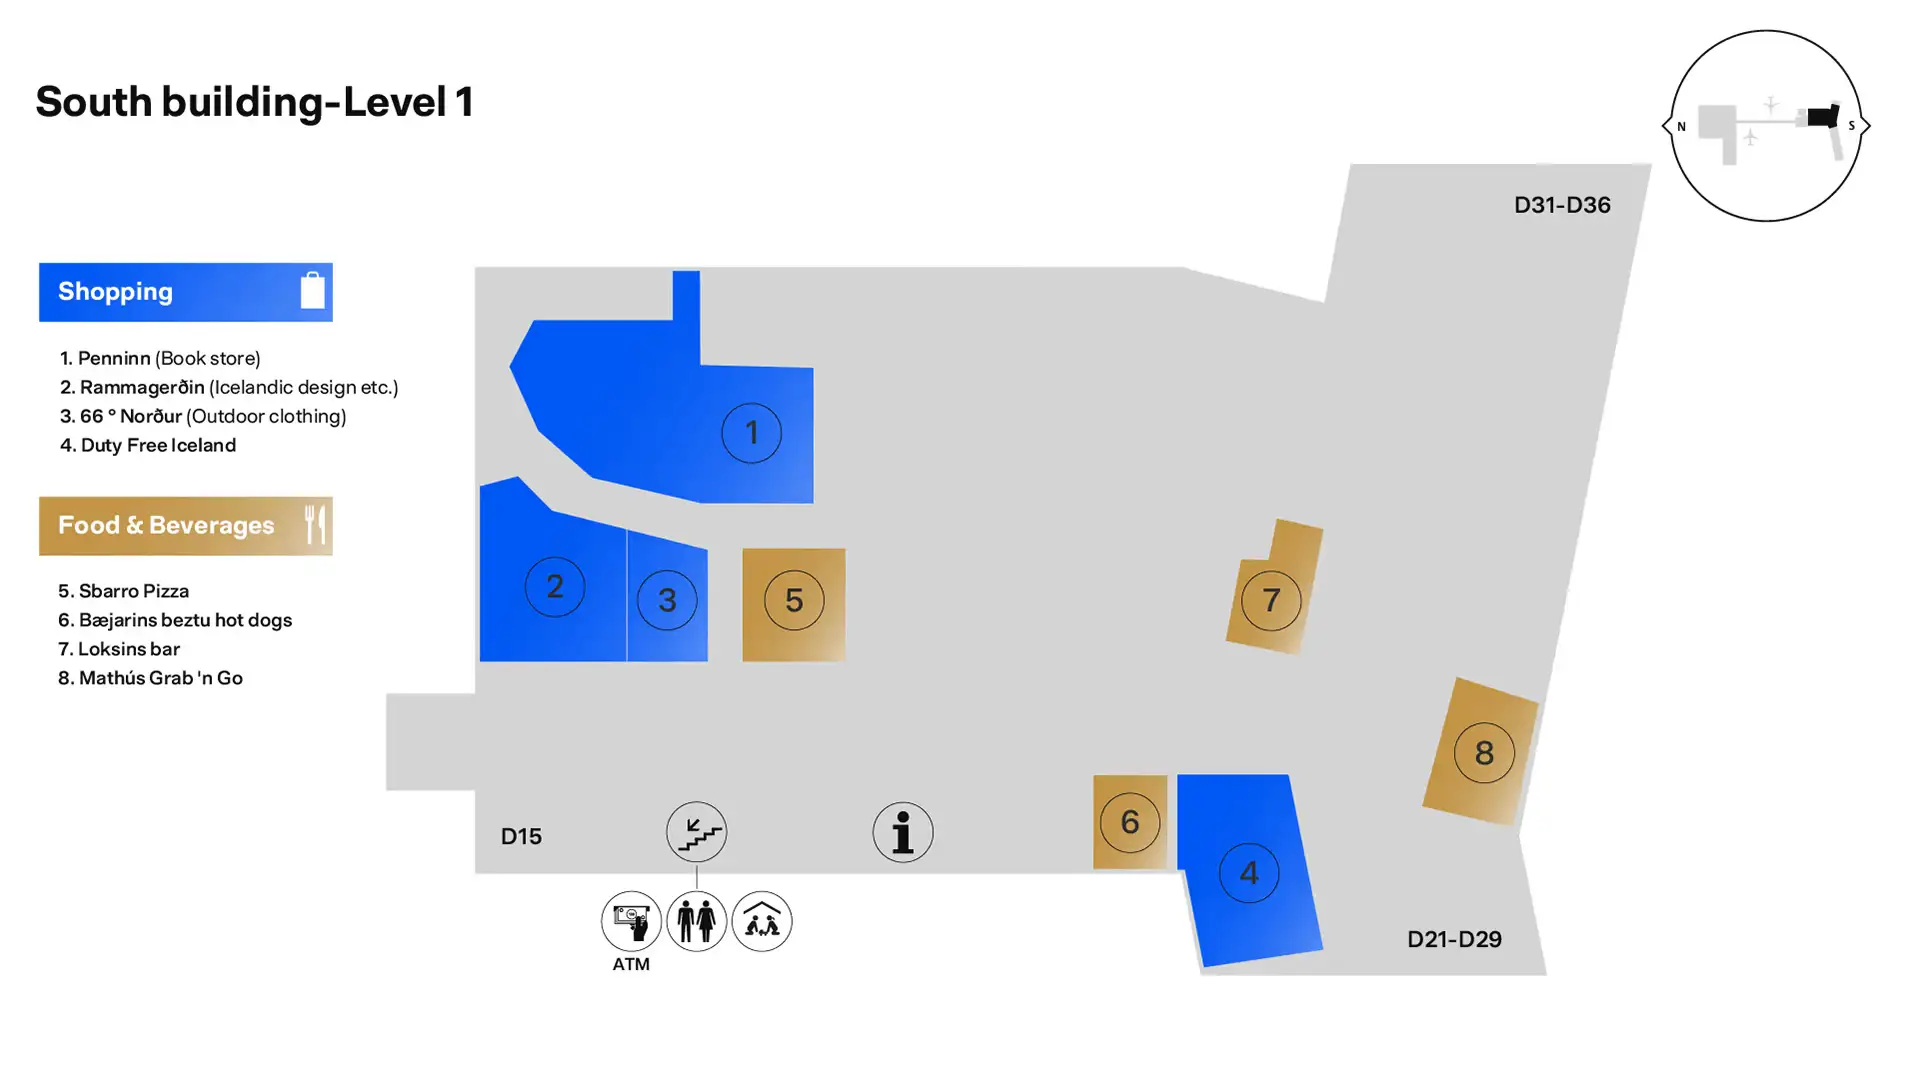
- Treat the Gate D decision as final: cross passport control before the late “Go to Gate” surge, then go straight down the escalators into Level 1 so the choke point can’t surprise you.
- Use the Level 2 commercial spine as your compass: duty-free exit → long straight south walk past the major shops/food → passport control signage at the south end before the C-gate spread.
- Assume Gate D holding areas will be crowded and seat-limited: aim to stage in the South Plaza at the bottom of the escalators (near the Level 1 food anchors) until your specific D gate stabilizes.
- If your D gate turns into bus boarding, look for the gate desk’s post-scan door/stair path instead of hunting for a curb exit; for arrivals, separate “buy/validate Flybus” inside the hall from “board Flybus” immediately outside the arrivals doors.
2026 Keflavik International Airport Map + Printable PDF
Ongoing terminal expansion work continues to shift the feel of the concourse, with temporary hoardings and a “work-in-progress” vibe near the South Building approach. The core map logic stays the same in 2026: Security exits into the Level 2 duty-free/commercial spine, then non-Schengen passengers funnel to passport control at the south end and descend to the tighter Gate D zone on Level 1—often after late gate posting triggers a sudden corridor surge.
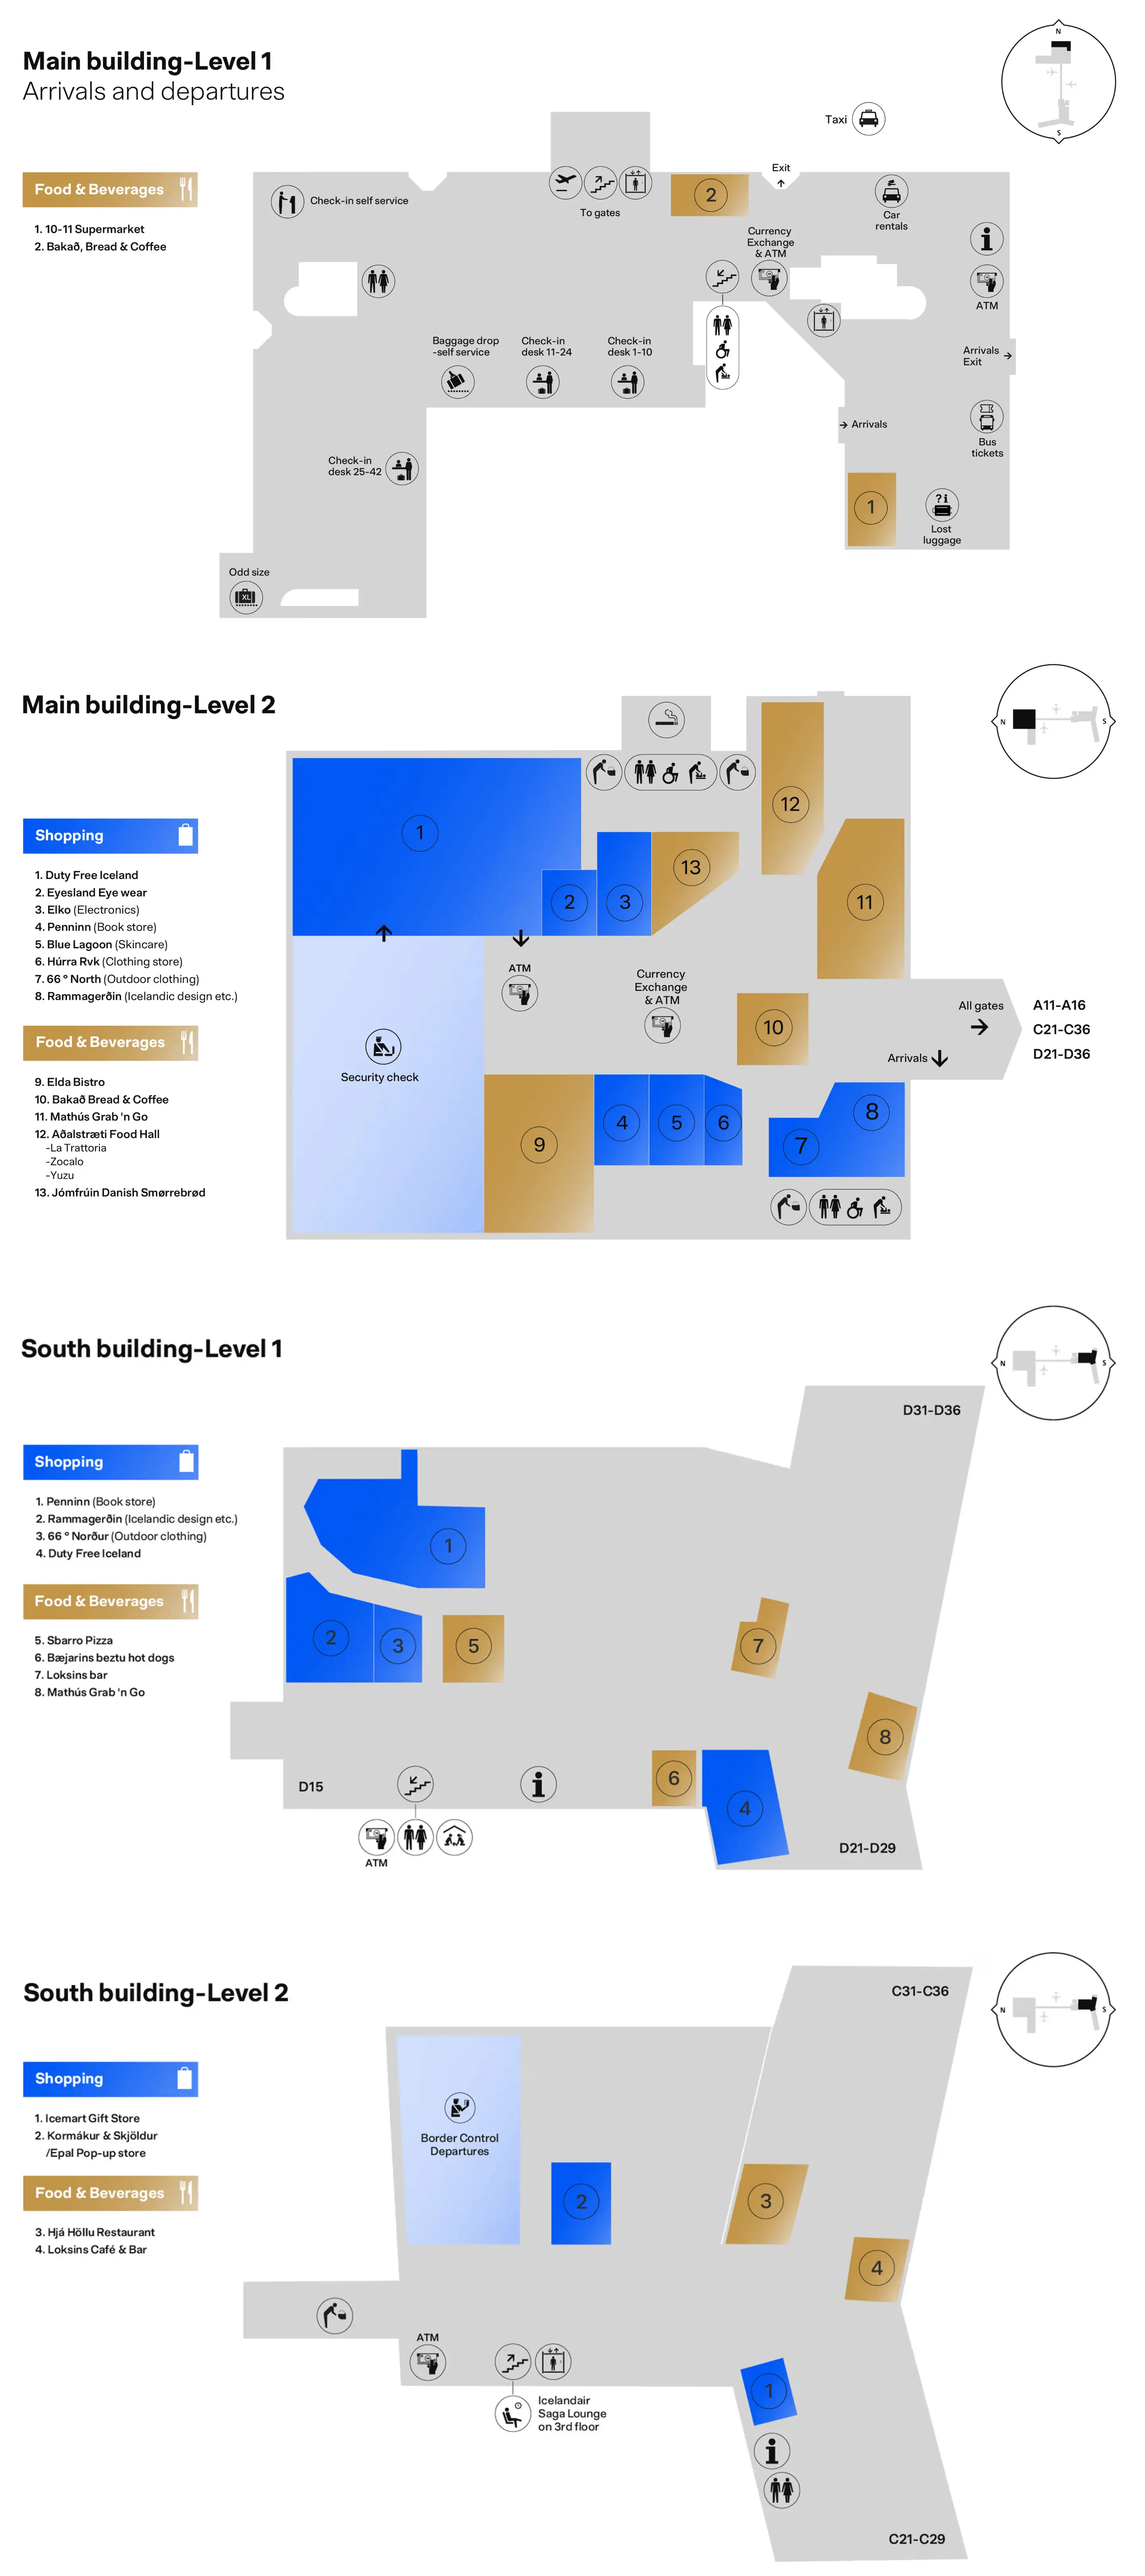
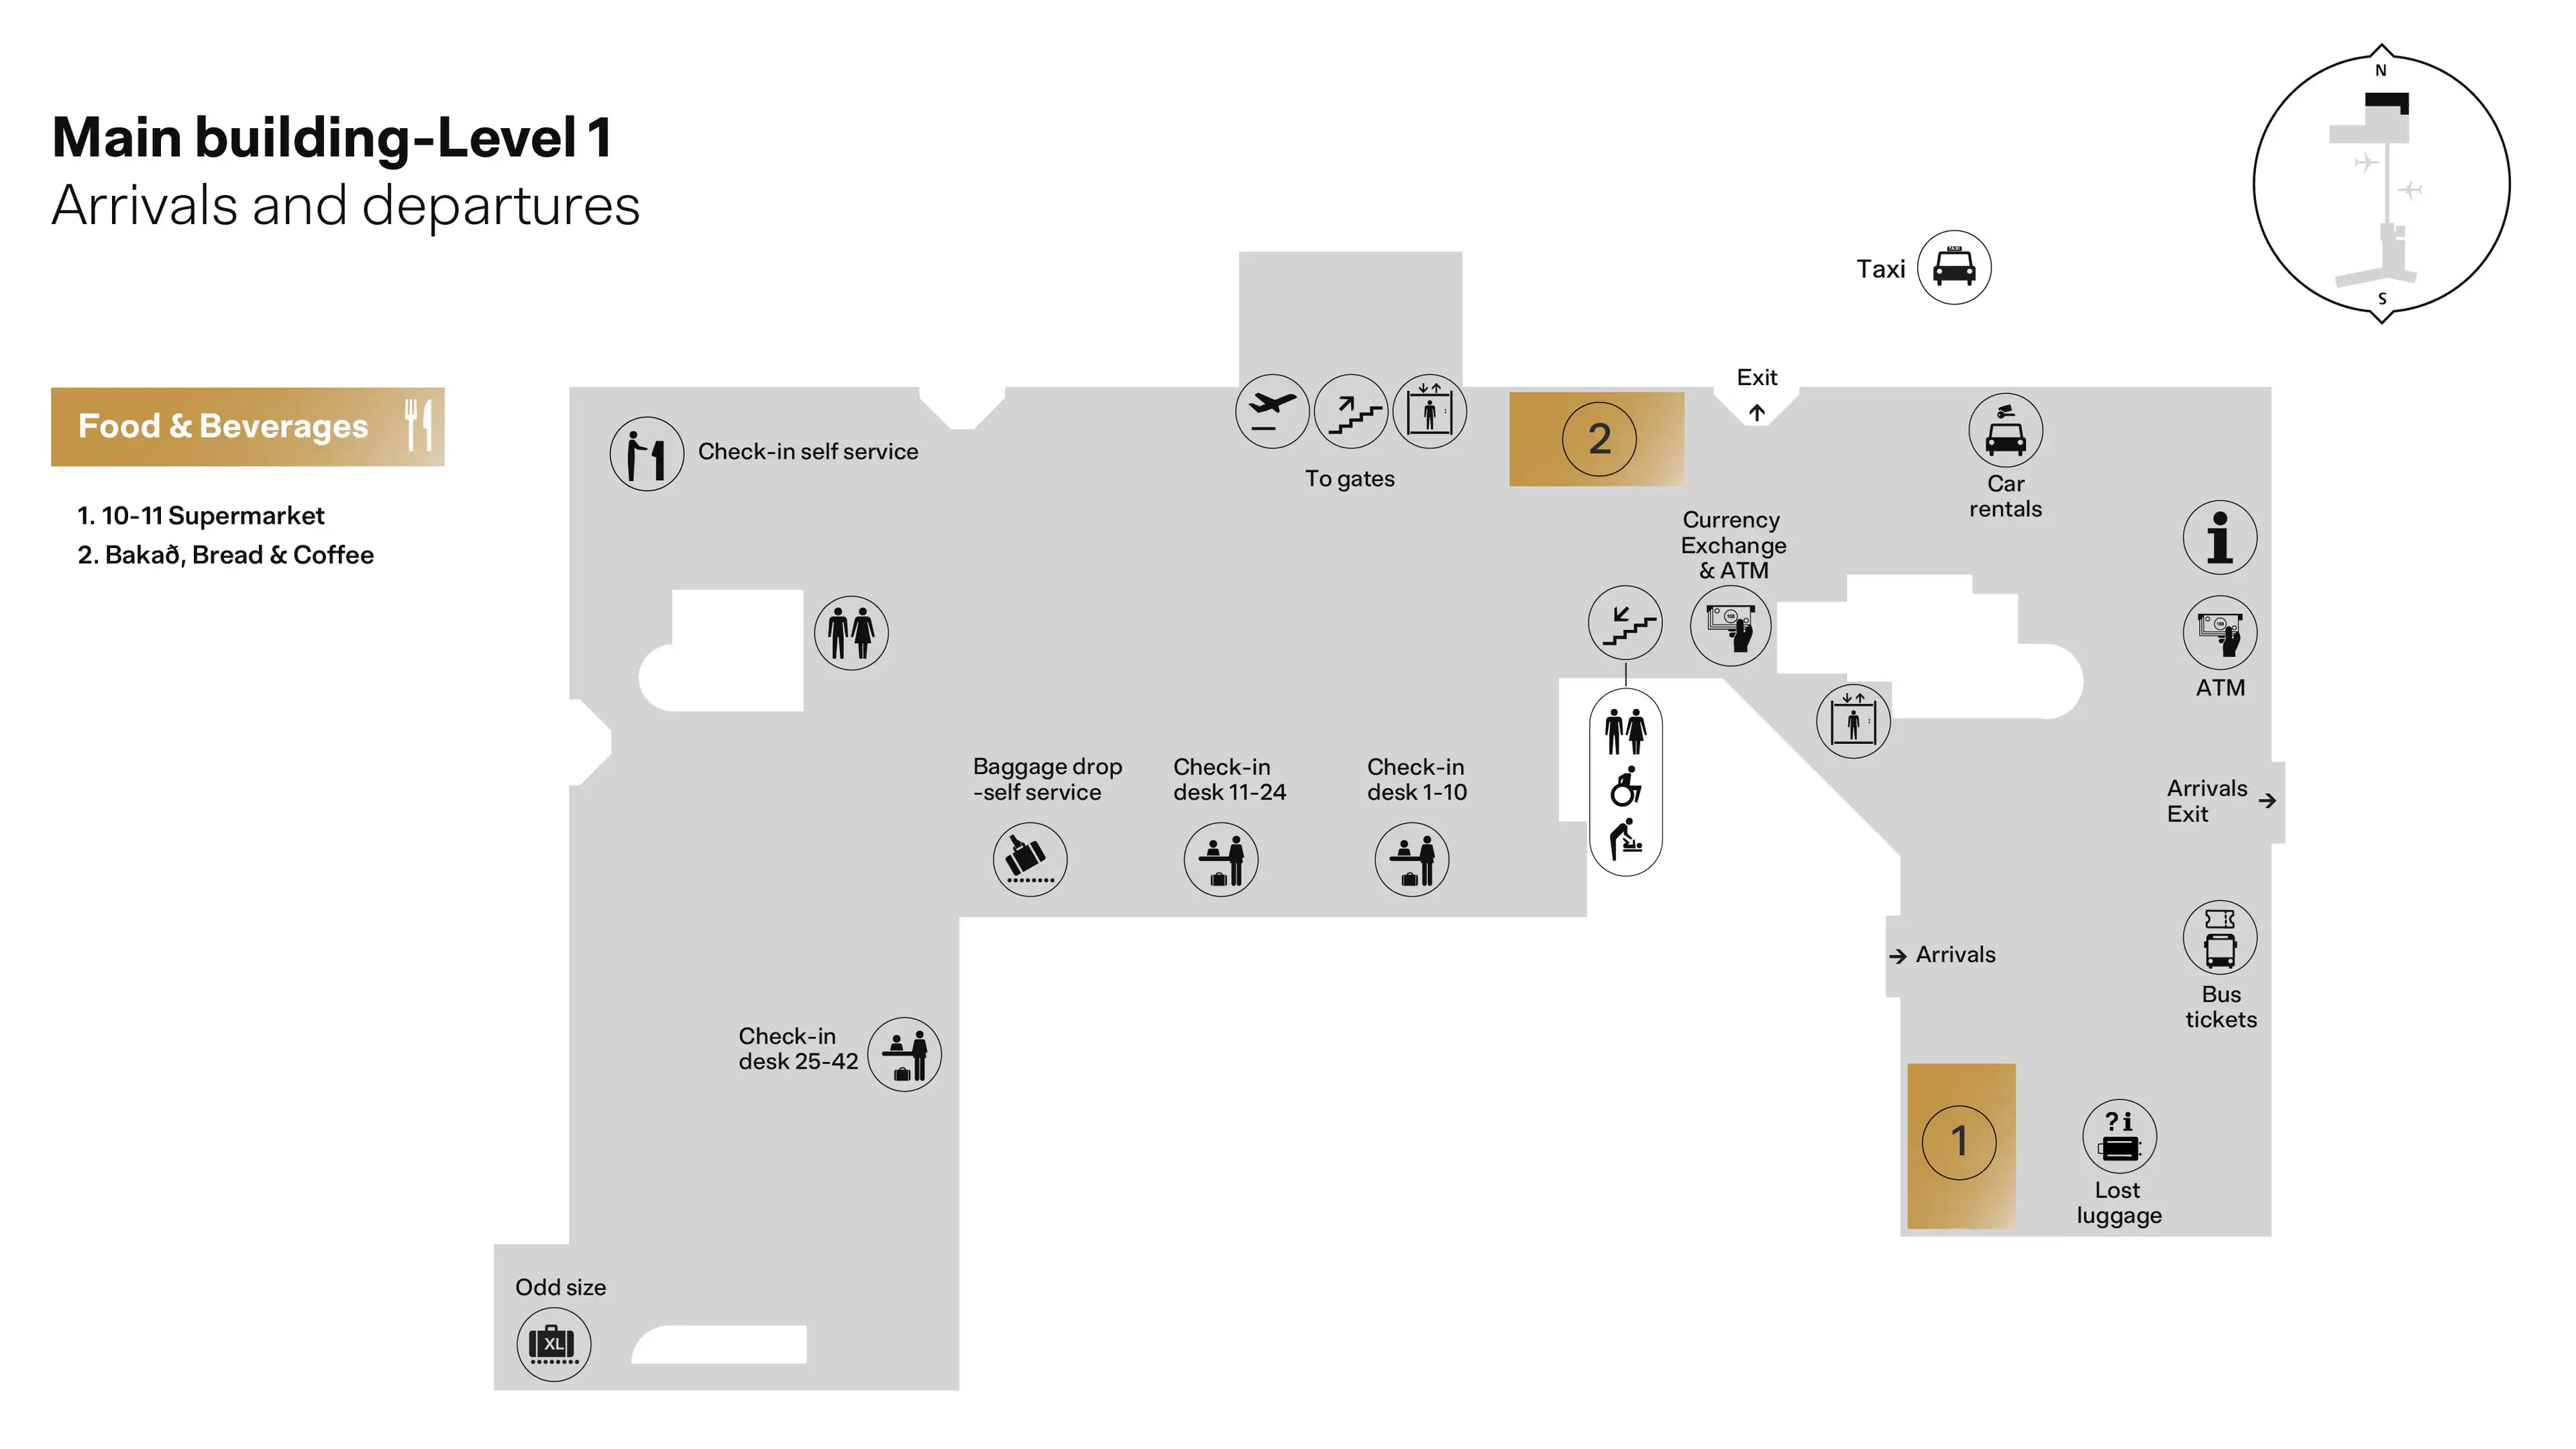
Keflavik International Airport Main Building Level 1 Arrivals and Departures Map 2025
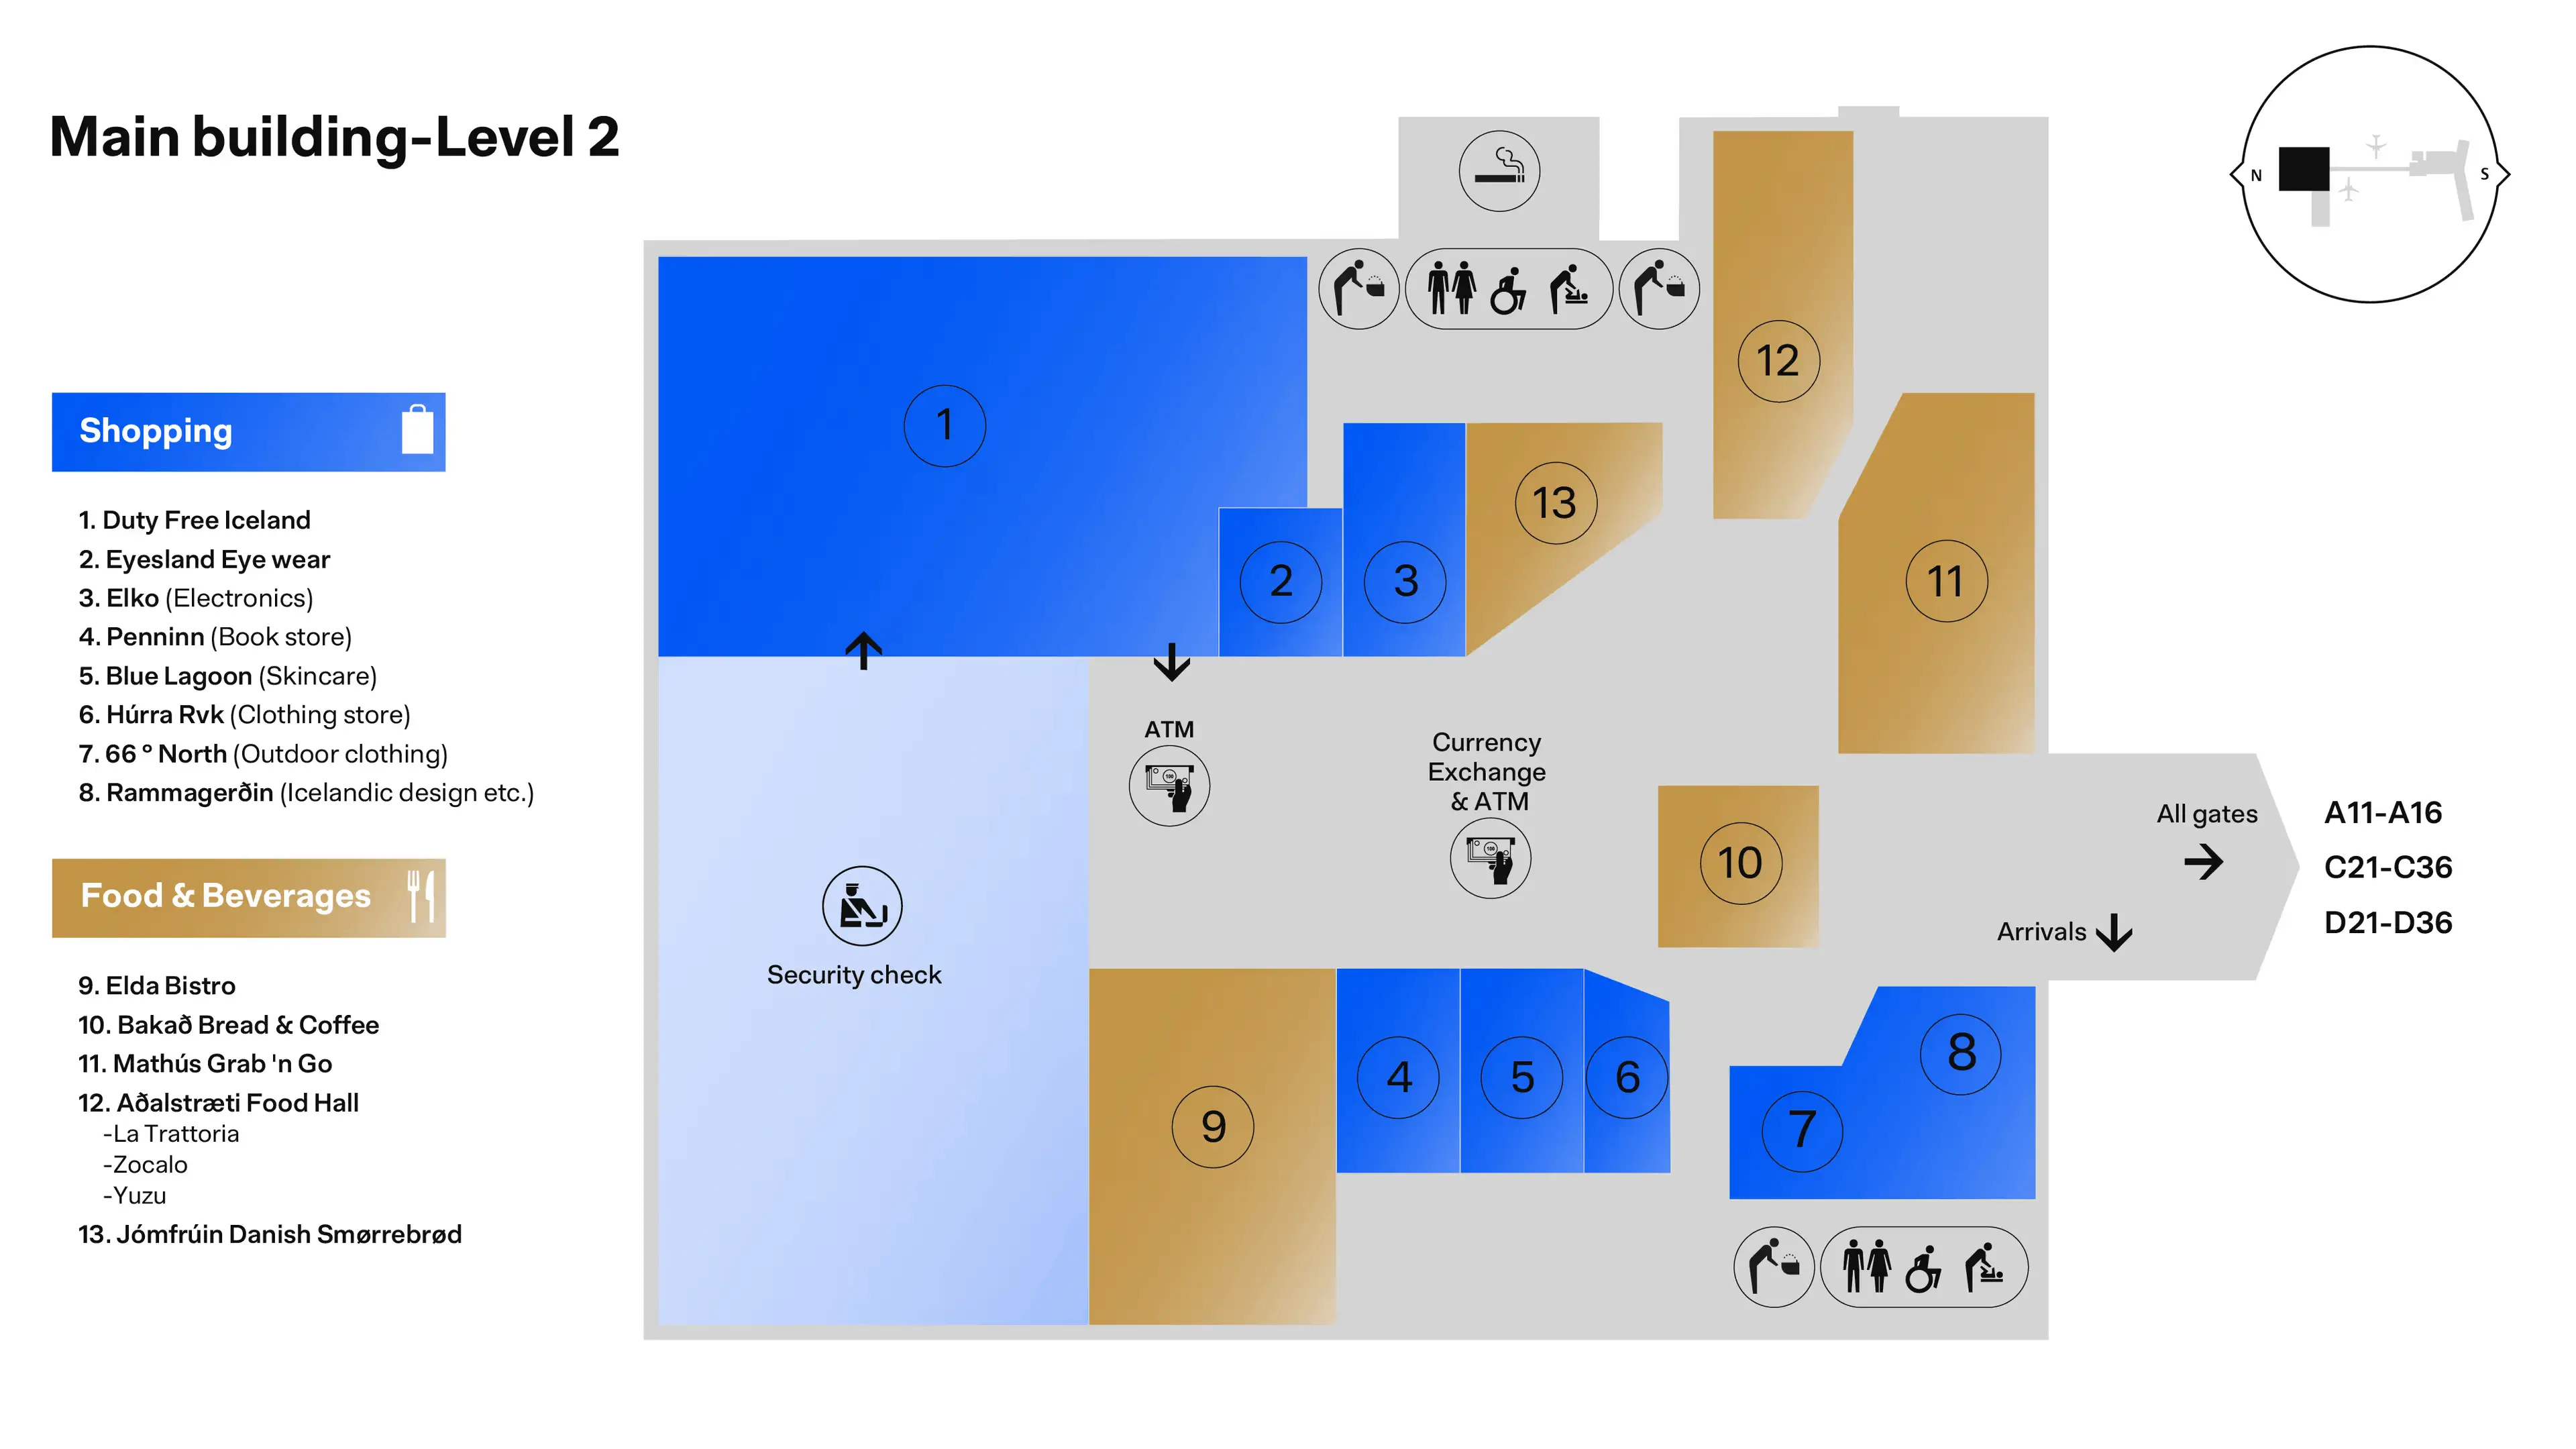
Keflavik International Airport Main Building Level 2 Map 2025
Keflavik International Airport South Building Level 1 Map 2025
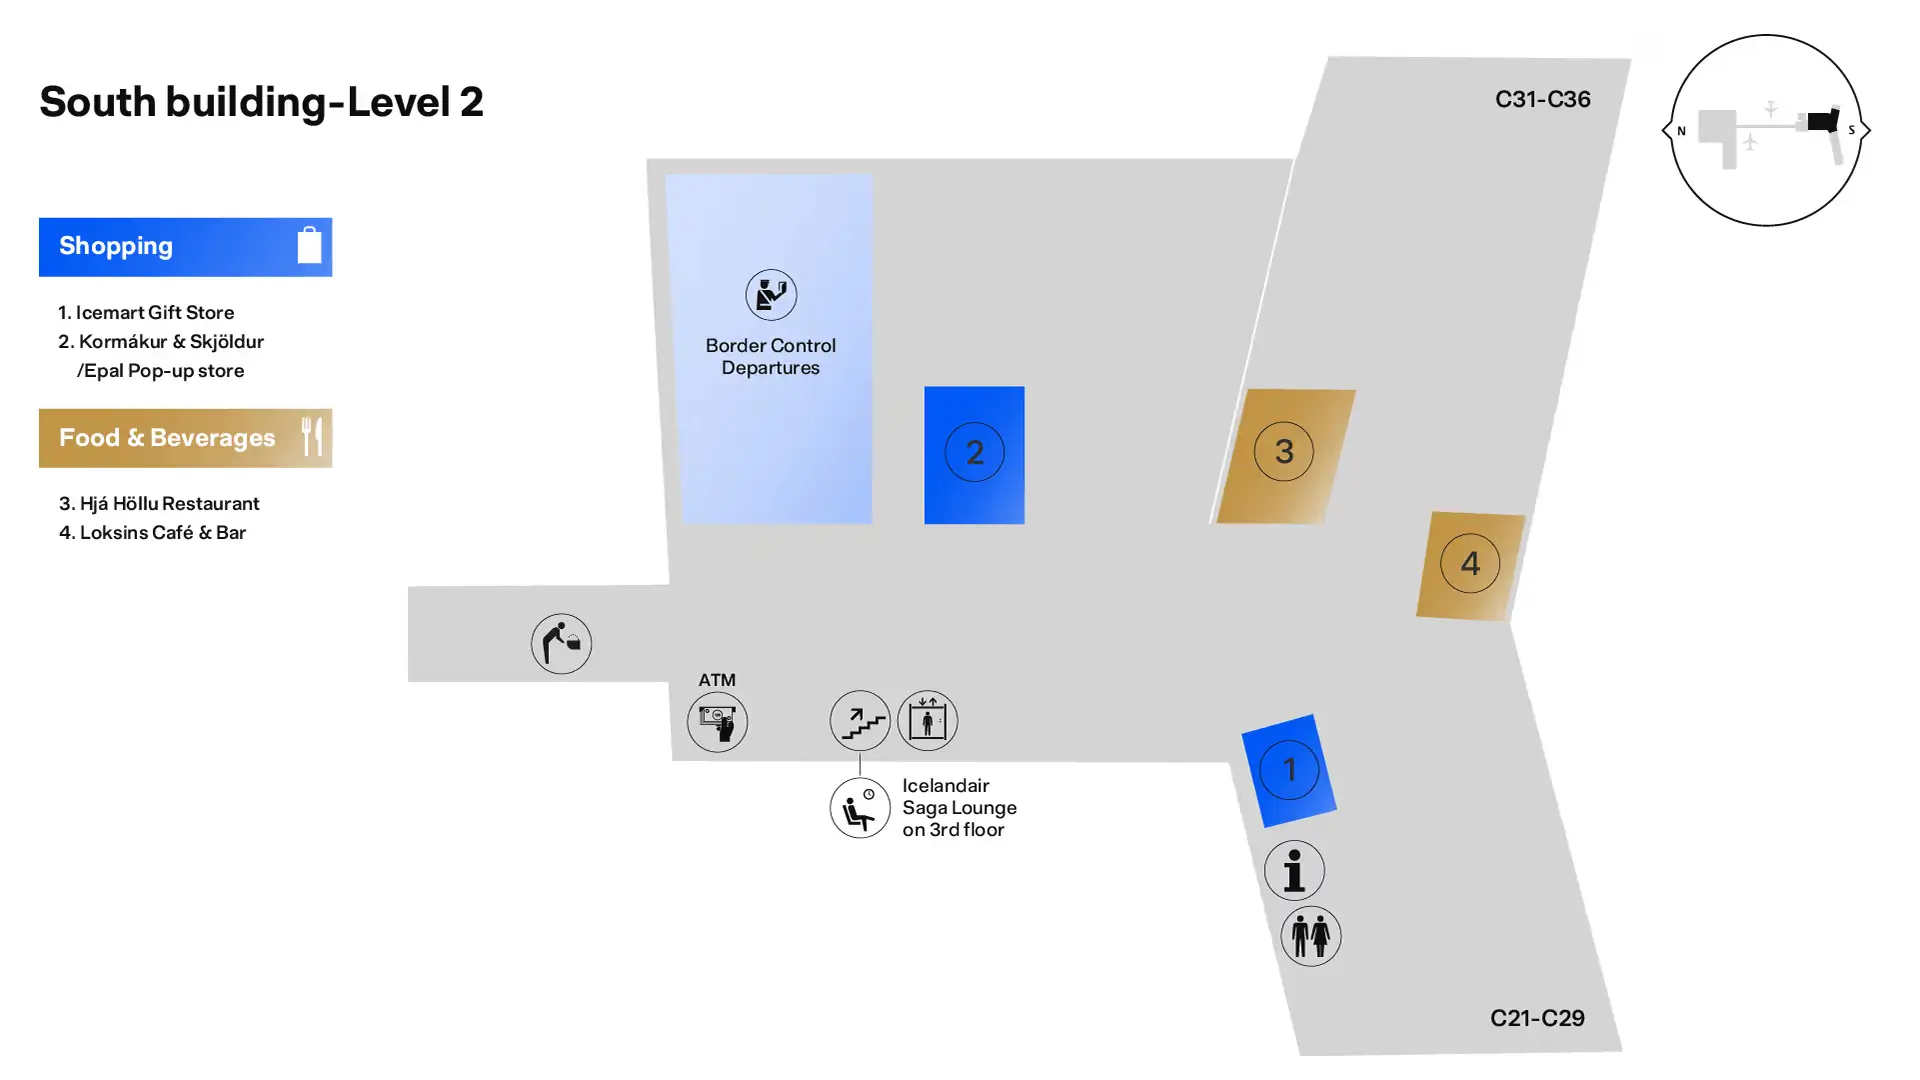
Keflavik International Airport South Building Level 2 Map 2025
2026 Keflavik International Airport Map Guide
What is the exact walking route (corridors + level changes) from Security exit to the Gate D passport-control checkpoint?
The route is a straight southbound walk on Level 2 from the security exit through the duty-free maze into the main shopping corridor, ending at the signed passport-control entrance for Gate D. After security, you’re intentionally funneled through walk-through Duty Free, then you “pop out” into the central departures concourse where the long commercial spine begins.
Stay on Level 2 and keep moving south past the main retail and food anchors in the central corridor (the same spine that leads toward the South Building and C gates). As the concourse starts to feel more “end-of-spine” than “mall,” watch overhead signs for “D Gates” and “Passport Control,” then peel off into the passport-control queue at the south end before the C-gate areas spread out. The only level change comes after passport control, where escalators and stairs drop to Level 1 for the Gate D zone.
What is the exact walking distance from the A/C gate spine to the first Gate D holding area (past passport control)?
The distance is roughly 400–600 meters of Level 2 corridor walking plus one down-escalator/stair descent to Level 1, which commonly totals about 15–20 minutes door-to-door when you include the passport-control buffer. The “distance mistake” at Keflavík is time, not meters: the border queue and the vertical drop are what turn a simple walk into a miss-risk.
From the A/C side, stay on the Level 2 commercial spine and walk south toward the South Building until you reach the signed “D Gates / Passport Control” entrance near the C-gate spread. Clear passport control, then immediately take the escalators or stairs down to Level 1; the first Gate D “holding” spaces start right after that descent in the South Plaza distribution area, where flows split toward lower-numbered D gates (often near the Icelandair service desk area) versus the longer pier toward higher-numbered D gates.
Where exactly is passport control located relative to the Gate D entrance (how many turns/landmarks from the duty-free spine)?
Passport control is the Gate D entrance, positioned at the south end of the Level 2 commercial spine where the concourse transitions into the South Building gate area. From the duty-free exit, it’s effectively one continuous corridor and then a single peel-off into the border-control queue—no hidden back hallways.
After you exit the walk-through duty-free shop, stay on the main departures corridor on Level 2 and keep moving south past the big retail and dining anchors along the spine. As you approach the point where passengers start branching toward C gates, follow the overhead “D Gates / Passport Control” signs and make the turn into the passport-control entrance (commonly a left peel relative to the southbound flow). Immediately beyond the booths, the escalators and stairs down to Level 1 are the next landmark, marking the physical transition into the Gate D zone.
What specific corridor do passengers take to move from Gate D back toward A/C (the “reverse direction” path) after clearing controls?
There is no normal public “reverse direction” corridor from Gate D back to A/C for departing passengers without staff intervention, and attempting to backtrack can trigger re-processing through controls. Gate D is designed as a one-way commitment once you’ve crossed the border and descended to Level 1.
If you truly must return, the only practical path is to go back toward the base of the escalators in the South Plaza on Level 1 (the area near the main food anchors) and ask airport or airline staff for the authorized route upward. In typical operations, passengers coming out of the non-Schengen area are routed via segregated channels to passport control and then released back onto Level 2 near the main commercial spine, where A and C gate directions resume from the central corridor. Treat the descent into Gate D as final planning-wise.
Where is the primary Gate D boarding cluster (the tight, seat-limited area) located on the map relative to the main shopping/duty-free corridor?
The primary Gate D boarding cluster sits on Level 1 directly underneath the Level 2 shopping/duty-free spine, reached only by passing through passport control at the south end and descending the escalators or stairs. The “tight” feeling is concentrated in the glass-partitioned holding pens and shared vestibule spaces where multiple D gates feed the same narrow corridor.
From the main duty-free/shopping corridor on Level 2, walk south to the signed “D Gates / Passport Control” entrance near the C-gate spread, clear passport control, then go down to Level 1 into the South Plaza distribution area. The first pressure zone typically forms within a short walk of the bottom of the escalators, especially toward the lower-numbered D gates where bus-boarding is common and passengers bunch near gate desks, doors, and stair portals instead of dispersing into a wide concourse.
Where are the nearest seating zones (benches/rows) within a 2–3 minute walk of the Gate D boarding cluster?
The nearest reliable seating is in the South Plaza area on Level 1 at the bottom of the escalators, where seats cluster around the main food and café anchors rather than inside the most crowded gate pens. This staging zone usually stays within a 2–3 minute walk of the Gate D desks while giving you more flexibility to pounce on an open seat.
If your immediate gate pen is full, walk back toward the escalator landing and spread into the seating tied to the Level 1 concessions, including the food-hall seating near Mathús (noted in the audit as being behind/near Gate D16) and the seating around Joe & The Juice in the same plaza area. For higher-numbered D gates, the next-best fallback is to drift a short distance along the D concourse toward the bar/restaurant anchors (the audit cites Loksins Bar near Gate D31), where benches and tables can open up between boarding waves.
Where are the nearest charging points / power outlets to the Gate D cluster, and what is the shortest path to them?
Charging points are most commonly integrated into seating in the Gate D holding pens and in the South Plaza seating area near the Level 1 food anchors. The shortest “high-odds” move is to target the plaza seating by the concessions rather than hunting inside the most congested gate rooms where every outlet gets claimed fast.
From the Gate D cluster, walk back toward the escalator landing (South Plaza) and scan the seating zones around the Level 1 cafés/food hall area (the same zone noted near Mathús and Joe & The Juice). If your assigned gate is in the lower-numbered D area, the gate-pen benches and nearby pillar/work surfaces can also have outlets, but availability collapses during the transatlantic bank. If you’re closer to the higher-numbered D pier, drifting toward the bar/restaurant landmark cited near Gate D31 can surface additional plugged seating along the corridor edges.
For remote-stand / bus boarding, where is the bus-boarding departure point located relative to the listed gate numbers in the D area?
The bus-boarding departure point is attached to the specific Gate D you’re assigned, usually immediately past the gate desk through a door and down a stair or into a small vestibule rather than out to any public curb. In other words, the “bus stop” is not a separate station you walk to—it’s a controlled, gate-linked portal that only opens when boarding pulses begin.
In the D area, follow your posted gate number to the desk like normal boarding. If it’s a bus gate, the landmark cue is what happens after scanning: you’ll be directed through a side door or down a staircase into a lower, tighter holding space where passengers bunch before being released to the bus. The audit specifically flags the lower-numbered D gates (often around the D15/D16 sector) as common bus-boarding territory, so if you’re assigned there, expect the boarding flow to compress near the gate door and stairwell rather than forming a long jet-bridge line.
Where is the baggage claim hall relative to the arrivals exit from customs, and what is the shortest path to the arrival-side duty-free area beside baggage claim?
Baggage claim sits before customs, and the arrivals public exit is immediately after customs in the same straight-line flow. The arrival-side duty-free area is positioned directly before the baggage belts, so the shortest path to it is simply to follow the main arrivals corridor—you’re funneled through it on the way to baggage reclaim.
After arriving airside and clearing passport control for entry, follow “Arrivals / Baggage Claim” and continue forward into the walk-through arrivals duty-free store. Exiting that store drops you directly into the baggage reclaim hall with the carousels. Once you have your bags, continue to the customs channels (green/red) and walk straight out into the public arrivals hall; the customs exit line is the threshold between baggage claim and the landside pickup/transport area.
What is the exact location (door/curb/numbered bay) for Flybus loading when exiting arrivals, and what is the shortest indoor route from baggage claim exit to that door?
Flybus loads curbside immediately outside the main arrivals exit doors, not from an indoor bay or a distant bus station. The most accurate “location” is the first bus lane directly in front of the terminal façade outside Arrivals, where branded Reykjavik Excursions/Flybus coaches stage and staff in high-visibility vests direct you to the right coach.
From baggage claim, walk through customs (green/red) and exit into the public arrivals hall, then continue straight toward the main exterior doors signed for buses/taxis. Go outside to the curb directly ahead; the Flybus coaches are parked there in the dedicated bus lanes. A fixed numbered bay is not reliably consistent in the audit context, so the dependable wayfinding anchor is the Flybus/Reykjavik Excursions branding on the coaches plus the staff marshaling passengers at the doors immediately outside the arrivals exit.
Where is the Flybus ticket counter positioned within the arrivals hall, relative to the baggage-claim exit line-of-sight (what landmark anchors it)?
The Flybus ticket counter is positioned directly in the public arrivals hall in clear line-of-sight as you exit customs from baggage claim. It’s placed to intercept passengers before they reach the exterior doors, using Reykjavik Excursions/Flybus branding as the visual anchor.
After you leave baggage claim and pass through the customs channel, you step into the arrivals hall facing the landside services strip. The Flybus/Reykjavik Excursions desk sits prominently near the cluster of car rental counters and the currency exchange landmark (Arion Bank noted in the audit), so you’ll typically see it across or just off to the side of the customs exit flow. If you already have an online ticket, you can ignore the desk and keep walking straight to the curb outside for boarding.