Adolfo Suárez Madrid–Barajas Airport Terminal 2 Map (Most Up-To-Date)
Terminal 2 at Madrid’s main airport complex is a vertically stacked “legacy” terminal that runs as a long, linear pier with a central processing core. Check-in sits on Level 2, security and gates on Level 1, and arrivals/baggage reclaim on Level 0—so most connections require at least one up/down move. The building also functions as the bridge between Terminal 1 (south) and Terminal 3 (north).
Map Table
| Zone | Connection | Walk Time |
|---|---|---|
| Level 2 (Departures) | check-in zones 4–5 • T4 shuttle pickup (correct direction) | curbside: short |
| Level 1 (Security + Gates C/D) | central security exit • split to C (south) / D (north) | to far D/E: 8–12 min |
| Level 0 (Arrivals + Hall 6) | baggage reclaim • customs exit • T1-bound shuttle stop | curbside: 1–2 min |
| South end (C43/C44) | airside corridor to T1 • passport-control boundary mid-corridor | 20–30 min total |
Adolfo Suárez Madrid–Barajas Airport Terminal 2 Map Strategy
- Treat the shuttle as two different stops: Terminal 4 direction = Level 2 departures curb; Terminal 1 direction = Level 0 arrivals curb by Hall 6.
- Identify the “point of no return” before you chase baggage: once you pass the one-way doors into Baggage Reclaim Hall 6, you are committed landside and must re-clear security.
- Plan around Schengen/non-Schengen separation: the T1↔T2 airside corridor is gated by passport control, so meetups and “quick” cross-terminal moves can be blocked.
- For self-transfers, budget for the vertical reset: Level 0 (bags) → Level 2 (re-check) → Level 1 (security → gates) is the time-loss sequence that breaks tight connections.
2026 Adolfo Suárez Madrid–Barajas Airport Terminal 2 map + Printable PDF
2026 navigation in MAD T2 still hinges on “level discipline”: departures/check-in (Level 2), security/gates (Level 1), and arrivals/baggage (Level 0) are separated by design. The biggest operational gotcha remains the split-level inter-terminal shuttle logic—Level 2 for Terminal 4 direction, Level 0 for Terminal 1 direction—plus the Schengen/non-Schengen membrane at the T1 airside connector.
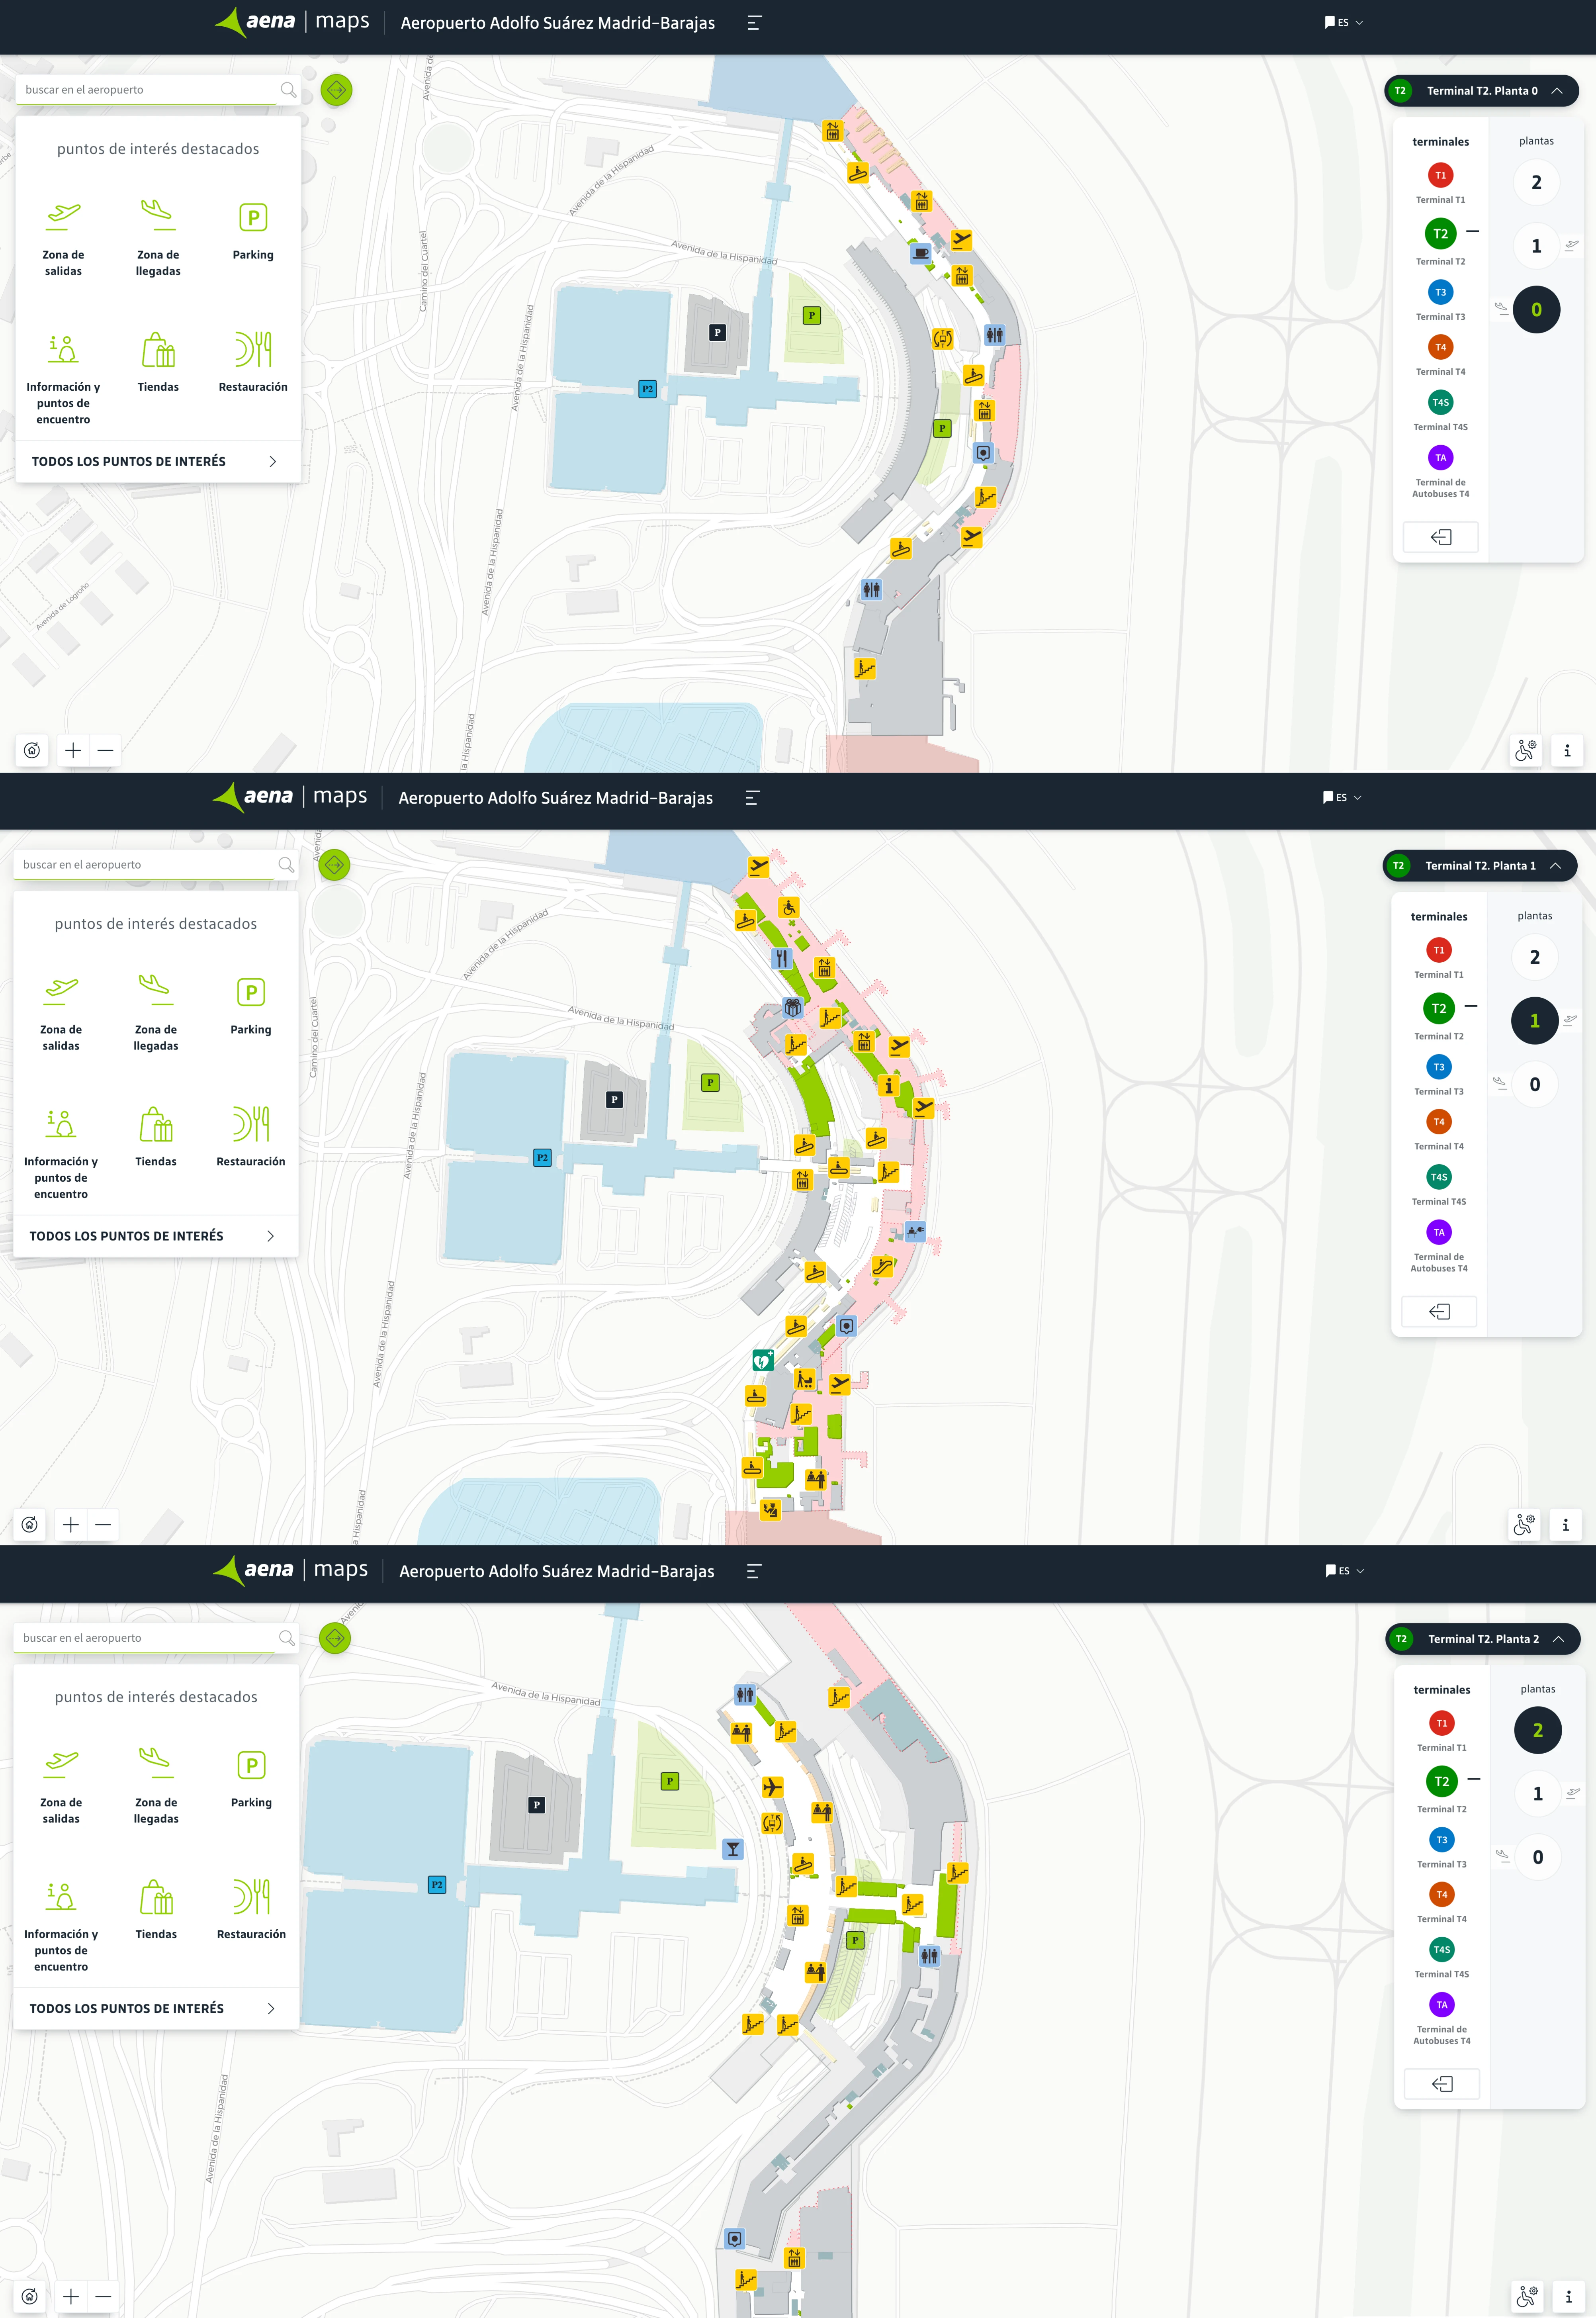
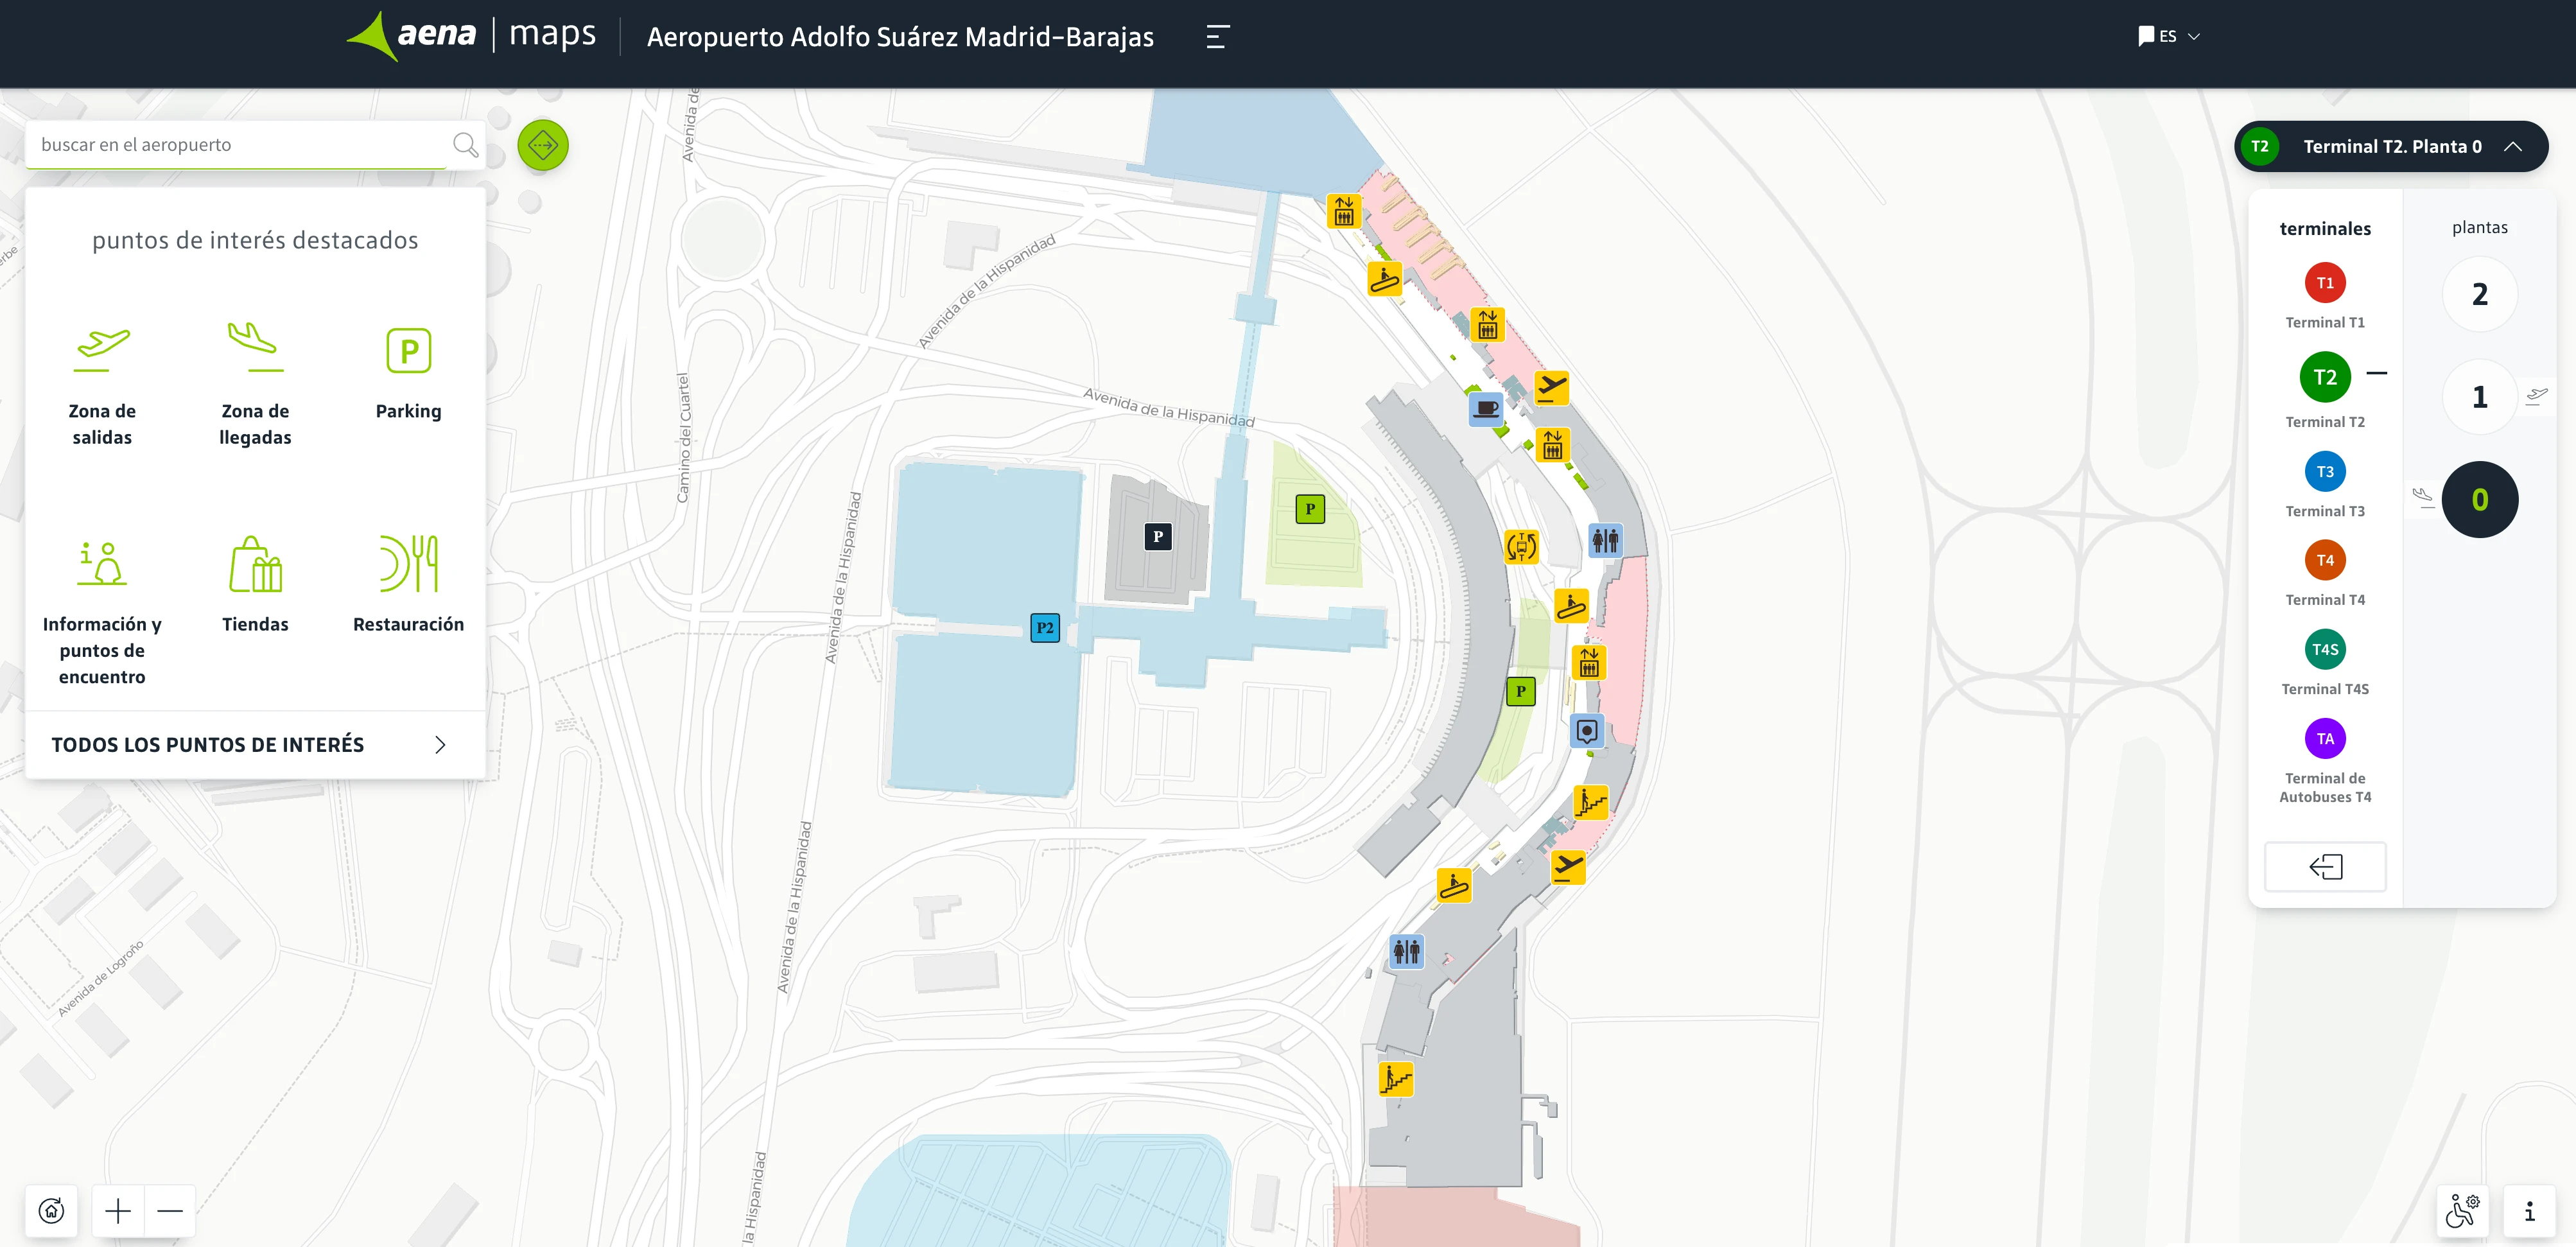
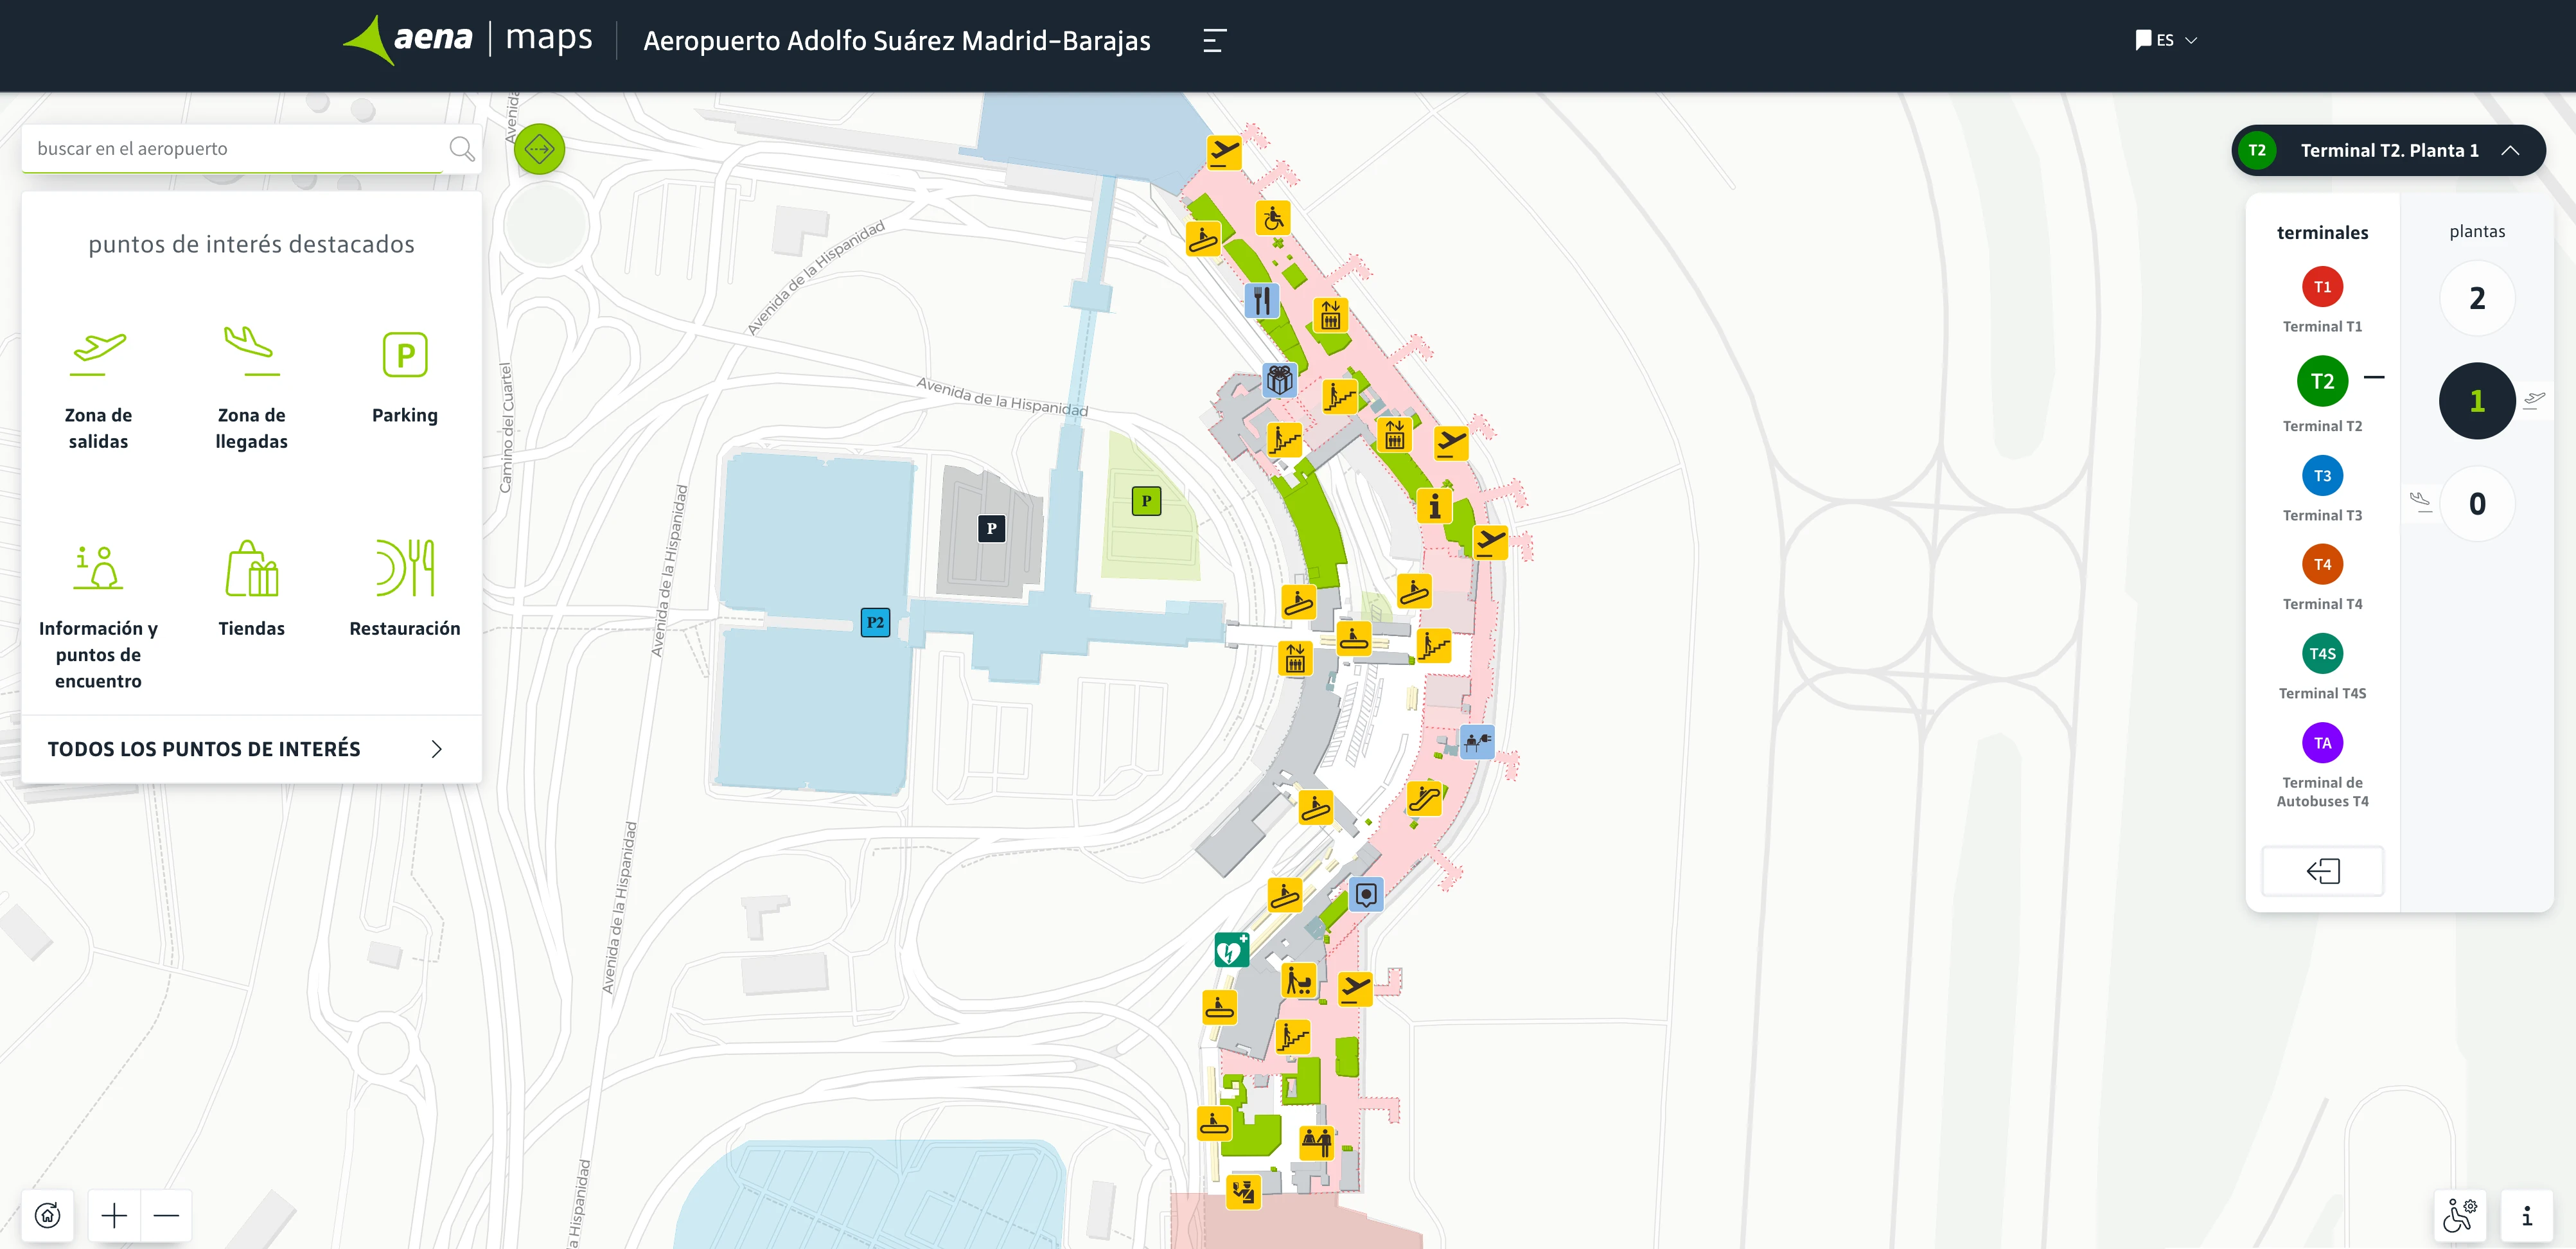
Adolfo Suárez Madrid–Barajas Airport Terminal 2 Level 0 Map 2025
Adolfo Suárez Madrid–Barajas Airport Terminal 2 Level 1 Map 2025
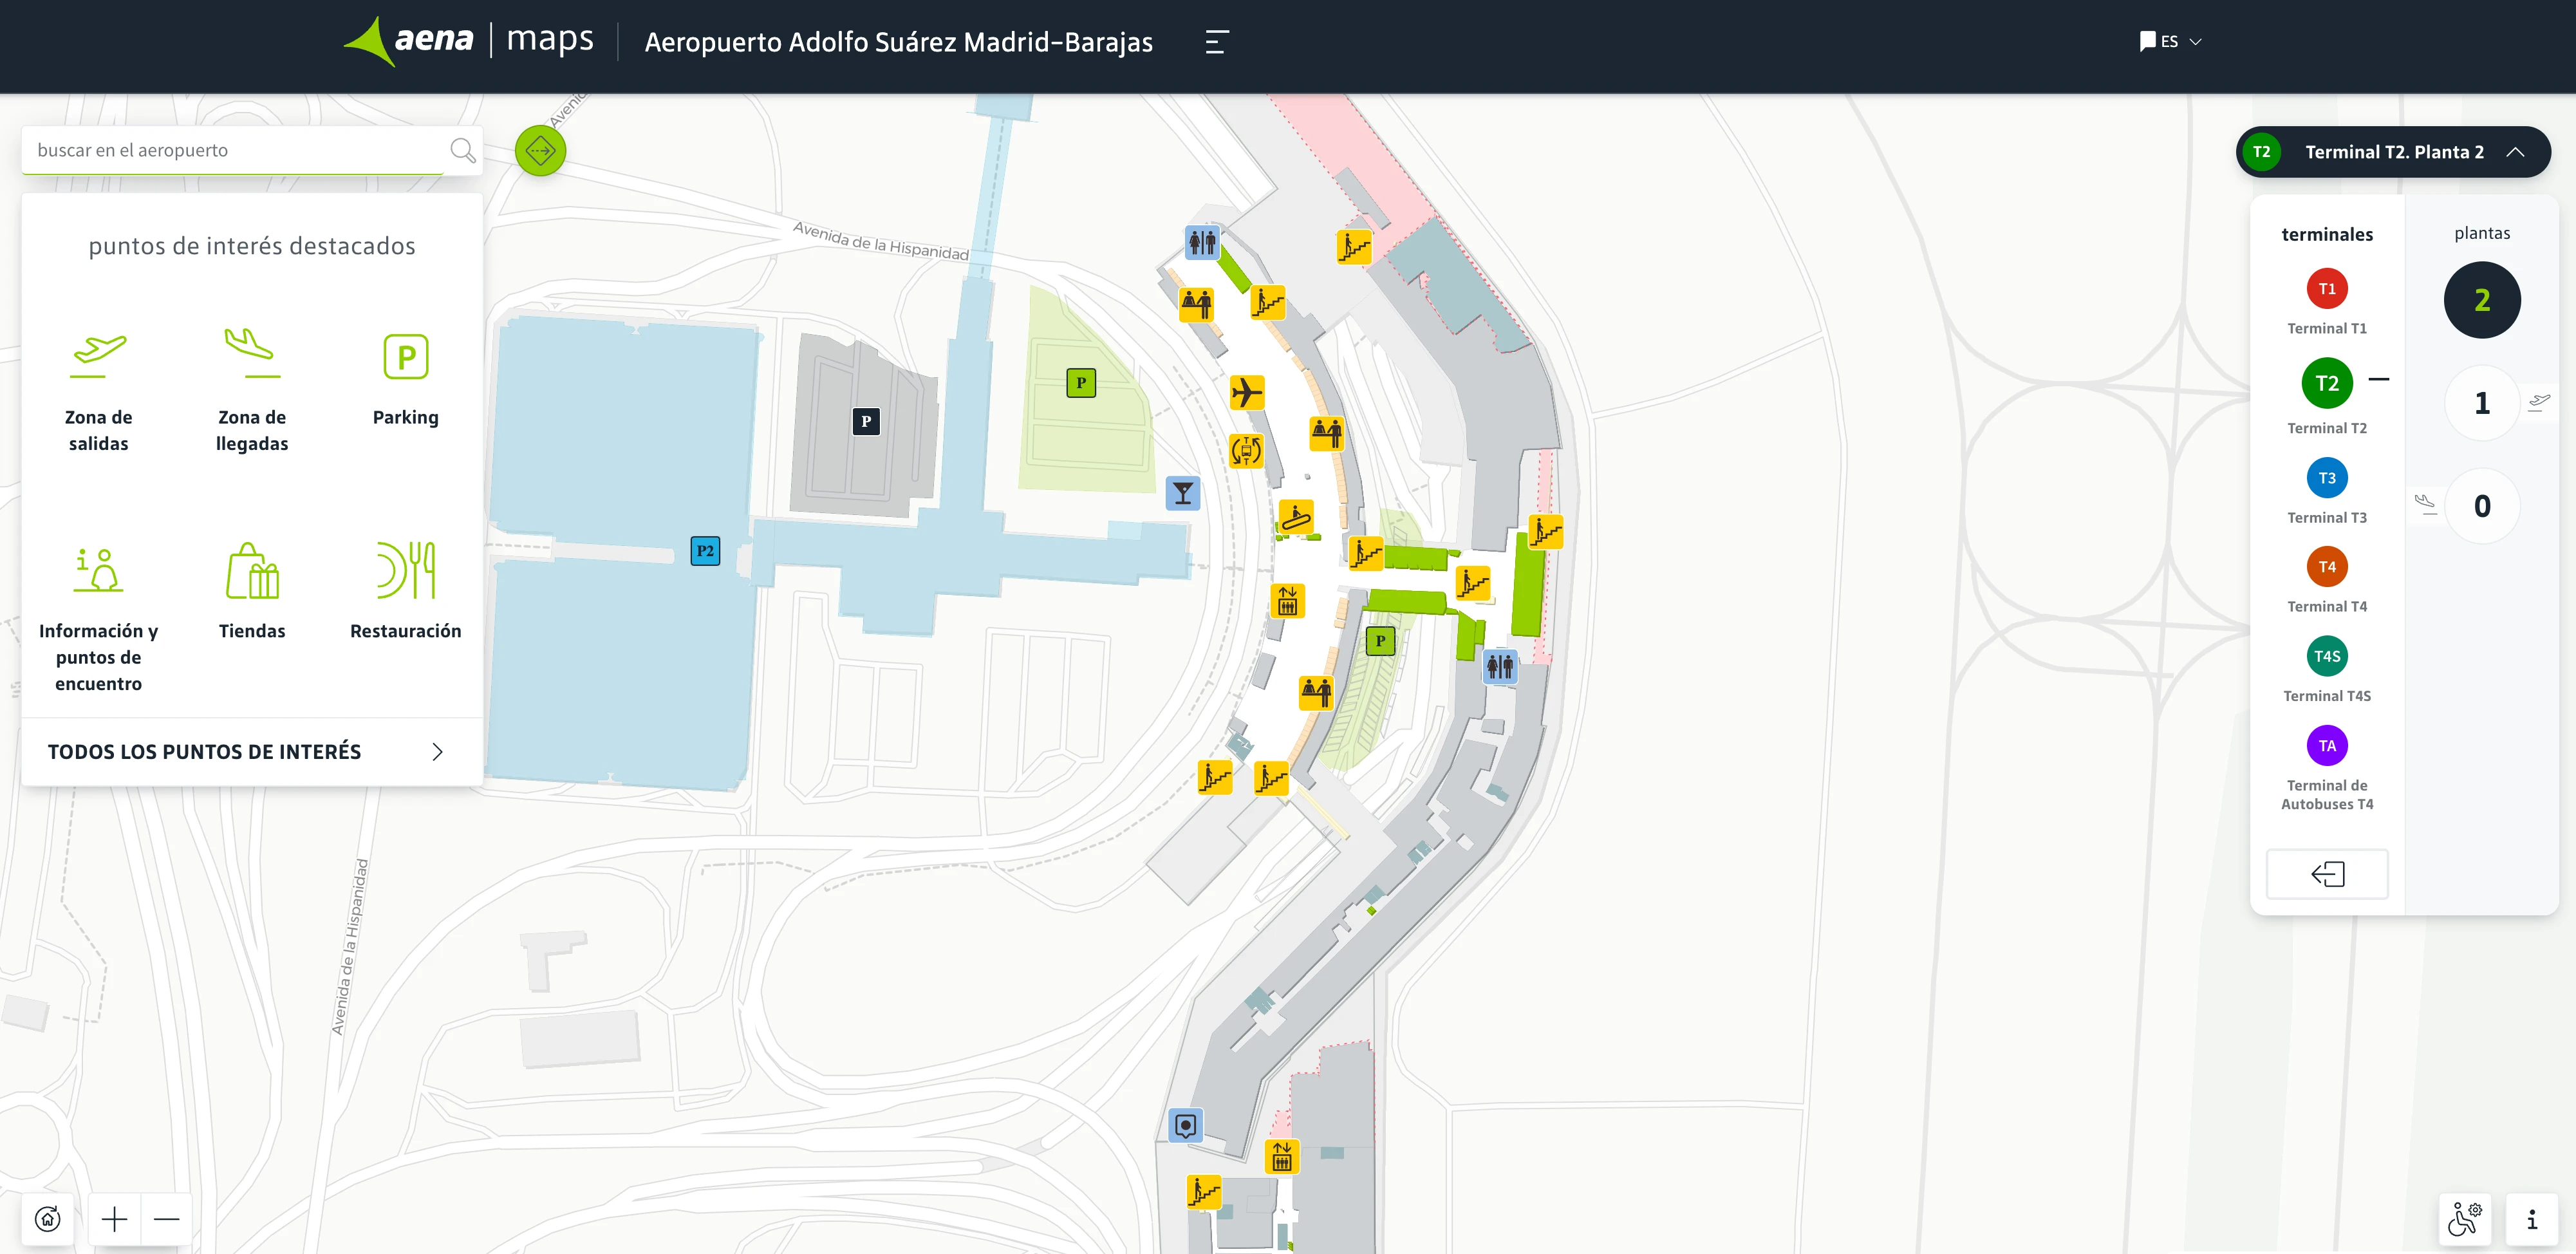
Adolfo Suárez Madrid–Barajas Airport Terminal 2 Level 2 Map 2025
2026 Adolfo Suárez Madrid–Barajas Airport Terminal 2 Map Guide
Which exact door/exit on Terminal 2 Departures level leads directly to the free inter-terminal shuttle bus stop?
The inter-terminal shuttle for Terminal 4 direction is reached via the central sliding doors on Terminal 2 Level 2 (Departures), closest to the main check-in block for Zones 4 and 5 (counters 400–500).
From the Level 2 check-in hall, stay in the middle of the façade (don’t drift toward the Terminal 1 side or the Terminal 3 side), turn away from the counters toward the curb, and exit through the nearest central doors to the Departures forecourt. Outside, align with the green “Bus Tránsito / Transit Bus” totem and the inner public-transport lane where the shuttle stops.
What is the walking distance (meters) from Terminal 2 Arrivals hall to the Terminal 2 inter-terminal shuttle bus stop?
Walking distance is about 30–50 meters from the Terminal 2 Arrivals hall to the curbside shuttle stop on Level 0.
Exit Level 0 through the main sliding doors by Baggage Reclaim Hall 6, then continue straight to the inner public-transport lane at the central curb. The stop sits essentially in front of the Hall 5/6 arrivals exits, near the pedestrian crossing toward the P2 car park. This Level 0 stop is the trap: it serves the return-loop direction (Terminal 4 → Terminal 2 → Terminal 1), so if you’re heading to Terminal 4 you need to go up to Level 2 departures for the correct shuttle.
Where exactly on the Terminal 2 map is the first point you can accidentally get forced landside (i.e., the “no return to airside” threshold)?
The “no return to airside” threshold is the one-way anti-return doors/turnstiles at the entrance into Baggage Reclaim Hall 6 on Level 0.
From the gates (Level 1), following “Exit / Baggage Claim” sends you down to Level 0 through the arrivals corridor. The exact trap point is where that corridor ends and you pass through the one-way glass barriers into the baggage reclaim hall (Hall 6). Once you cross those one-way doors, you cannot walk back to the gate area or sterile corridor—your only way back to airside is to go landside, go up to Level 2, and re-clear security to Level 1.
What is the exact map path from Terminal 2 baggage reclaim to Terminal 2 check-in counters (shortest continuous route)?
The shortest route is the central vertical core from Baggage Reclaim Hall 6 (Level 0) up to the check-in hall (Level 2), then a short straight walk to counters 400–500.
Exit Baggage Reclaim Hall 6 into the public Arrivals hall on Level 0, then aim for the terminal’s central bank of escalators/elevators near the Aena Information Desk and “Metro” signage. Take the escalator/elevator up two levels to Level 2 (Departures). At the top, enter the check-in hall and continue roughly 50–100 meters into the central check-in block, where Zones 4–5 / counters 400–500 sit.
Where is the Terminal 2 primary security checkpoint located relative to the main check-in hall (e.g., directly above/behind which zone)?
The primary security checkpoint sits directly below the main Level 2 check-in hall, on Level 1, under the central check-in block around Zones 4–5 (counters 400–500).
From Level 2, finish at the central check-in area, then look for the “Embarque / Boarding” access that drops you down (escalators/stairs) into the Level 1 screening hall. After screening, you spill into the retail/duty-free hub before the concourse splits south to C gates (toward C43/C44 and the T1 connector) and north to D gates (toward D53–D66 and the T3 connector).
What is the walking distance (meters) from the Terminal 2 security exit to the farthest end of the departure gate concourse?
Walking distance is approximately 450–600 meters from the Terminal 2 security exit to the far end of the departure concourse (high-number D gates and the T3 E-gates direction).
After you clear security on Level 1, you exit into the duty-free/commercial hub and then commit to one of the two long linear spines. The longest walk is typically the northbound run past the D gates toward the far-end gates around D62/D64 and the connector toward Terminal 3’s E-gate area. At a normal pace, that distance usually translates to roughly 8–12 minutes, especially if you have to weave through the central “La Plaza” pinch point right after security.