Zayed International Airport Map (Most Up-To-Date)
Zayed International Airport is a single-terminal hub built around a large, centralized atrium feeding four long piers in an X-shaped footprint. The airport operates at megaterminal scale, so most “lost time” comes from looping the atrium retail field or choosing the wrong pier leg before committing to a long walk. Within Abu Dhabi’s main aviation hub, departures sit on the raised plateau level while arrivals process at ground level, with vertical transitions concentrated at signed nodes.
Map Table
| Terminal | Key Airlines | Primary Function | Transfer Mode |
|---|---|---|---|
| Terminal A | Etihad Airways, all commercial carriers | unified departures + arrivals | walking, moving walkways, bus gates (E/F) |
| Pier A–D | mixed carriers by gate assignment | concourses + gates | travellators on pier spines |
| Bus gates E/F | remote-stand departures | lower-level holding | escalators near B10, bus transfer |
| Central Atrium | all passengers | retail core + pier selection | atrium corners to A/B/C/D |
Zayed International Airport Map Strategy
- Treat the central atrium as a decision point, not a browsing loop: find your pier letter (A/B/C/D) first, then enter the correct leg of the X.
- Assume long walks to far gates; get onto the pier’s moving walkway corridor immediately and stay on the central spine.
- Use level logic to cut time-risk: transfers stabilize near Transfer Security/Transfer Desk (Level 3), then the main departures/retail atrium sits above on the plateau level.
- For separate-ticket self-transfers, run a two-part route on the map: Arrivals → Immigration exit → public Arrivals Hall, then the signed vertical climb to Departures check-in at Doors 1–3.
2026 Zayed International Airport Map + Printable PDF
Zayed International Airport in 2026 runs through Terminal A’s single, centralized layout: transfer processing resolves before the atrium, then every route becomes a pier commitment with long walking distances assisted by moving walkways (no train). The map matters most for choosing the correct pier letter immediately at the atrium corners, budgeting time to far gate zones, and avoiding peak-hour bottlenecks near the atrium and lounge-entry queues.
Zayed International Airport Ground Floor Arrivals and Baggage Claim Map 2026
Zayed International Airport Level 1 Mezzanine Map 2026
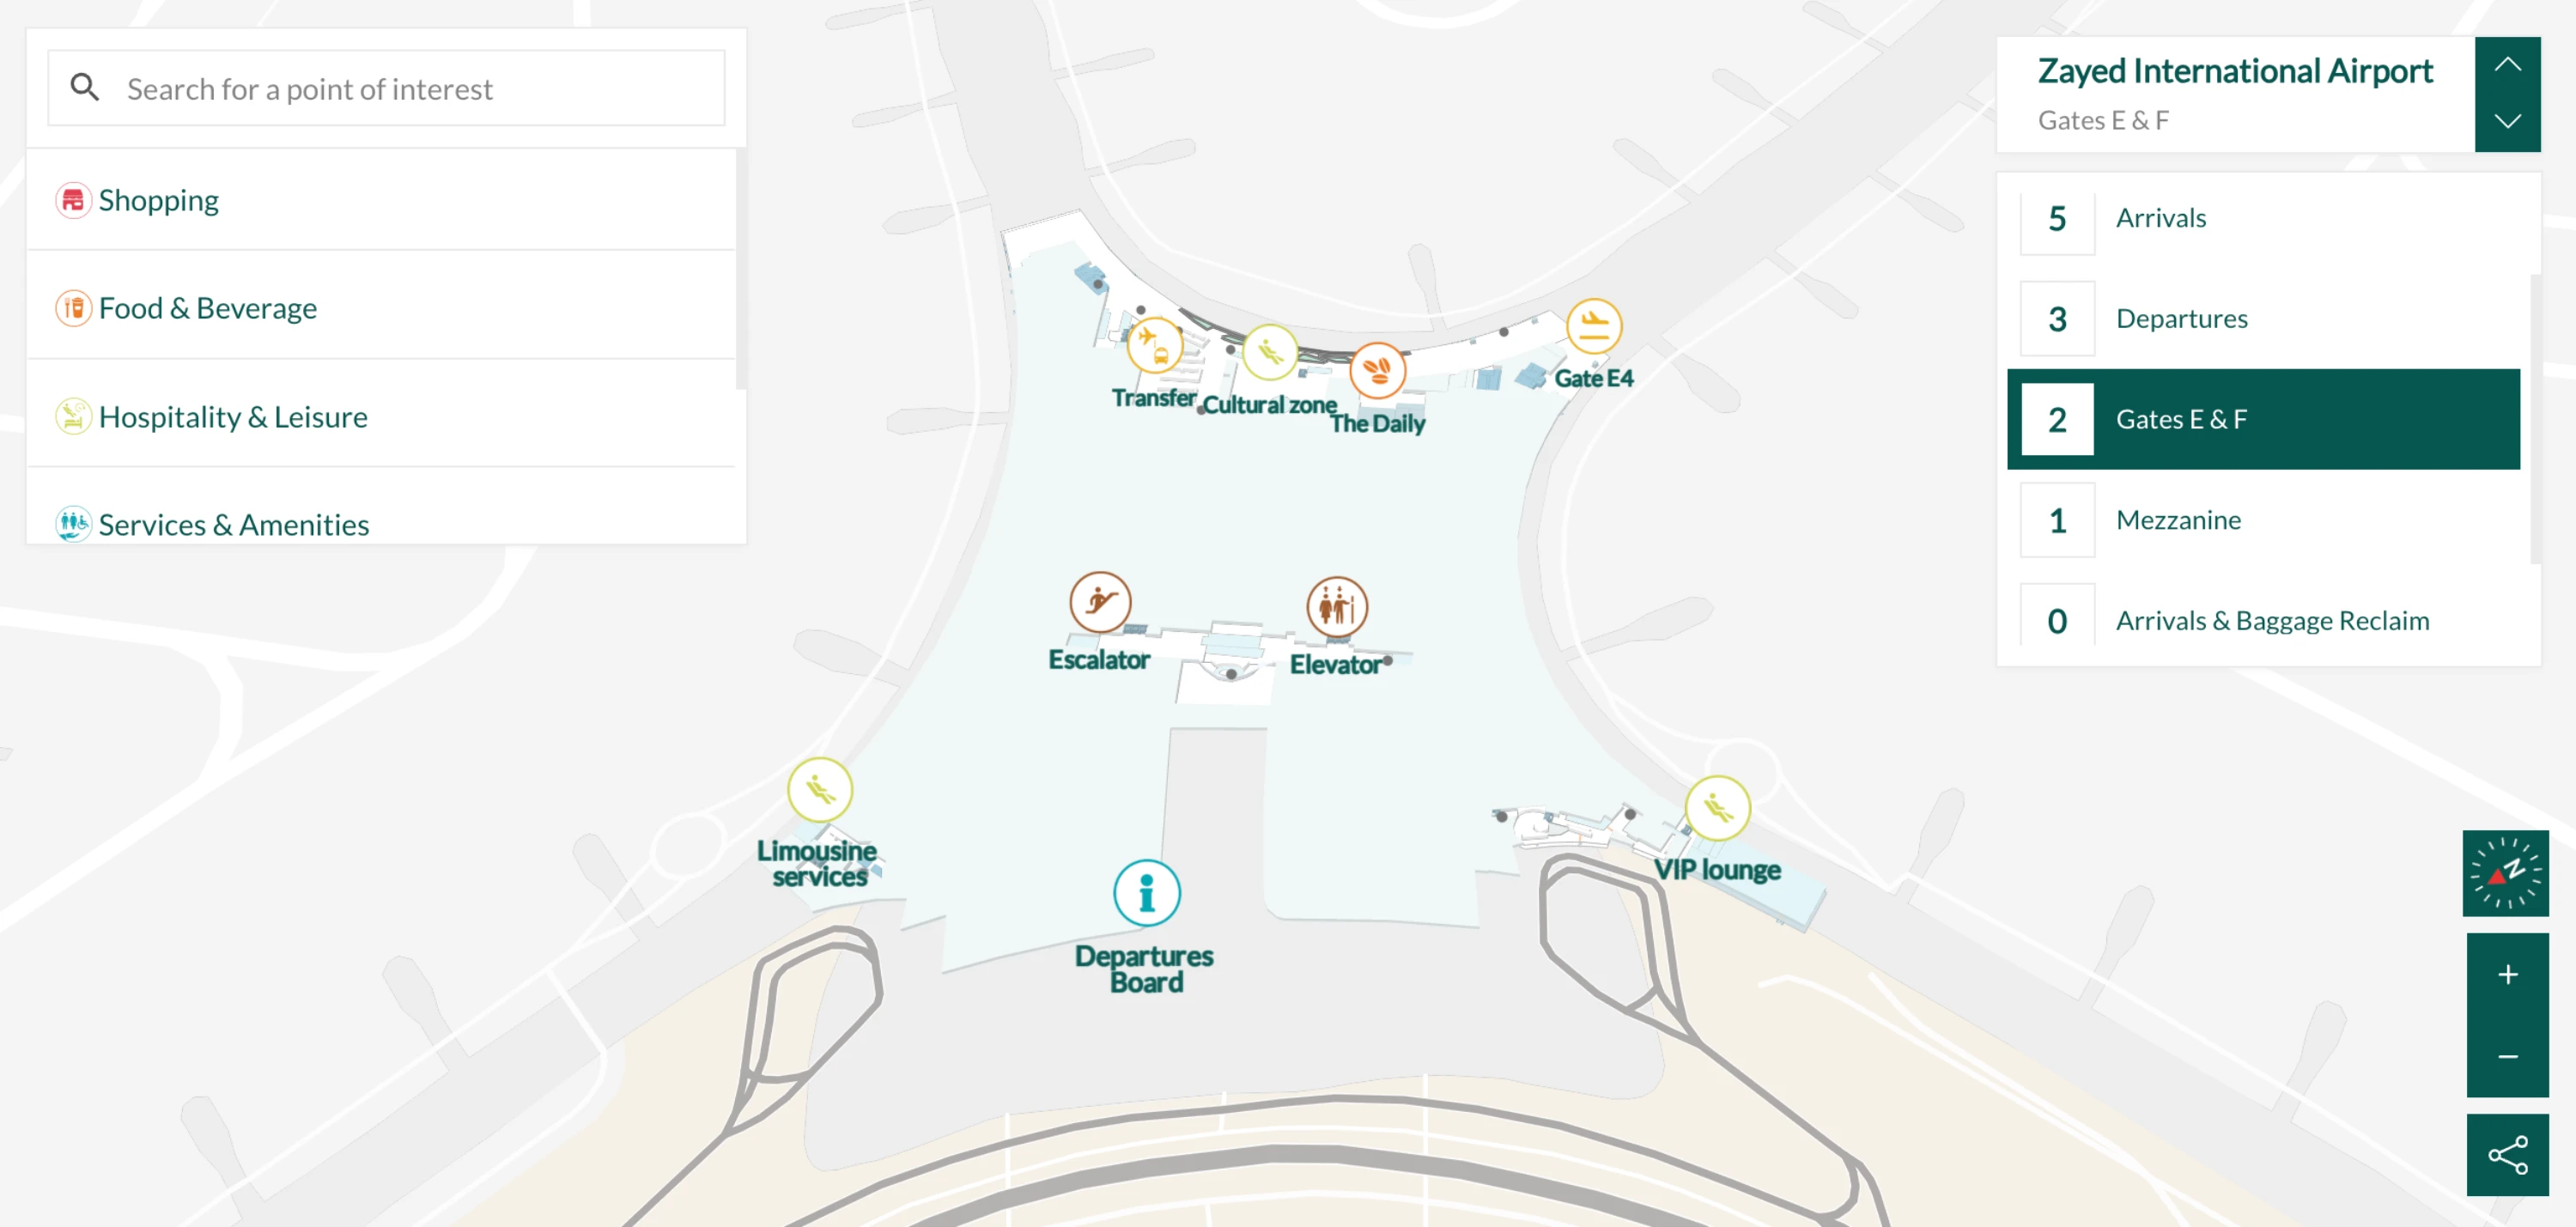
Zayed International Airport Level 2 Gates E F Map 2026
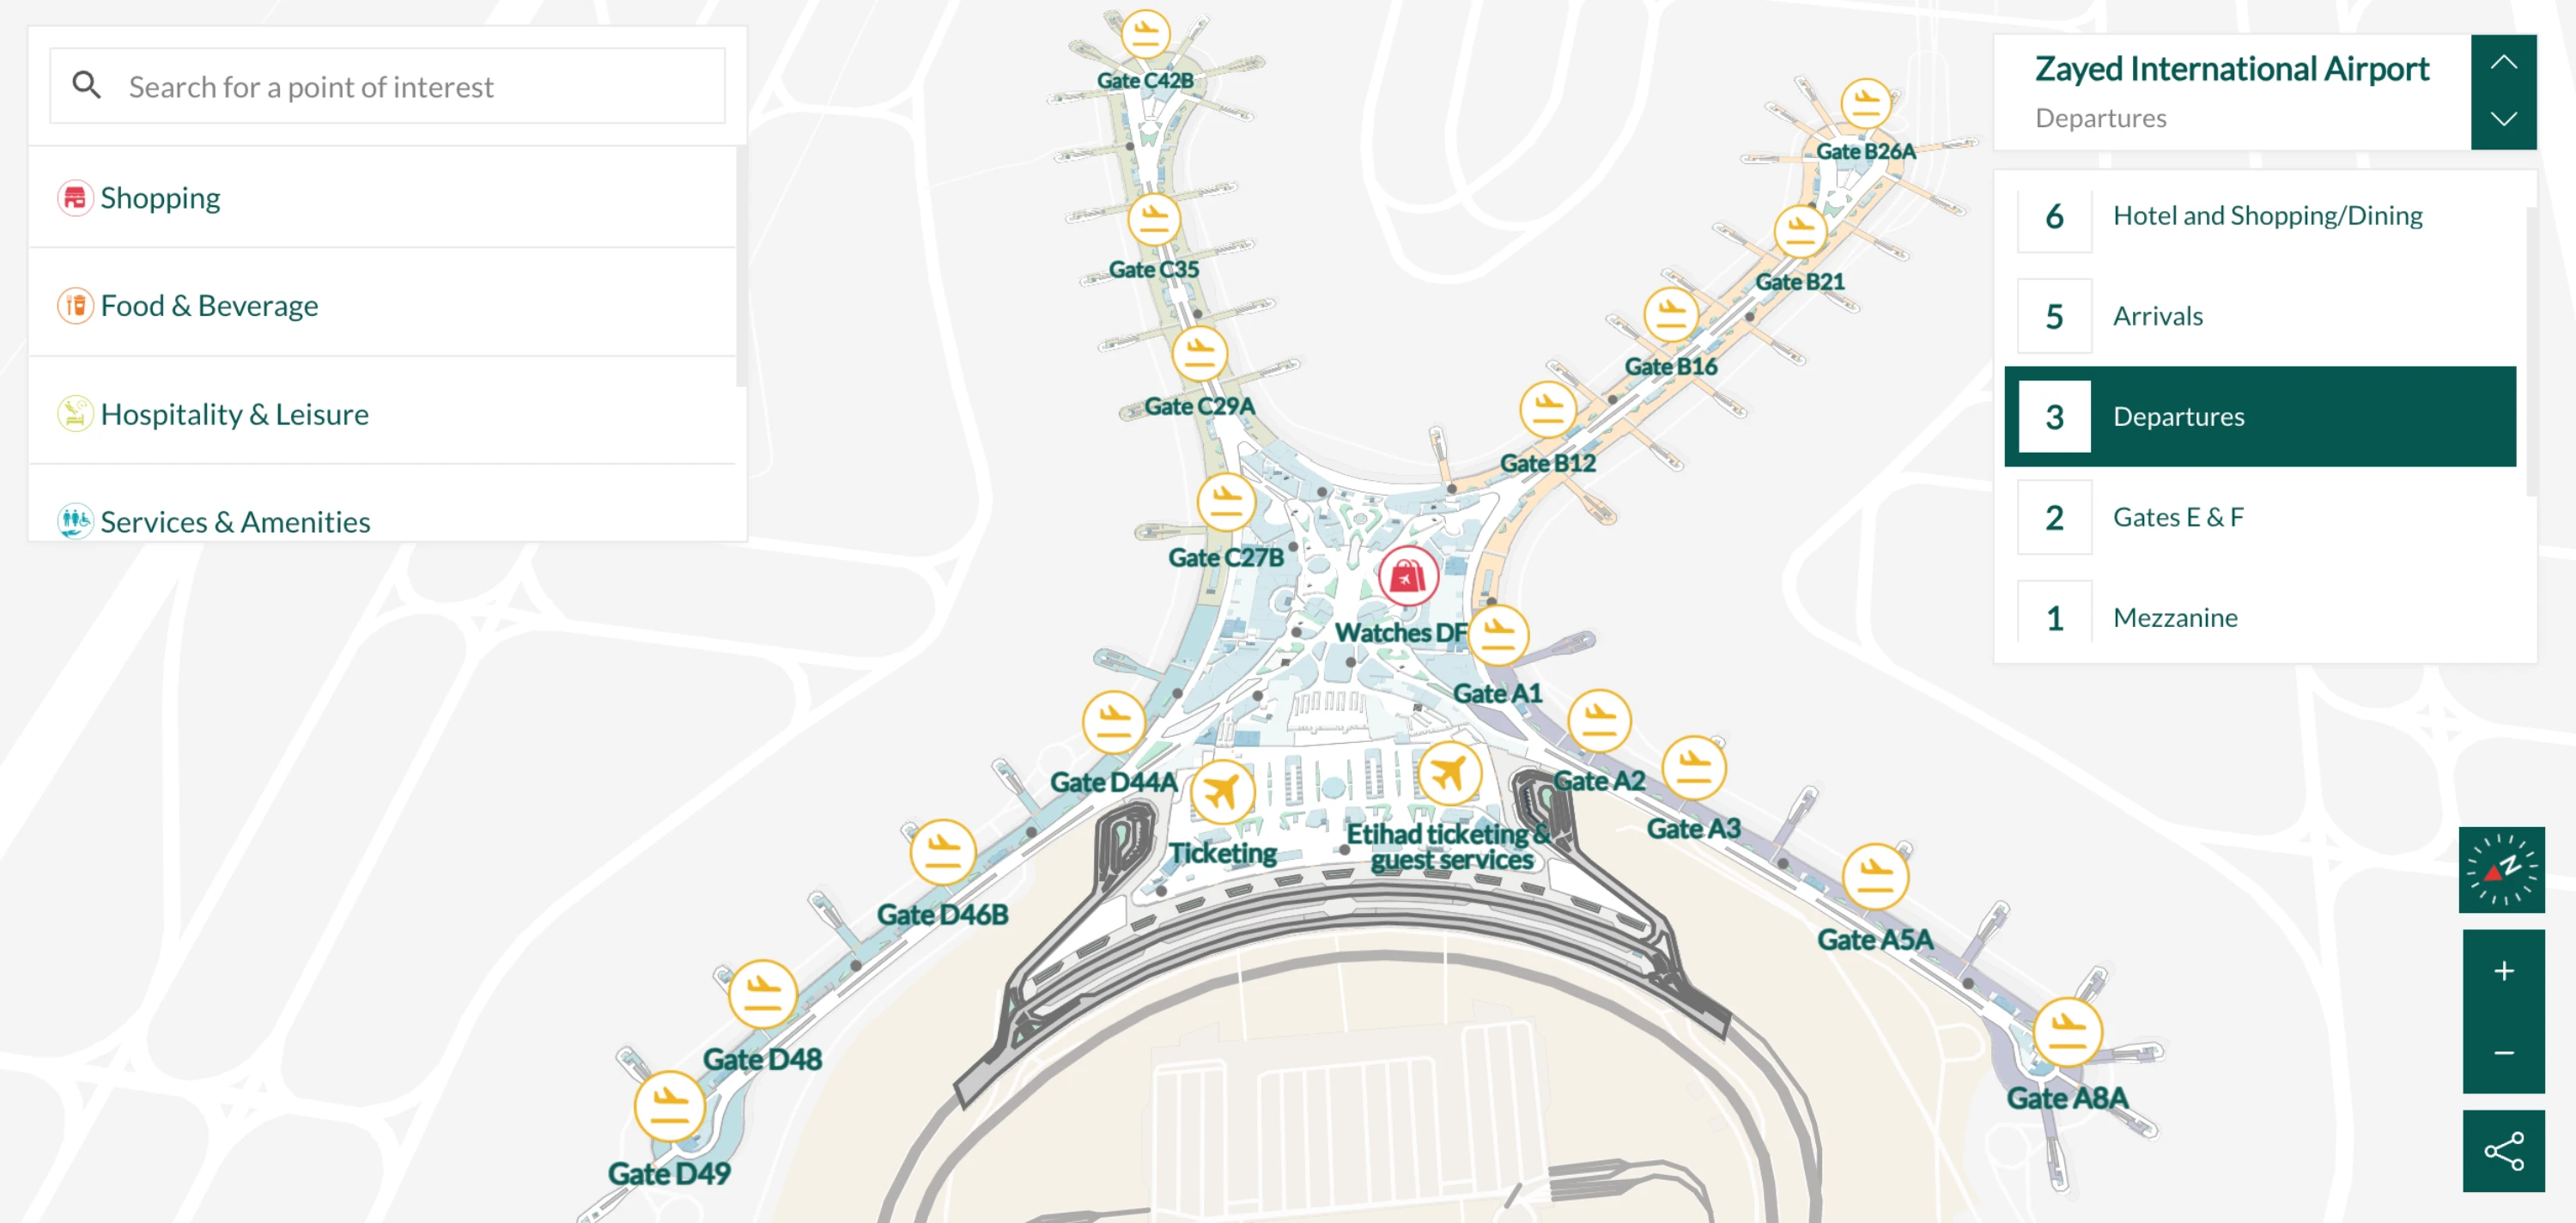
Zayed International Airport Level 3 Departures Map 2026
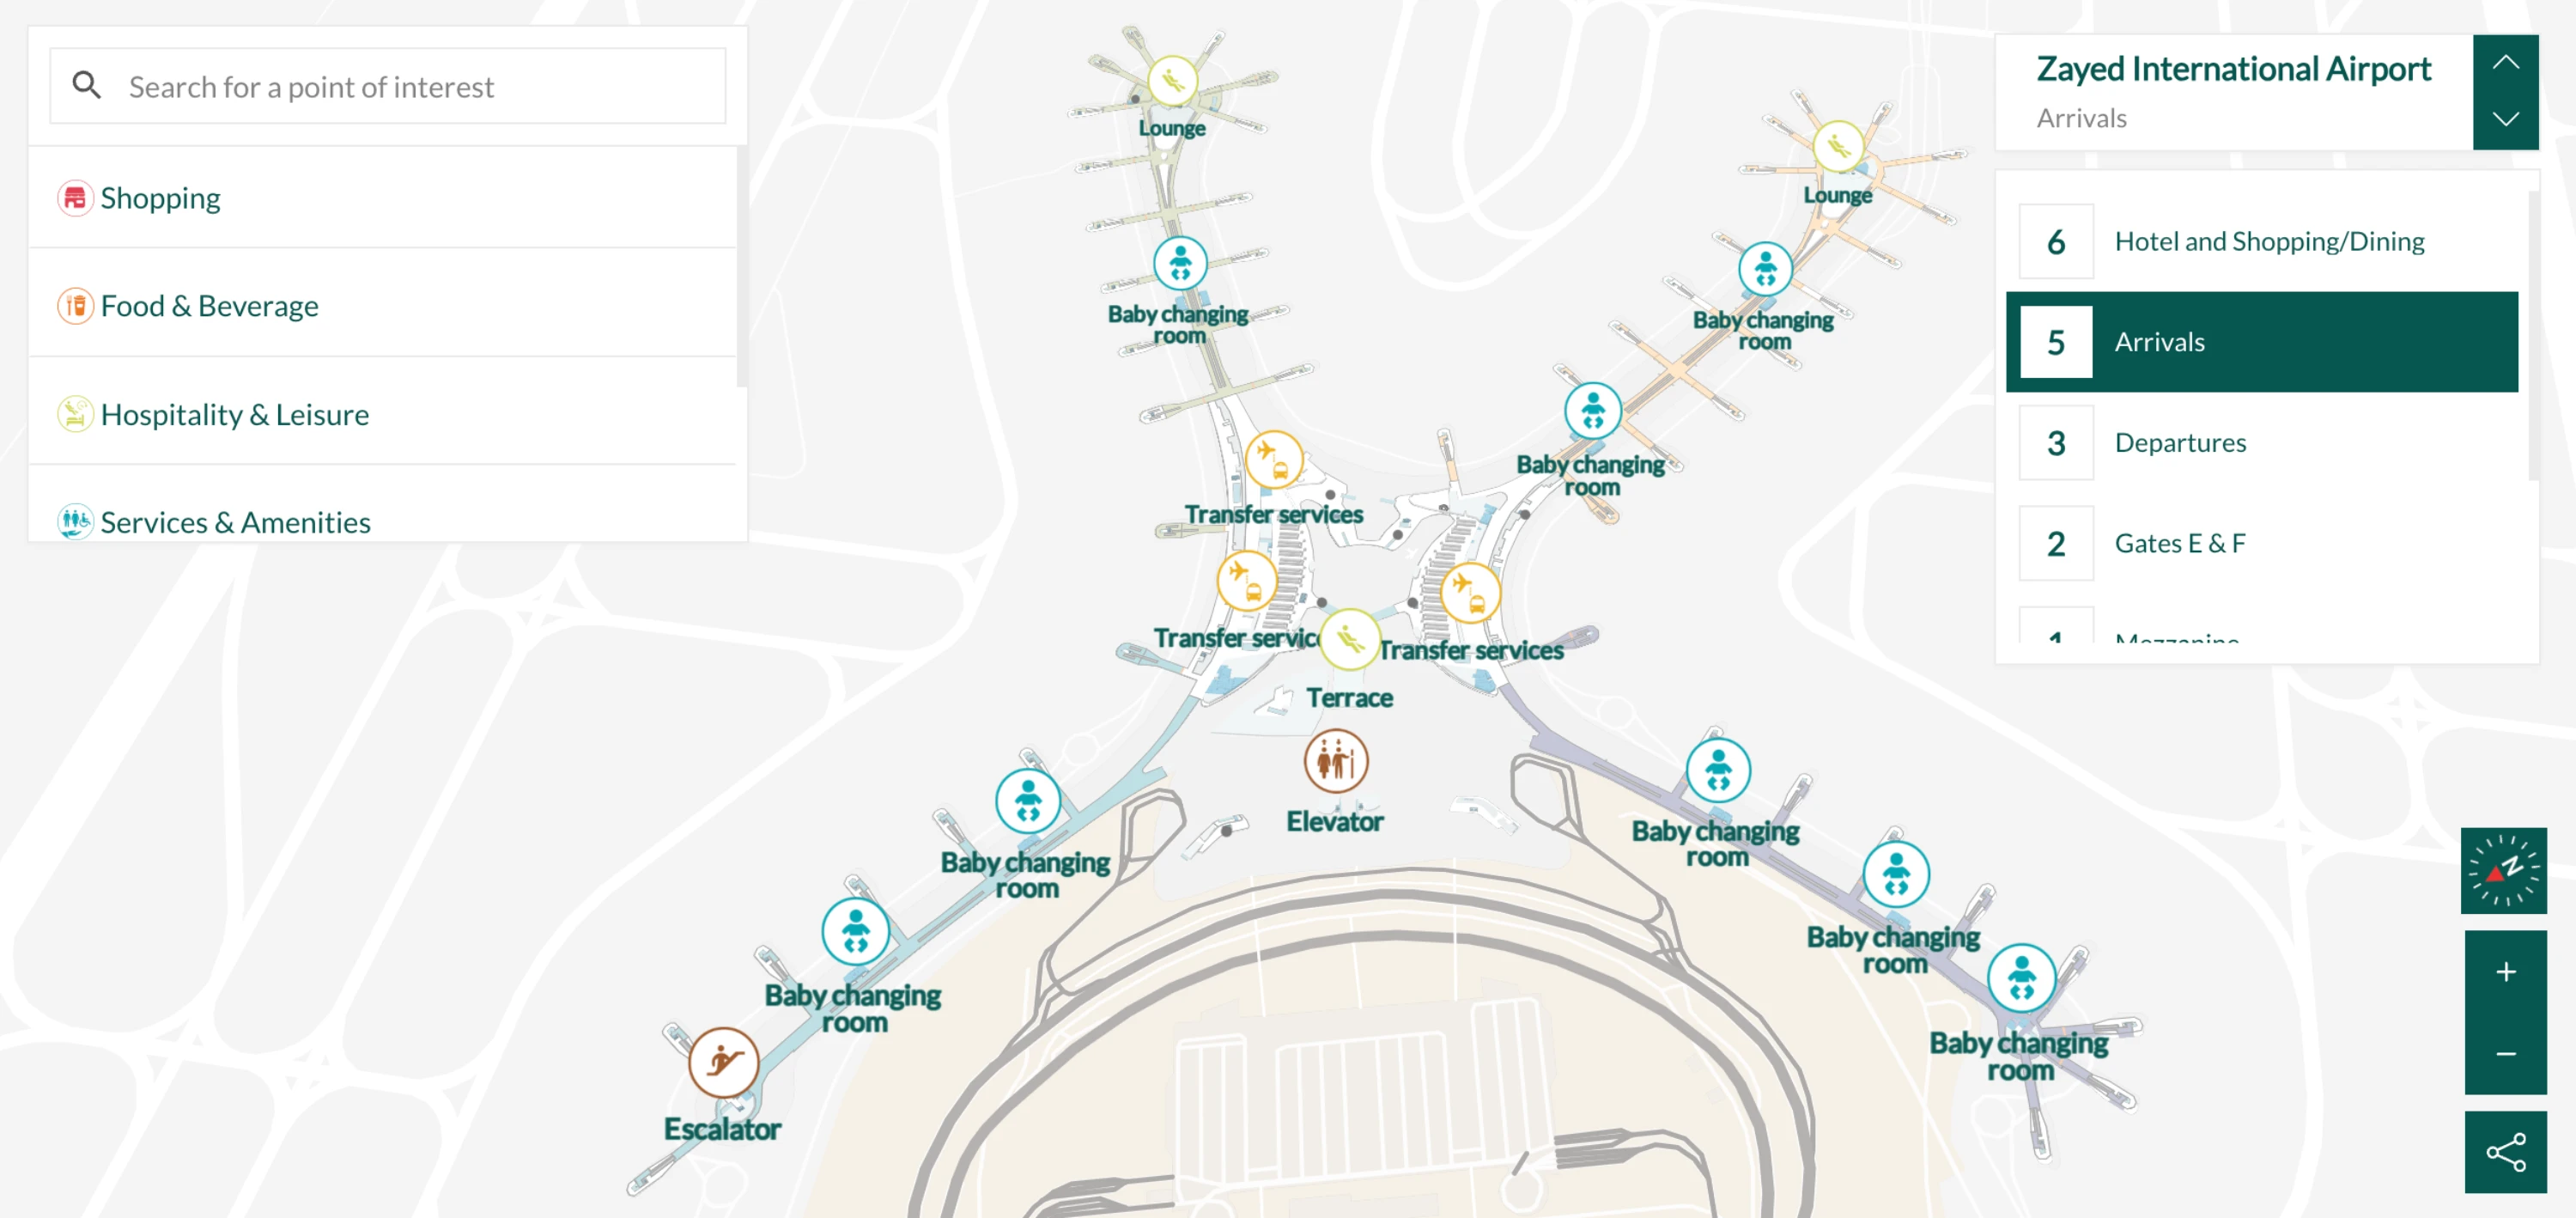
Zayed International Airport Level 5 Arrivals Map 2026
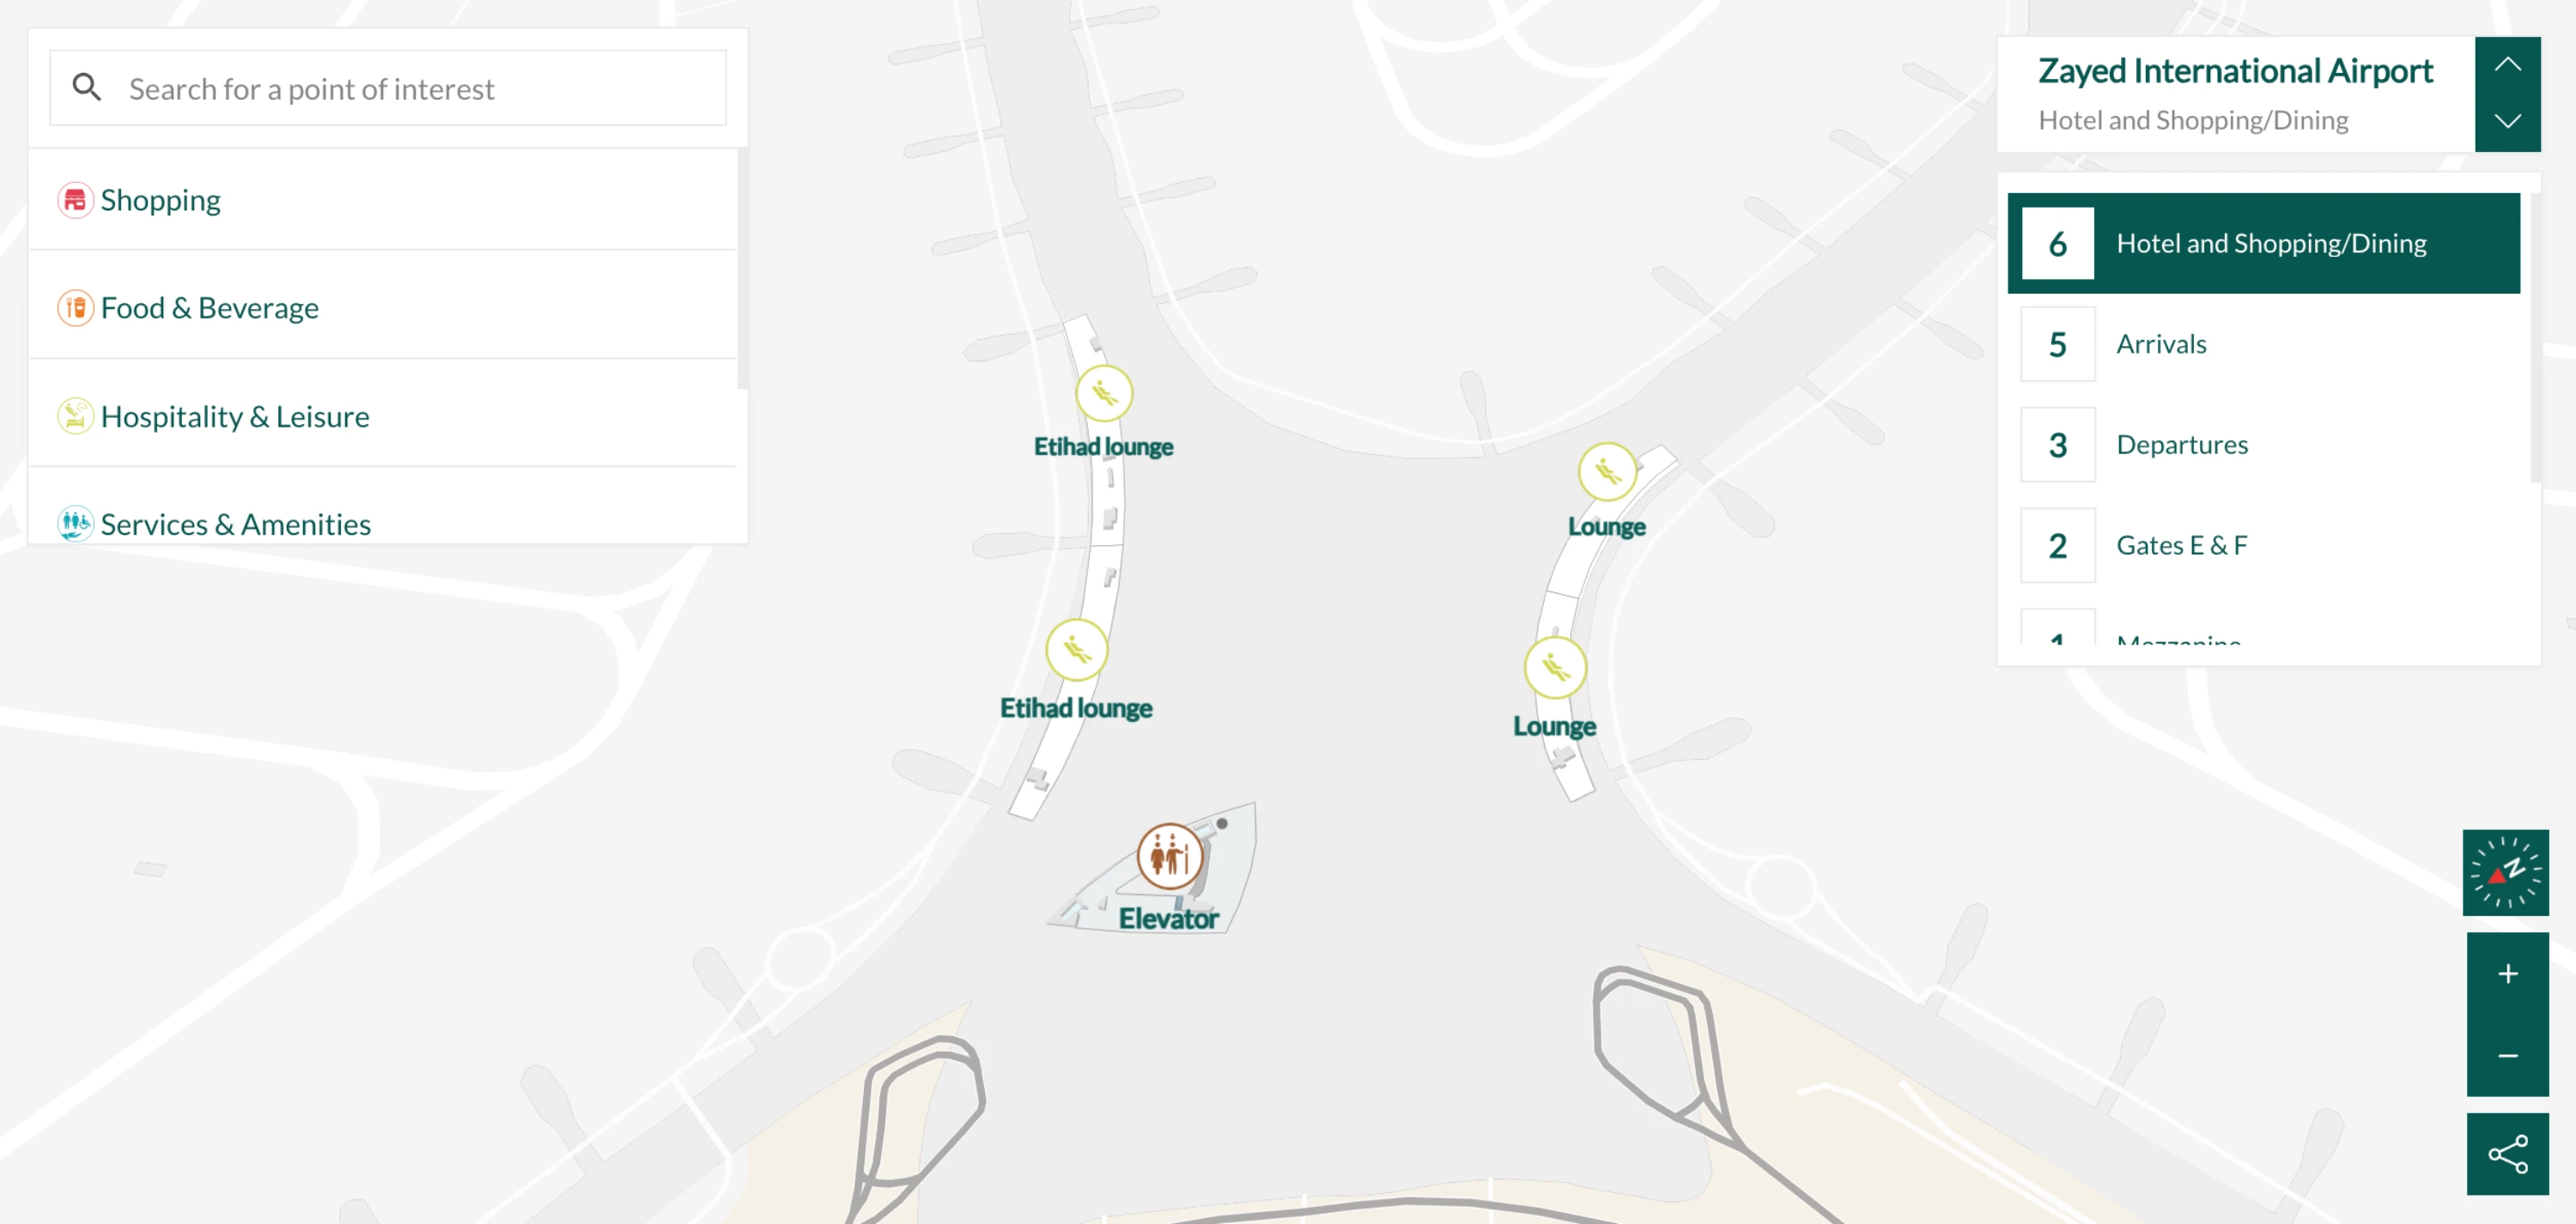
Zayed International Airport Level 6 Hotel and Shopping Map 2026
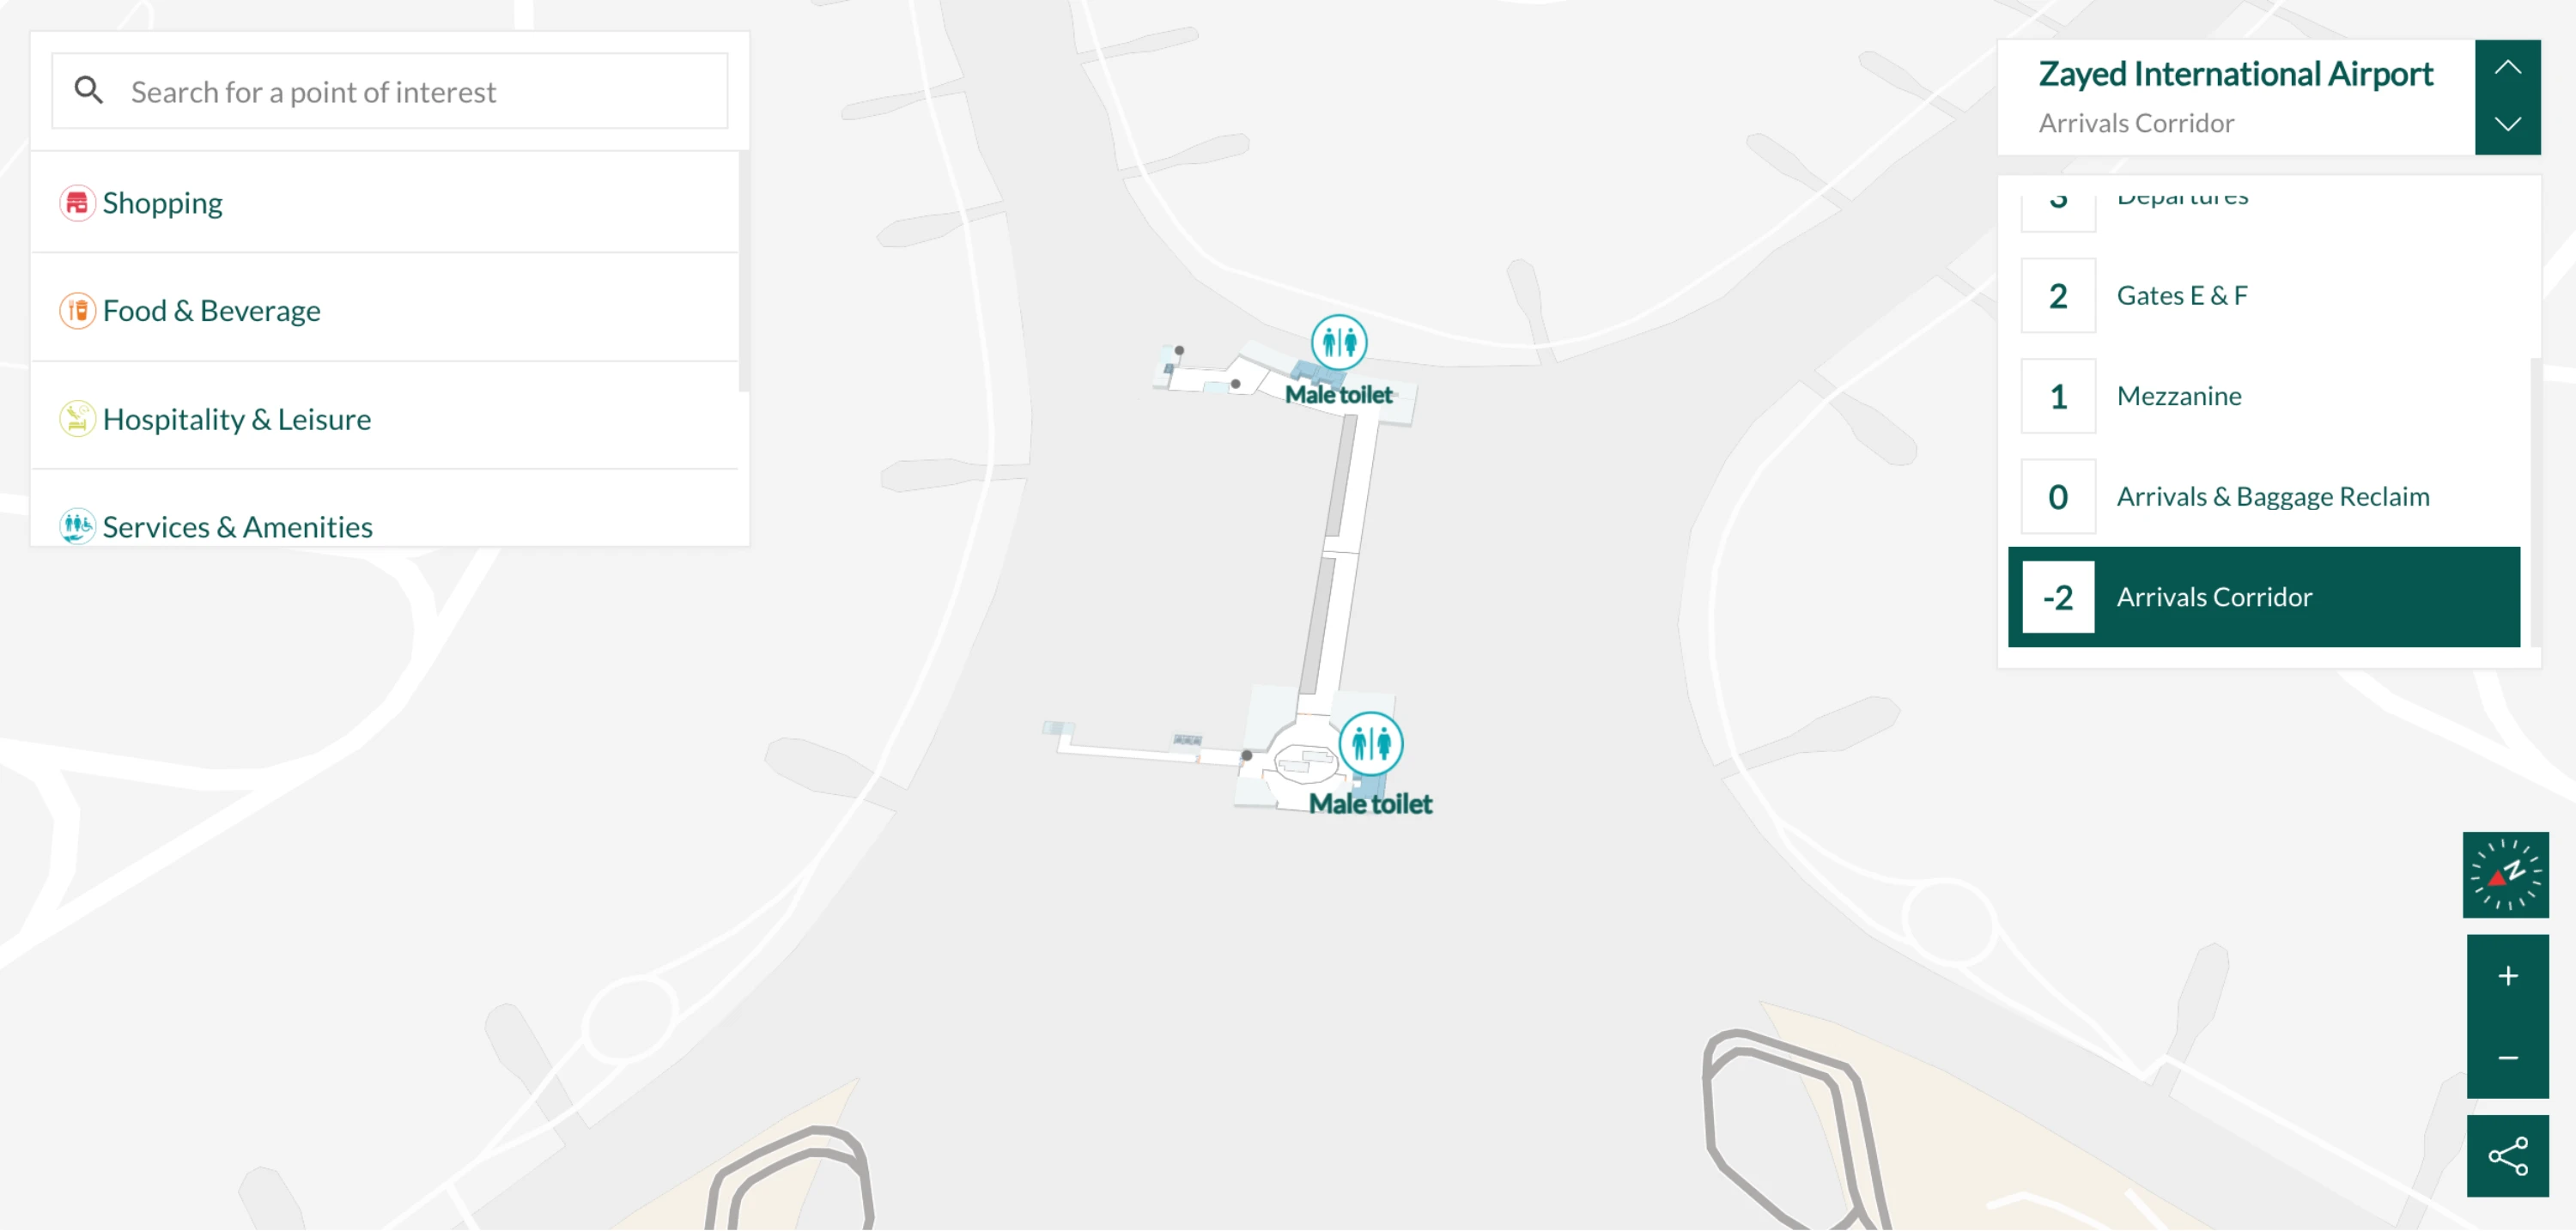
Zayed International Airport Level B2 Arrivals Corridor Map 2026
2026 Zayed International Airport Map Guide
What is the exact walking time from Transfer Security exit to the Transfer Desk / Connections counter inside Terminal A (fastest signed route)?
Walking takes under 3 minutes from the Transfer Security exit to the Transfer Desk/Connections counter in Terminal A. The desk sits on Level 3 immediately beside the transfer screening area, so the fastest route is the signed “Flight Transfer” path with no atrium detour. This is the last easy fix-point for boarding-pass or connection issues before you go up into the departures atrium.
| Route step | Level | Landmark to confirm you’re on-track | Typical walk time |
|---|---|---|---|
| Exit Transfer Security lanes | L3 | end of the screening lanes, recompose area | 0:00 |
| Follow “Flight Transfer” / “Transfer Desk” signs straight ahead | L3 | transfer facility corridor directly outside security | 1:00–2:00 |
| Arrive at Transfer Desk / Connections counter | L3 | desks adjacent to the transfer facility, staffed help point | < 3:00 total |
What is the walking time from Security to the farthest departure gates in Terminal A (identify the farthest gate zone on the map and measure it)?
Walking takes about 15–20 minutes from Security to the farthest departure gate zones in Terminal A. The longest walks are to the absolute tips of the piers—commonly the high-number ranges at the ends (for example A40+ or D40+), where the pier corridor ends and the last gate clusters sit. The time swing comes from how quickly you exit the atrium and whether you stay on the moving-walkway spine.
| Route segment | Adjacent anchor point | Typical time |
|---|---|---|
| Security exit → Central Atrium edge | escalators up into the main atrium retail field | 3–5 min |
| Atrium edge → correct pier throat | pier letter portals at atrium corners (A/B/C/D) | 2–4 min |
| Pier throat → far gate cluster (tip gates) | moving walkways in the center of the pier corridor | 10–12 min |
| Total: Security → farthest gates | tip-of-pier gate ranges (A40+ / D40+ style ends) | ~15–20 min |
Where is the self-transfer path for separate tickets: the exact map route from Arrivals to Immigration exit → Departures check-in area (shortest legal path)?
Exiting airside is mandatory for separate-ticket self-transfers because you must clear Immigration and enter landside before re-checking in. The shortest legal path runs from Arrivals to Immigration, out to the public Arrivals Hall at ground level, then straight to the signed vertical transition up to the Departures plateau and into the main check-in entry at Doors 1–3.
| Step | From → To | Landmark anchor to follow |
|---|---|---|
| 1 | Arrivals corridor → Immigration | “Arrivals / Baggage Claim” signs (ignore “Transfer”) |
| 2 | Immigration → Baggage Claim → Customs | baggage hall belts, then Customs exit lanes |
| 3 | Customs exit → public Arrivals Hall | landside arrivals meet-and-greet hall (ground level) |
| 4 | Arrivals Hall → Departures / Check-in vertical rise | elevators / inclined travellators signed “Departures / Check-in” |
| 5 | Departures level → check-in hall entry | Doors 1–3 zone (primary check-in + kiosks cluster) |
Where are the boarding pass print points located (kiosks/counters) after immigration—and what is the nearest one to the main departures entry?
Boarding pass printing is fastest at the self-service kiosk cluster immediately inside the main Departures check-in entry at Doors 1–3. After you exit Immigration, clear Customs into the public Arrivals Hall, then take the signed vertical route up to the Departures plateau and enter through Doors 1–3—this is the nearest print point to the main departures entry and curbside drop-off zone.
- Self-service kiosks: Level 5 Departures check-in hall, immediately inside Doors 1–3.
- Manned counters (printing + bag re-check): Level 5 check-in desks in the same Doors 1–3 zone.
- Best “nearest” choice: the kiosks just inside Doors 1–3, before you spread into the wider check-in hall.
Where is the Pearl Lounge entrance located relative to the central atrium (level + nearest landmark store/zone) so you don’t loop the retail core?
The Pearl Lounge entrance is deep in Pier D near Gate D43, not at the central atrium retail loop. The practical way to avoid circling shops is to leave the atrium by the Pier D portal, commit to the Pier D spine, and keep walking until the gate-numbering reaches the D40s—Gate D43 is the anchor that tells you you’re in the right zone.
The entrance is accessed from the main departures concourse level (the same level as gates), with the lounge occupying a multi-level footprint reached via its internal elevator/escalator. From the atrium, the correct routing is “Atrium corner → Pier D throat → Pier D travellator corridor → Gate D43 vicinity,” ignoring retail islands once you’ve locked the Pier D letter.
What is the walking distance from the Pearl Lounge entrance to the closest common gate cluster (nearest gate range)?
Walking takes about 2–5 minutes from the Pearl Lounge entrance to the nearest Pier D gate cluster because it sits by Gate D43. The closest “common” gates are the D40s, where multiple adjacent gates are grouped in the same deep-Pier D zone, so you can typically reach your nearest D-range gate without backtracking toward the atrium.
- Nearest gate range: D40–D45 (anchor: Gate D43).
- Typical walk: ~2–5 minutes depending on which side of the D40s your assigned gate is on.
- Time-risk trigger: if your boarding gate is in A/B/C, the walk stops being “minutes” and turns into a cross-atrium pier transfer.
Where are the quiet seating / low-traffic zones in Terminal A that are not in the central atrium (identify specific corridors/levels on the map)?
Quiet seating is easiest to find mid-pier on the gate corridors, away from the central atrium retail core and away from the last-gate boarding pens. The lowest-traffic areas are typically the recessed seating pockets along the Pier A–D spines after you pass the atrium corner “pier throat” and before you reach the dense gate clusters.
- Mid-pier seating bays on the Pier A spine between the atrium corner and the A40+ end gates.
- Mid-pier seating bays on the Pier C spine between the atrium corner and the far C-end gates.
- Mid-pier seating bays on the Pier D spine before the Gate D40–D45 cluster (anchor: approach to Gate D43 area).
- Any seating set back from the main travellator corridor line (avoid the atrium, and avoid immediate gate holding areas with boarding announcements).
Where are the intercity bus pickup points at Terminal A for Dubai-bound service (exact curb/door/exit label on the map)?
Dubai-bound intercity buses pick up on the lower curbside at the Arrivals level outside the public Arrivals Hall. The correct bay is signed for “Coach Services” / “Etihad Shuttle,” and it’s easiest to lock it immediately after Customs so you don’t drift to the taxi or ride-hailing split.
After you clear Immigration and collect bags, exit Customs into the public Arrivals Hall (ground level). Follow the nearest “Coach Services” / “Etihad Shuttle” signs before you commit to any curb lane, then walk straight out to the lower Arrivals forecourt where the coach/shuttle bay is marked. If you hit the taxi queue first, you’ve gone too far toward the metered curb and should backtrack to the coach-signed section of the same Arrivals curb.
Where is the taxi vs rideshare pickup split (exact level + door/zone names) so arrivals don’t end up at the wrong curb?
Waiting at the taxi curb for an Uber/Careem won’t work because ride-hailing pickup is routed to the Arrivals Car Park, not the metered taxi rank. Taxi pickup is at the Arrivals forecourt curb immediately outside the public Arrivals Hall, while rideshare requires following “Ride Hailing / Pre-Booked Transport” signage into the parking structure connection.
| Pickup type | Level / zone | Where to walk from Customs exit | Landmark anchor that confirms it |
|---|---|---|---|
| Taxi (metered) | Arrivals level forecourt curb | go straight out of the Arrivals Hall doors to the curb | visible queued taxis at the curbside rank |
| Rideshare (Uber/Careem) | Arrivals Car Park pickup zone | follow “Ride Hailing” / “Pre-Booked Transport” signs into the car park connector | entry into the parking structure (not the open curb lane) |
Where are the moving walkways located (which corridors/concourse links), and what is the fastest walkway-assisted route from security to the far gates?
Moving walkways run along the central spine corridors of each pier (A, B, C, and D), positioned in the main straight concourse runs after you leave the atrium and enter a pier. The fastest route is the one that gets you off the atrium floor quickly and onto the pier spine without weaving through retail islands.
| Route step | Where the walkways show up | Landmark anchor |
|---|---|---|
| Security exit → Atrium edge | no sustained travellator run; focus on direct line | escalator rise into the central atrium |
| Atrium edge → correct pier portal | short connectors; don’t loop retail | pier letter gateways at atrium corners |
| Enter Pier A/B/C/D spine | main travellators begin | moving walkways centered in the pier corridor |
| Stay on travellator line to far gates | continuous assisted segments | long straight pier run toward A40+/D40+ style tip zones |
Fastest walkway-assisted logic: choose your pier letter at the atrium corner, step onto the pier’s central travellator corridor immediately, and stay on that spine until you’re inside your gate-number cluster—only then peel off for side seating, shops, or lounges.