Don Mueang International Airport Map (Most Up-To-Date)
Don Mueang International Airport (DMK) runs as a linear, north–south, two-terminal strip with Terminal 1 (International) on the north end and Terminal 2 (Domestic) on the south end, stitched together by multiple connectors at different levels. Within Bangkok’s main low-cost airport hub, the “short” transfer is deceptive: the key difficulty is choosing the right level for the T1↔T2 move, then matching Arrivals vs Departures floors without backtracking.
Map Table
| Terminal | Key Airlines | Primary Function | Transfer Mode |
|---|---|---|---|
| Terminal 1 (International) | AirAsia (international), regional carriers | International Arrivals (L1), International Departures (L3) | L1 corridor, L2 skybridge, L3 departures connector |
| Terminal 2 (Domestic) | AirAsia (domestic), Thai Lion Air, Nok Air | Domestic Arrivals (L1), Domestic Departures (L3) | L1 corridor, L2 skybridge, L3 departures connector |
| T1↔T2 seam | — | Connector zone | L3 fastest, L1 congested |
Don Mueang International Airport Map Strategy
- Treat T1↔T2 as a level-choice problem first: go up to Level 3 for the widest, air-conditioned lateral transfer; use Level 1 only when you’re exiting to curbside services.
- Lock your floor before you walk: Arrivals functions cluster on Level 1; check-in and outbound processing cluster on Level 3, so plan one vertical move, then do your long walk.
- Sequence self-transfers like a checklist: immigration + bags + landside walk + re-check + security is the time sink, so aim to hit the connector and the correct escalator bank immediately after you exit the hall.
- For pickups, navigate by Gate number and level, not by “outside”: DMK’s curbside is zoned, so the correct exit door is the real destination (Grab vs official taxi vs shuttle).
2026 Don Mueang International Airport Map + Printable PDF
DMK’s dual-terminal layout remains a high-throughput LCC setup with the same core wayfinding problem: the “best” inter-terminal route depends on whether you stay landside on Level 1 or shift up to Level 3 for the smoother connector. The most map-critical items for printing are the Gate-number exit points (Grab/taxi/shuttle) and the vertical banks that move you from Arrivals (L1) to Departures (L3) without detours.

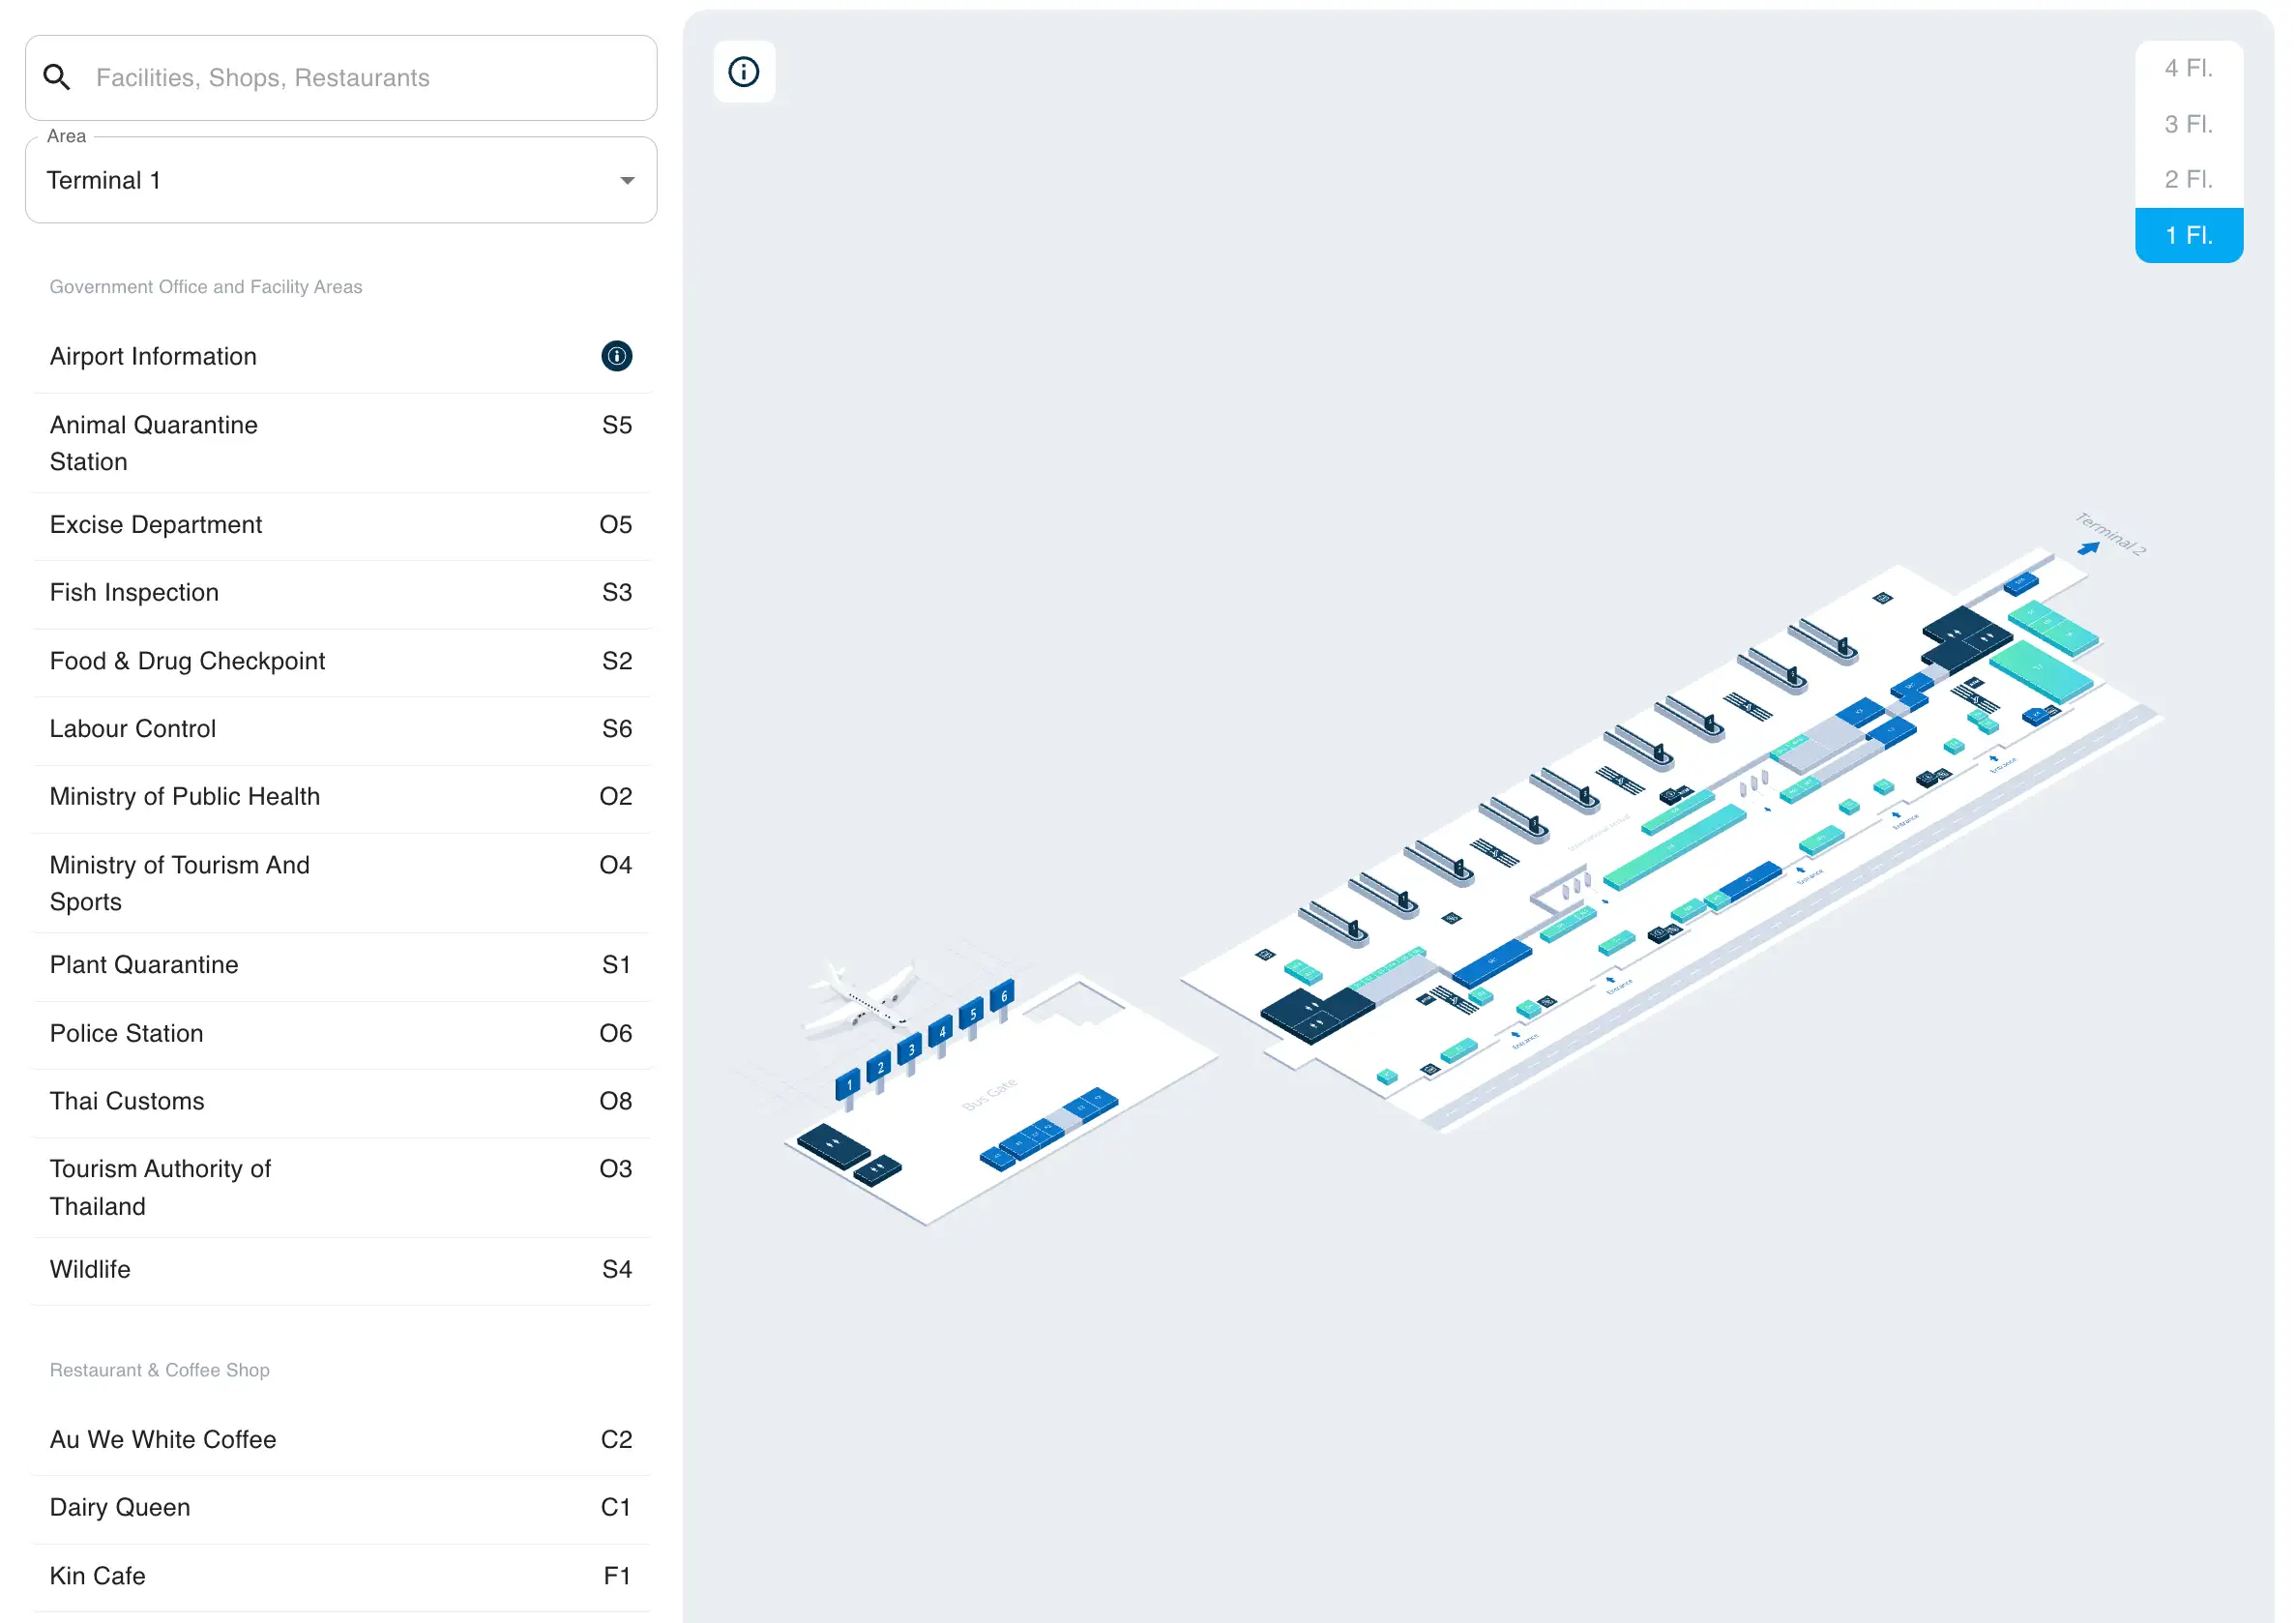
Don Mueang International Airport Terminal 1 Level 1 Map 2026
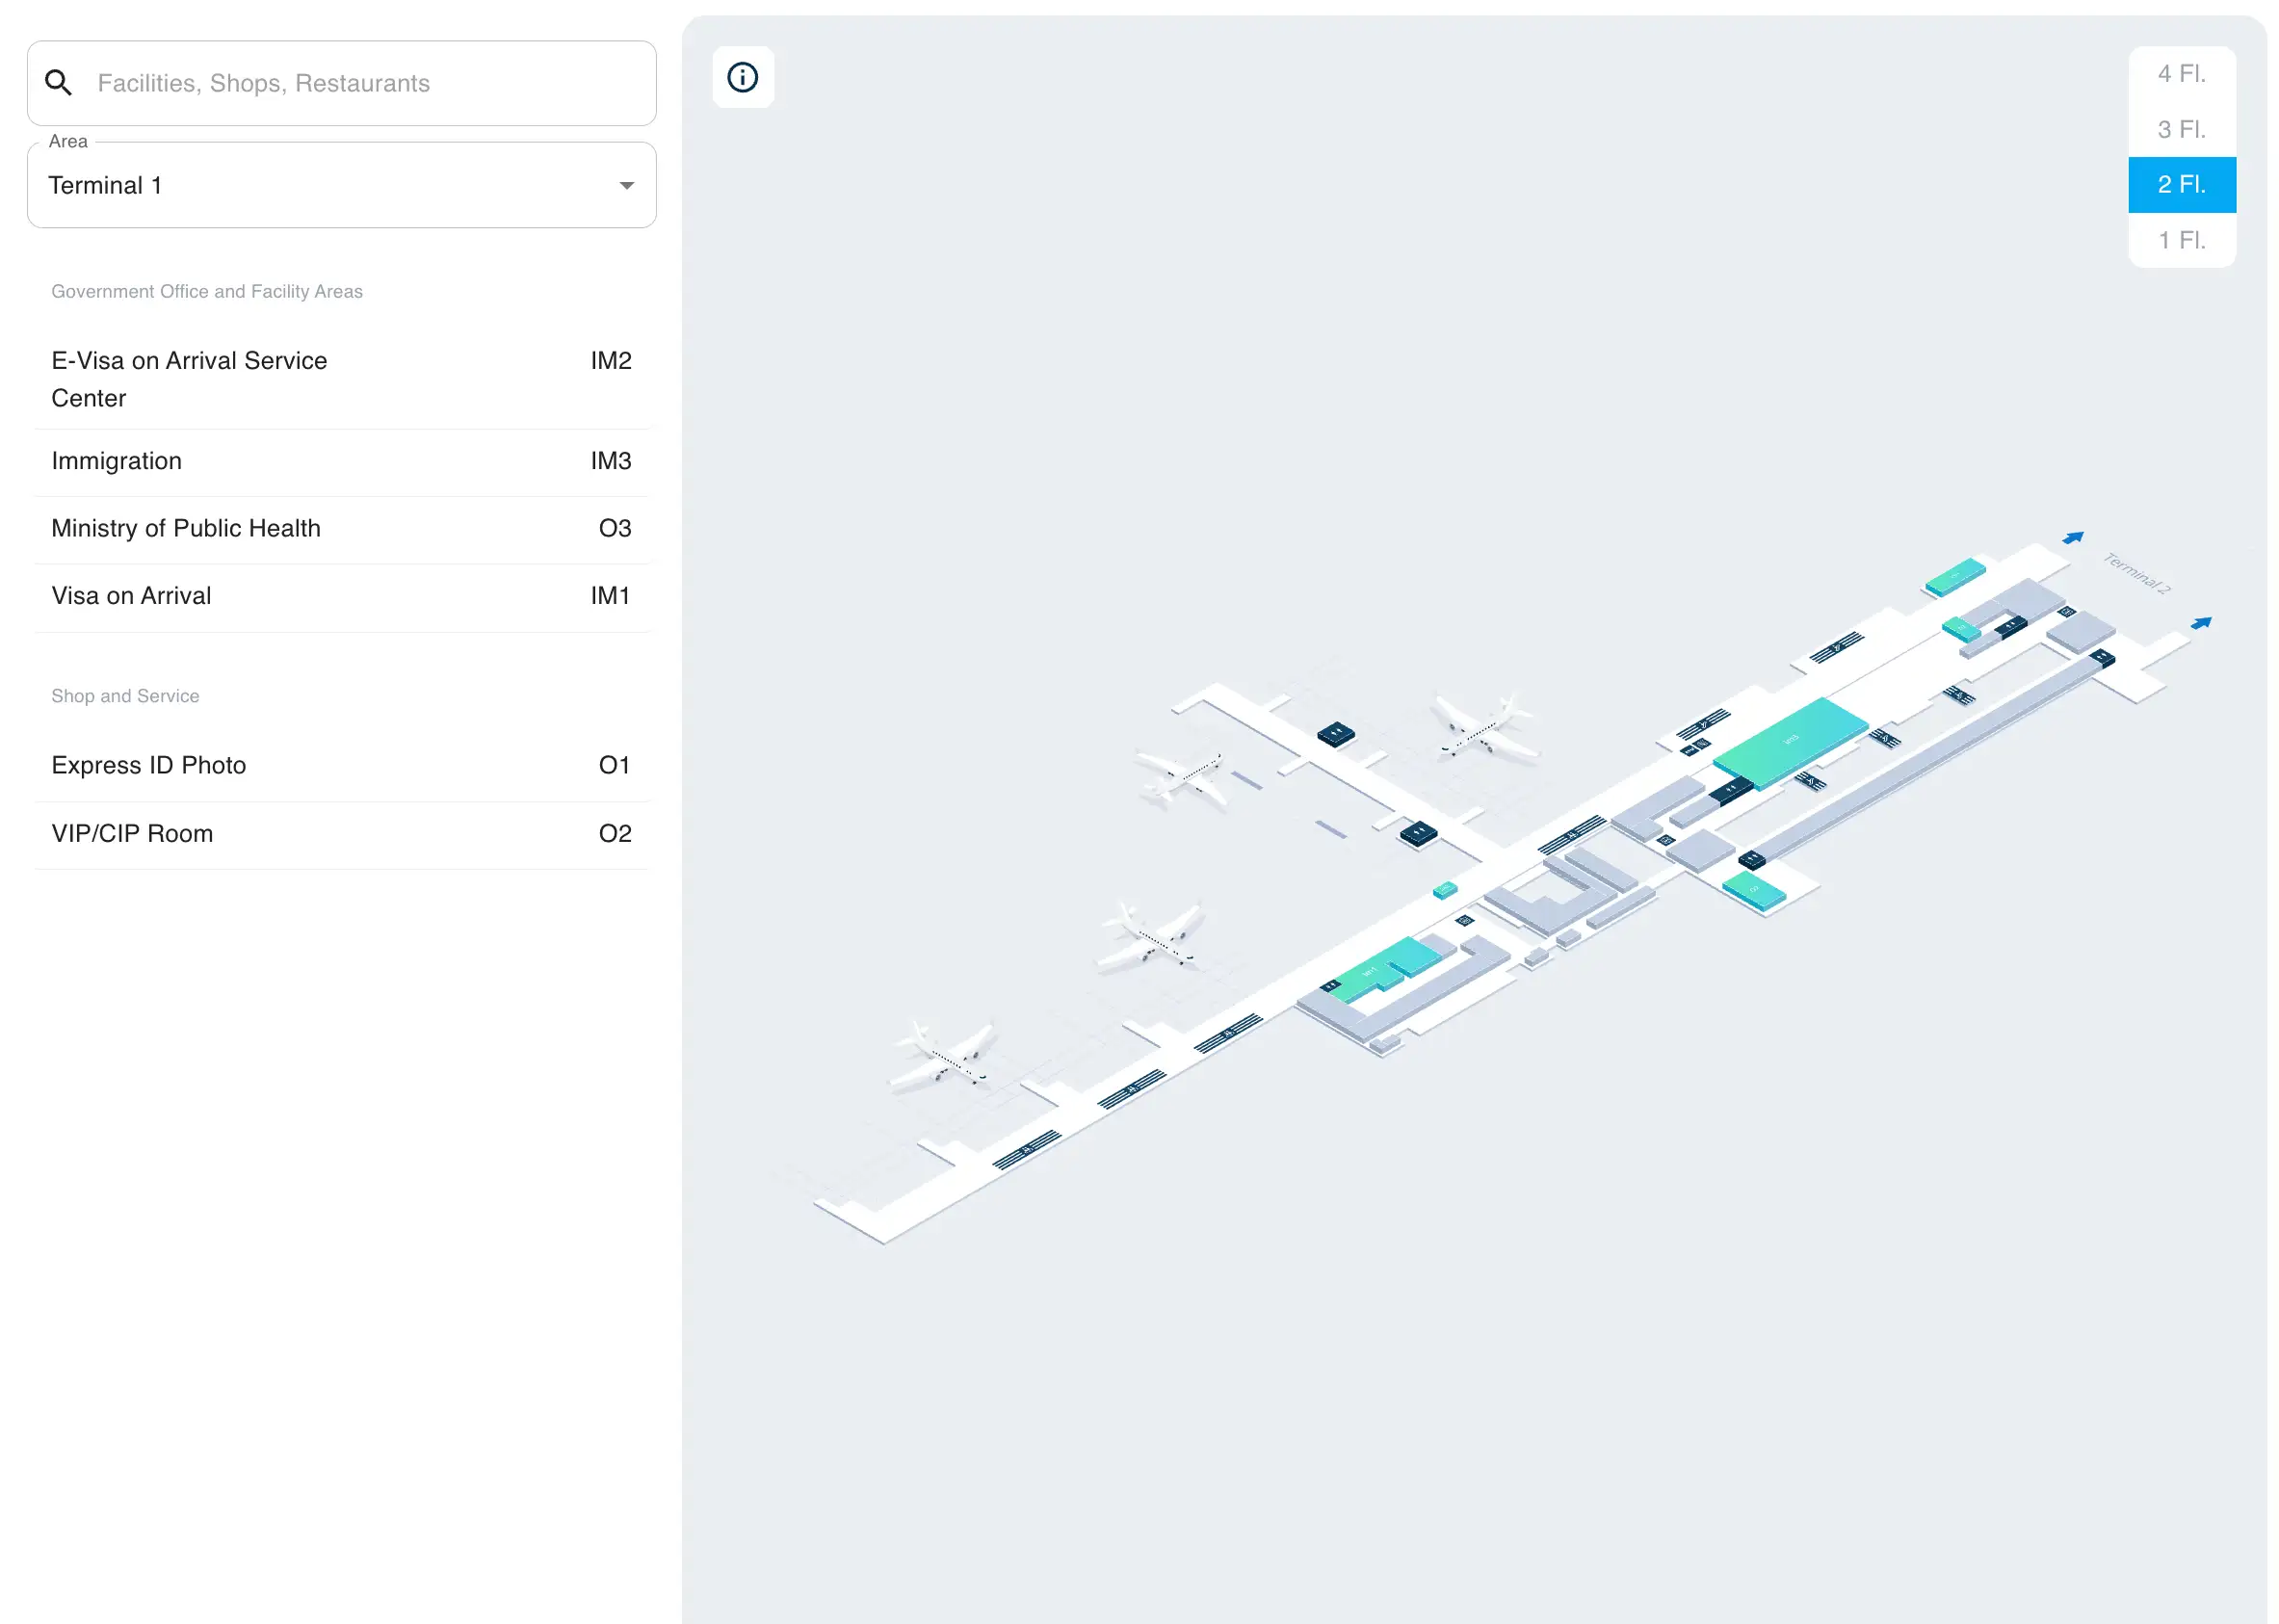
Don Mueang International Airport Terminal 1 Level 2 Map 2026
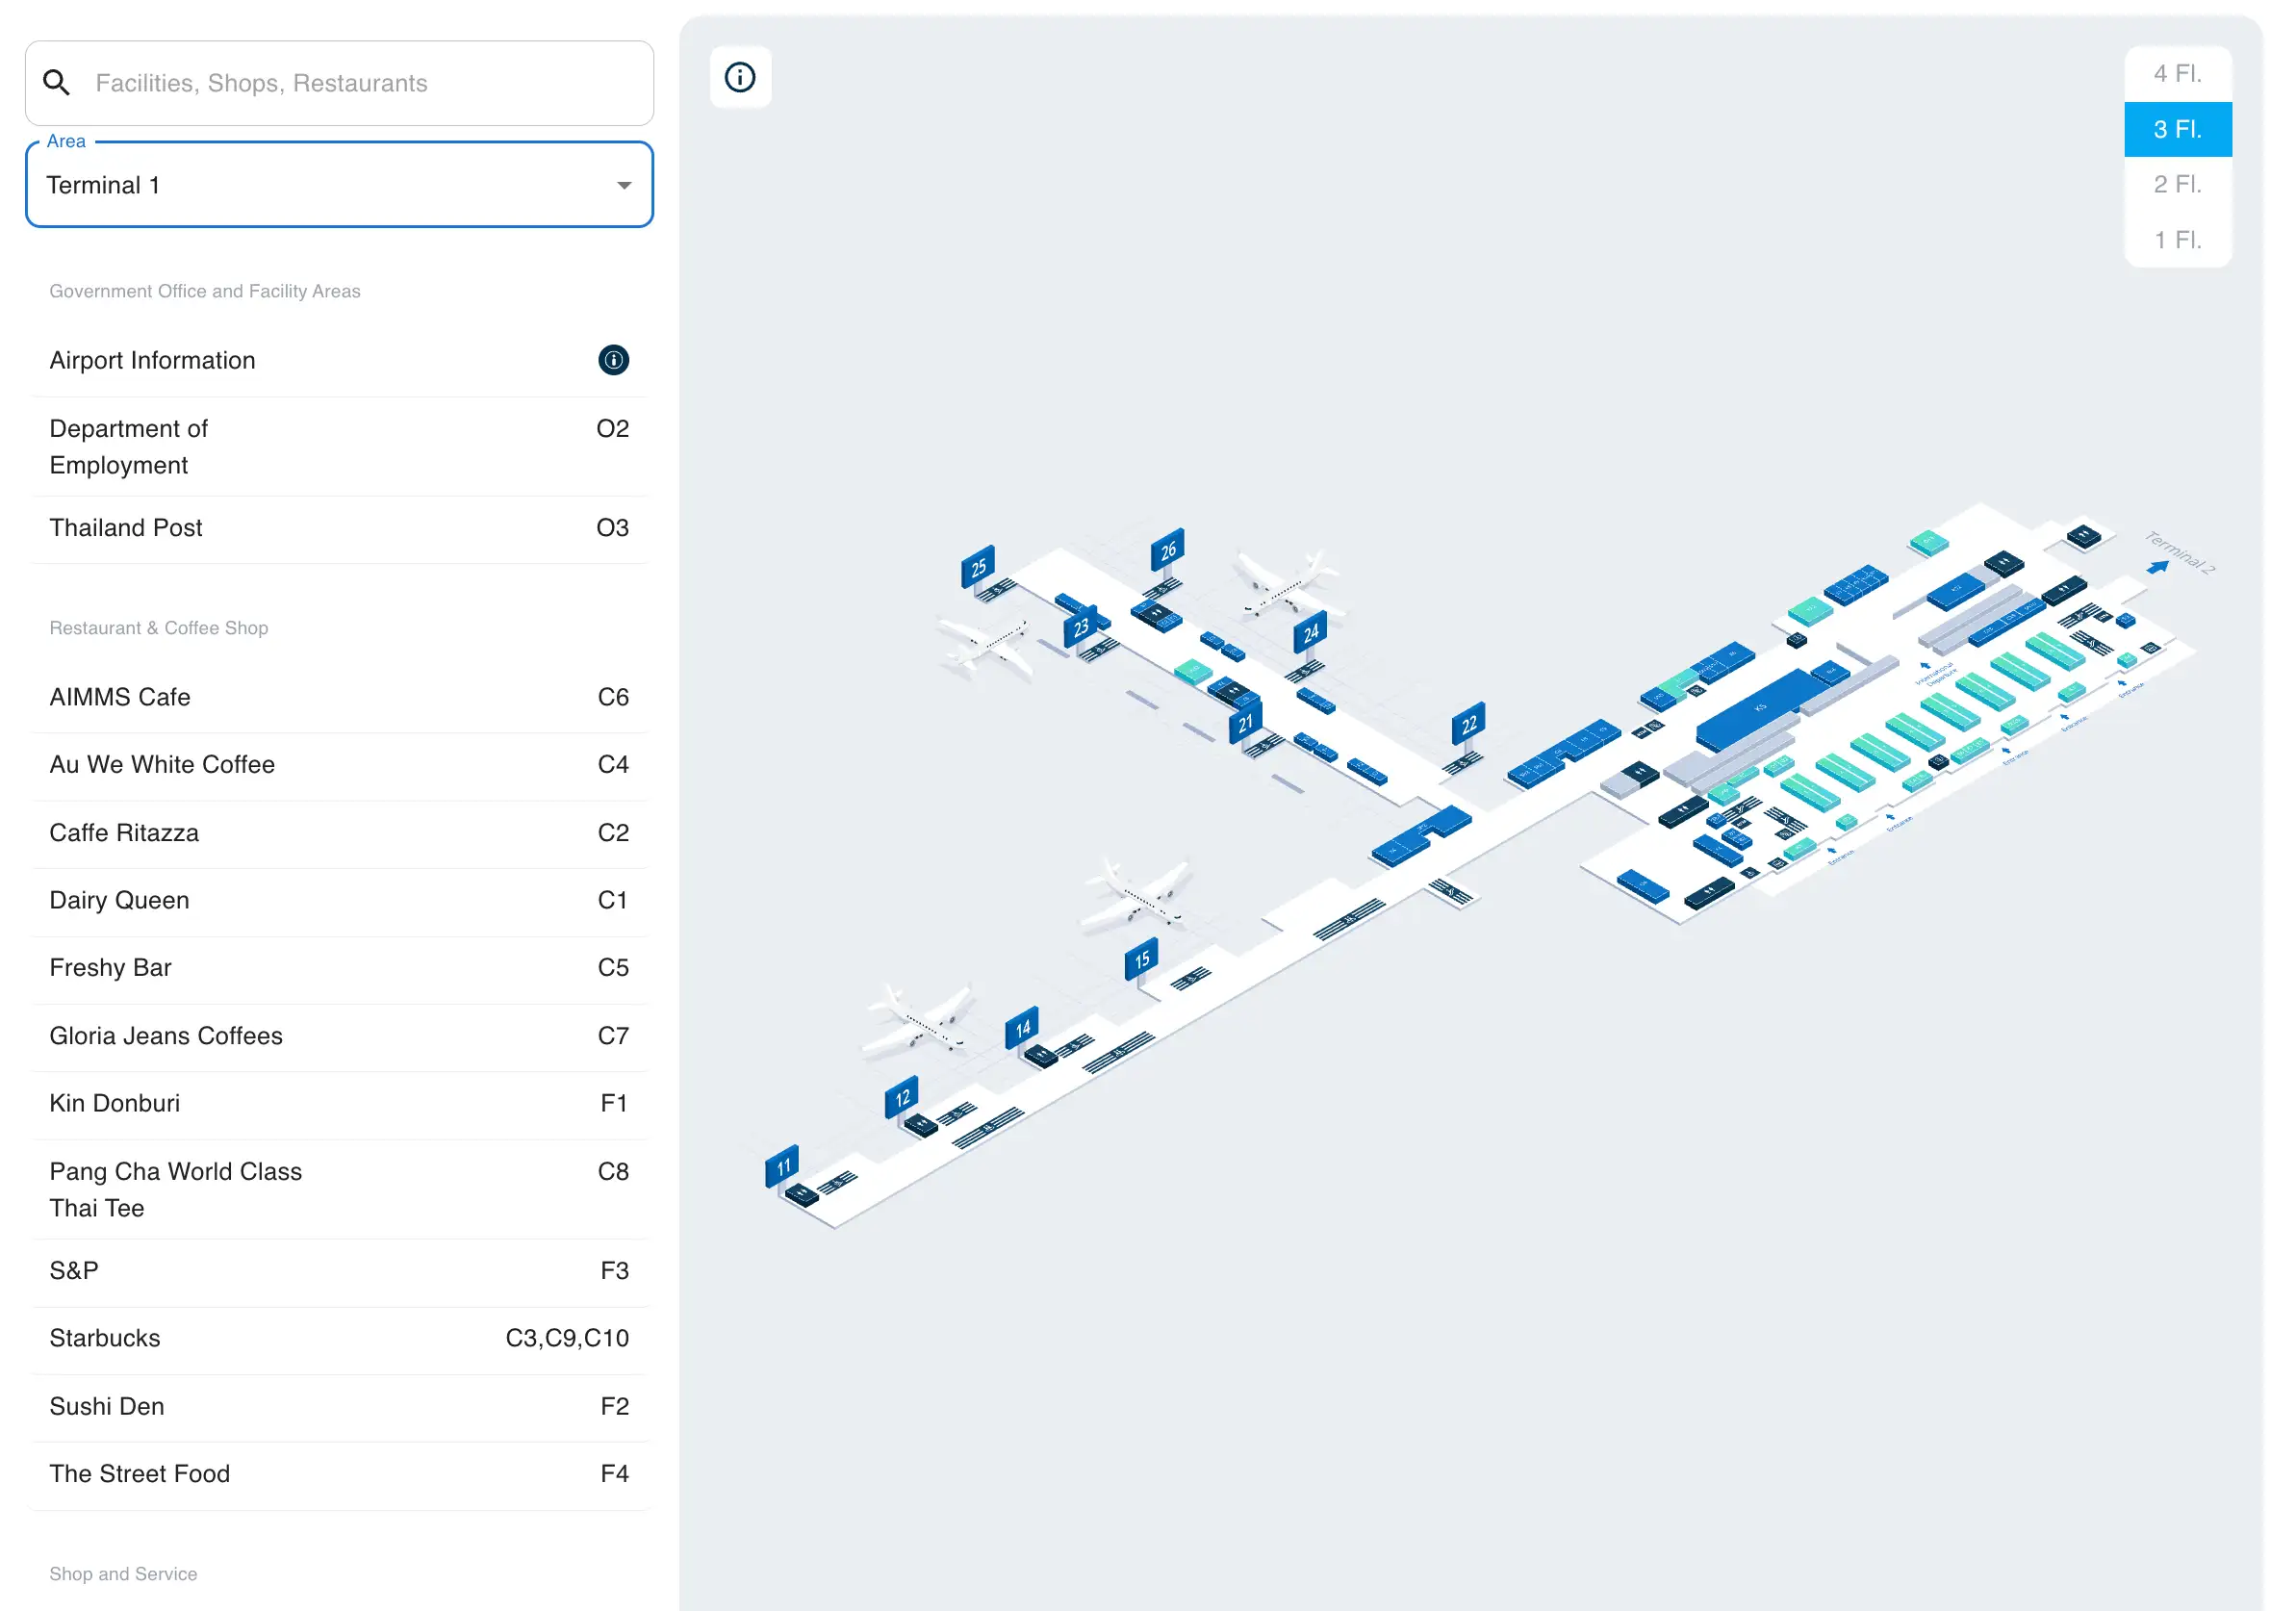
Don Mueang International Airport Terminal 1 Level 3 Map 2026
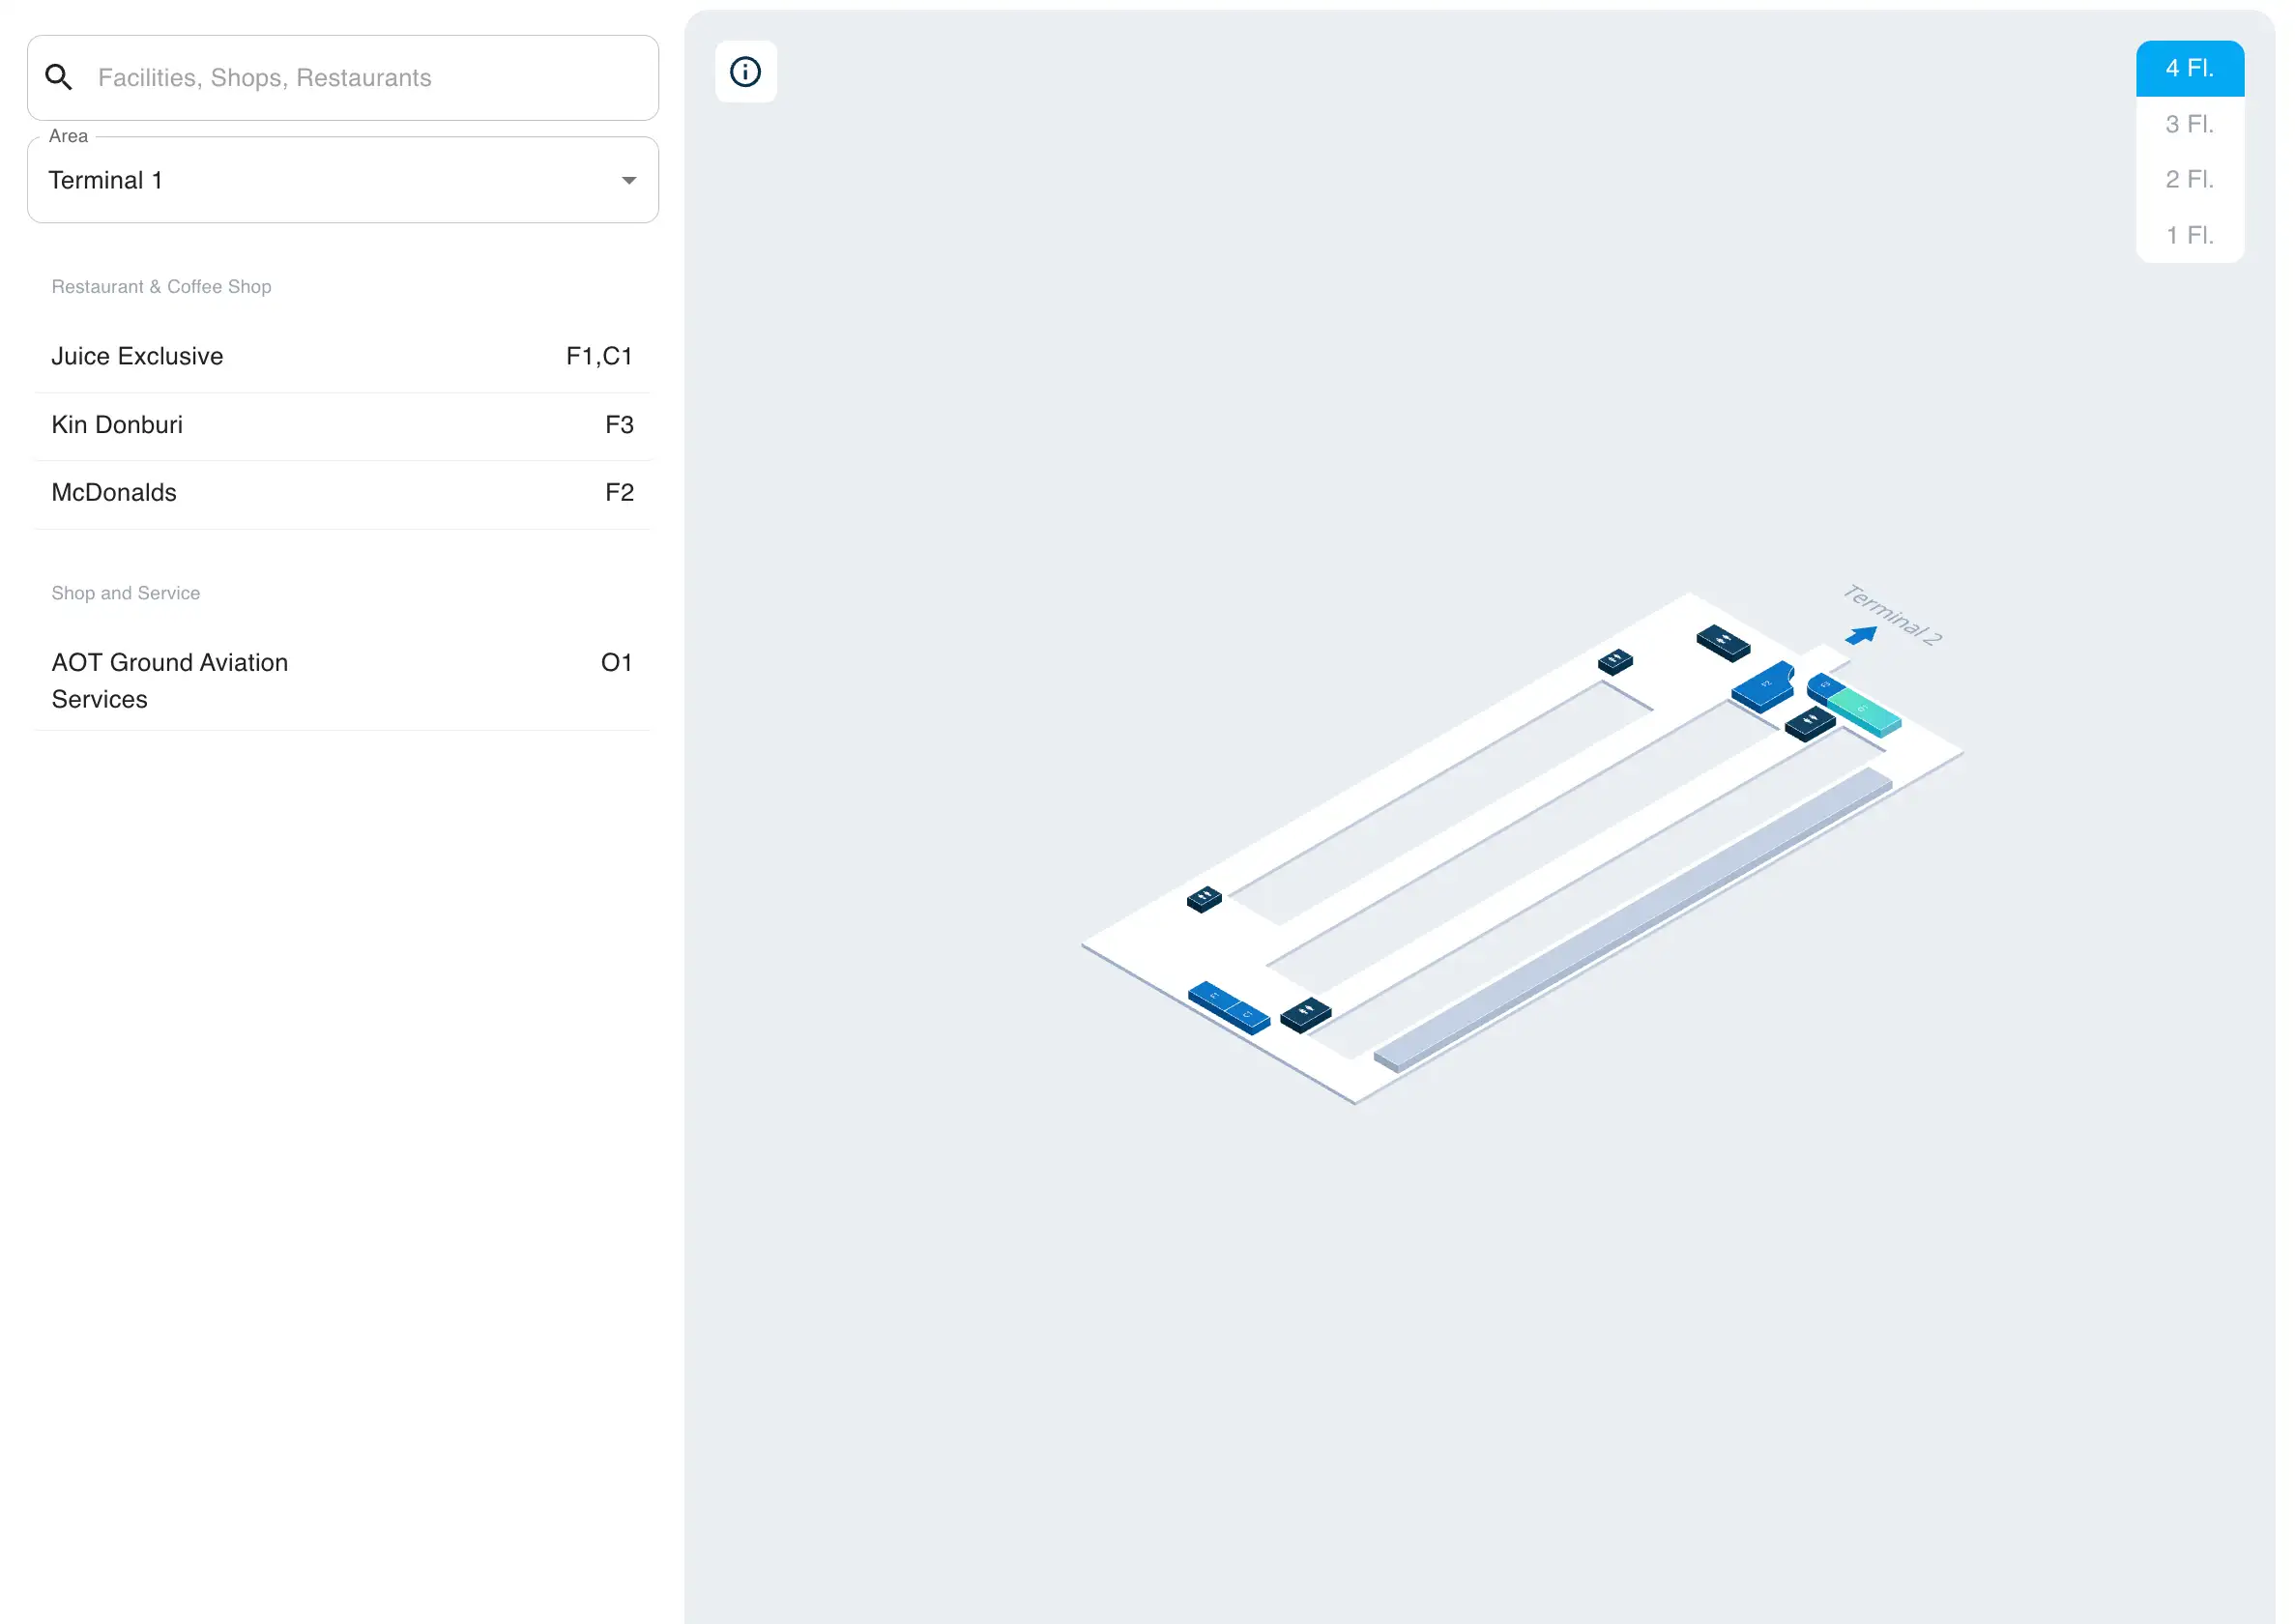
Don Mueang International Airport Terminal 1 Level 4 Map 2026
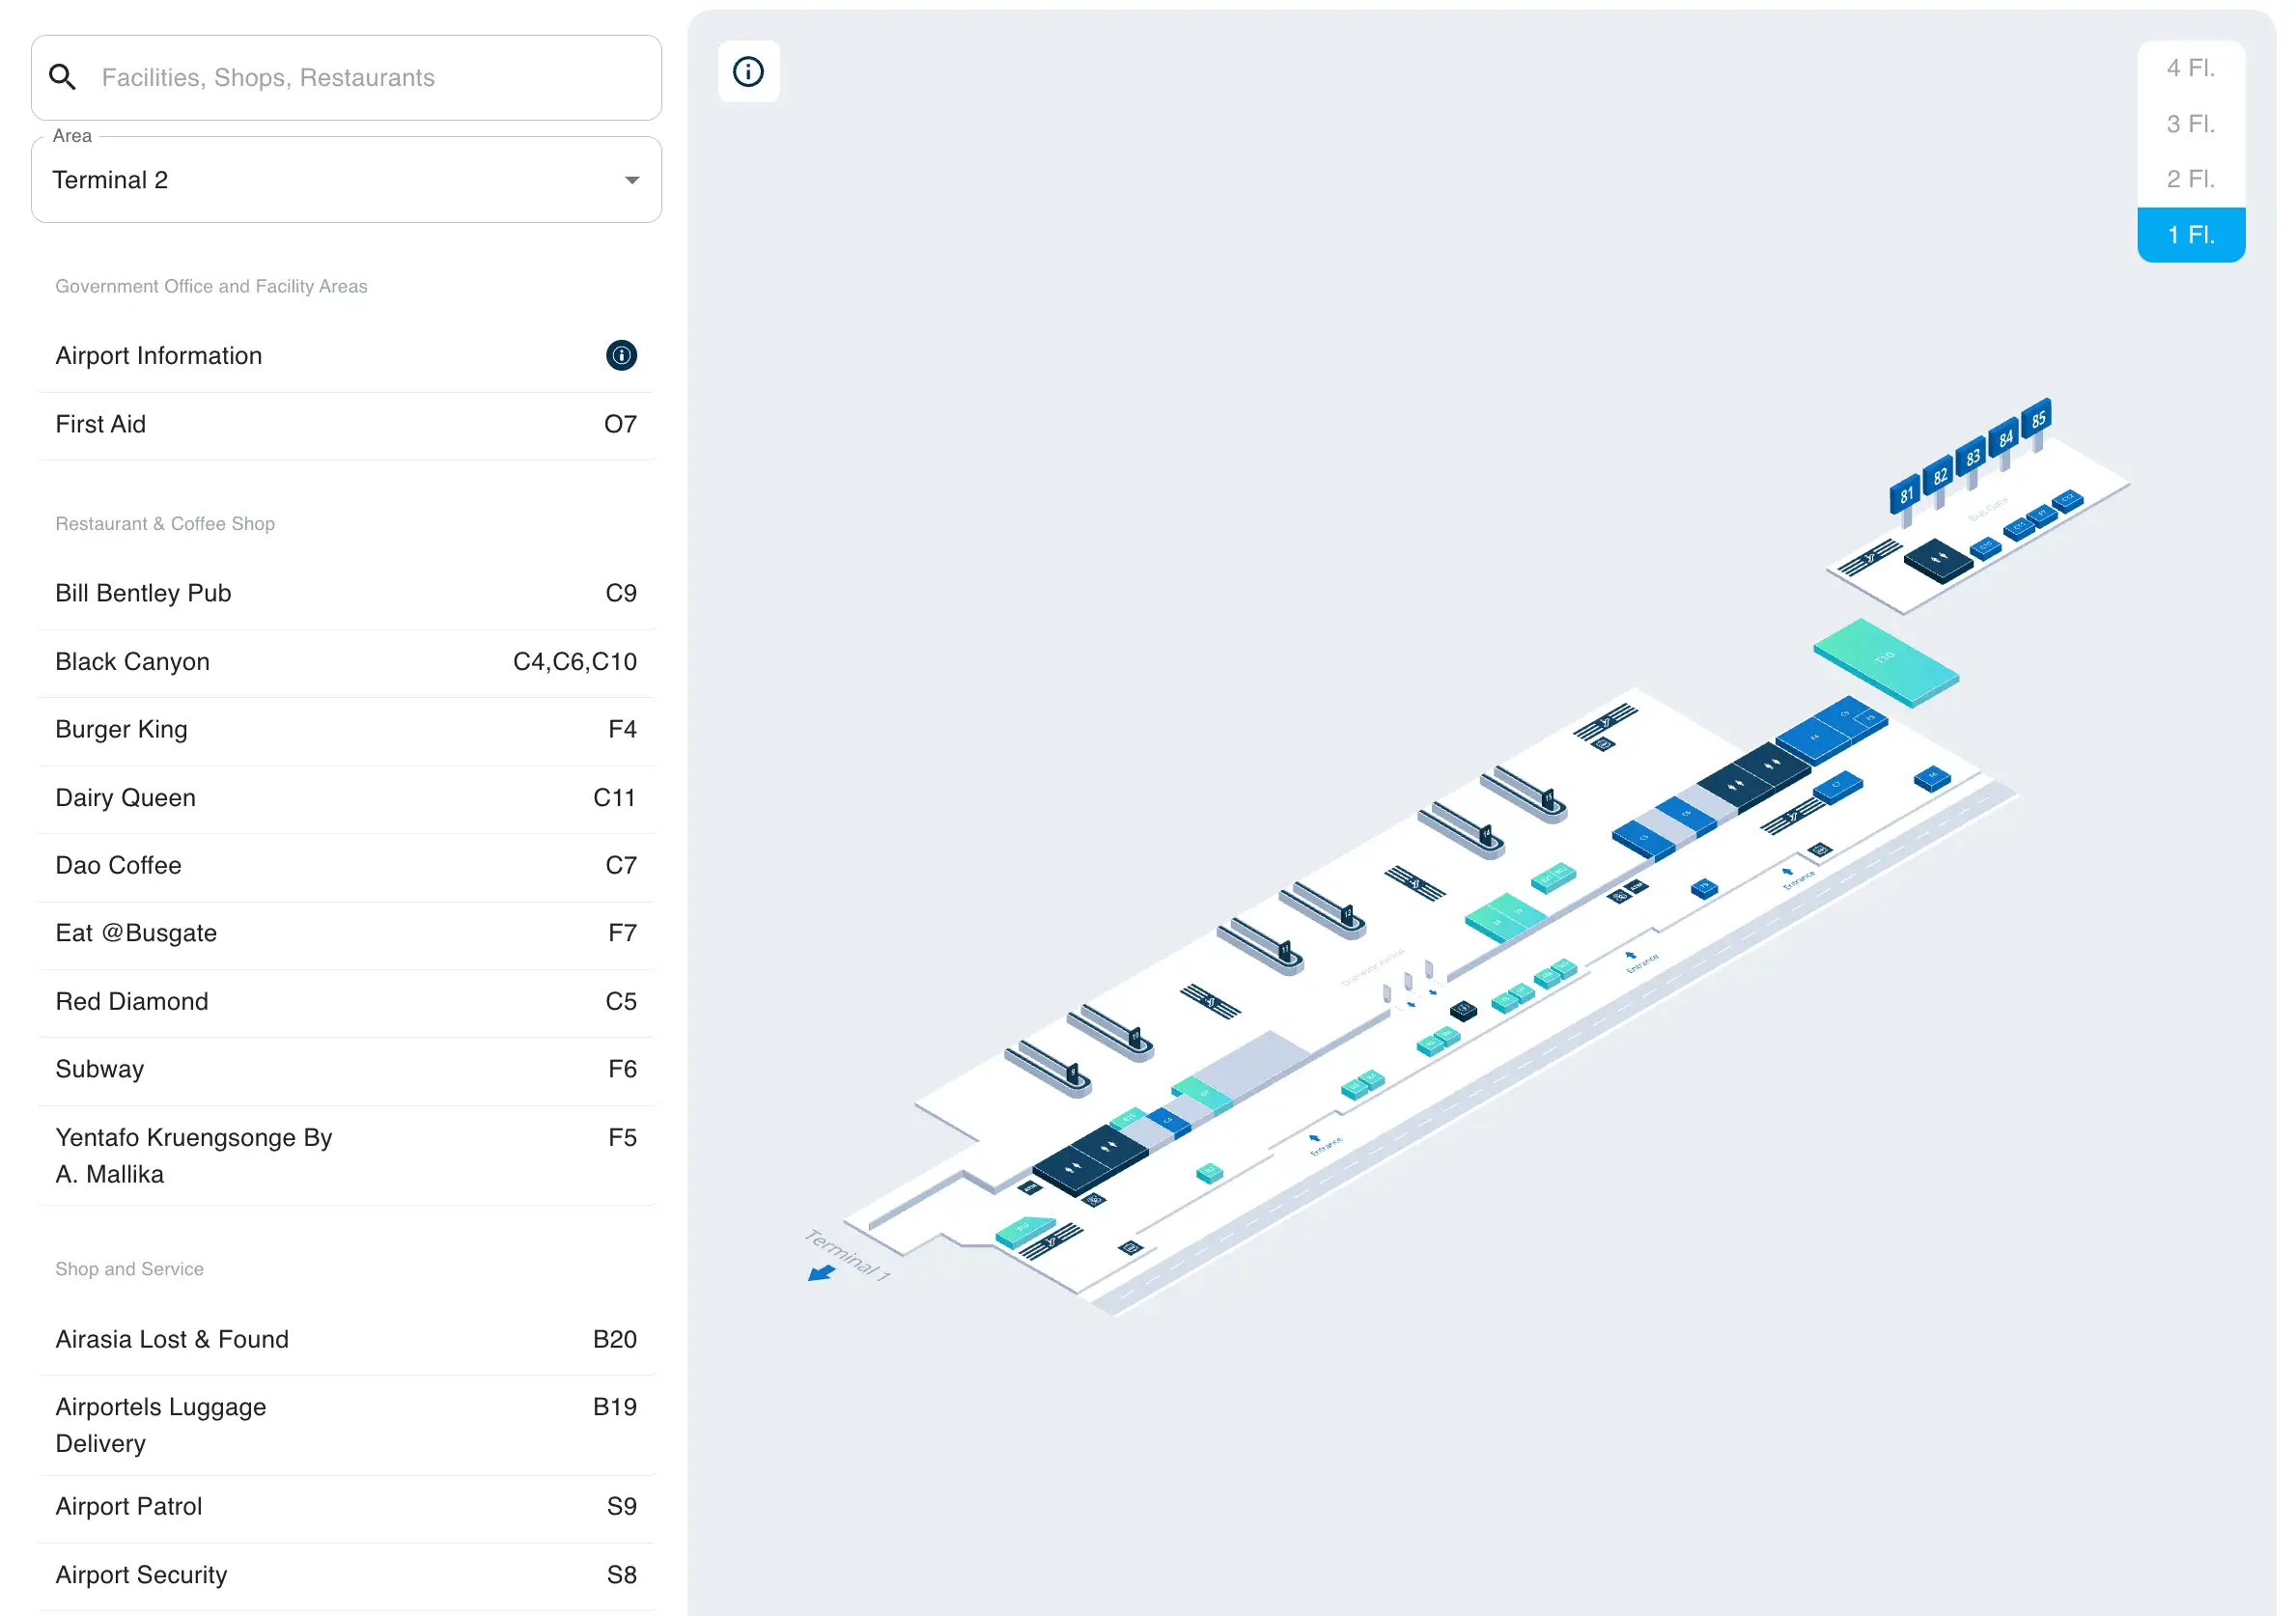
Don Mueang International Airport Terminal 2 Level 1 Map 2026
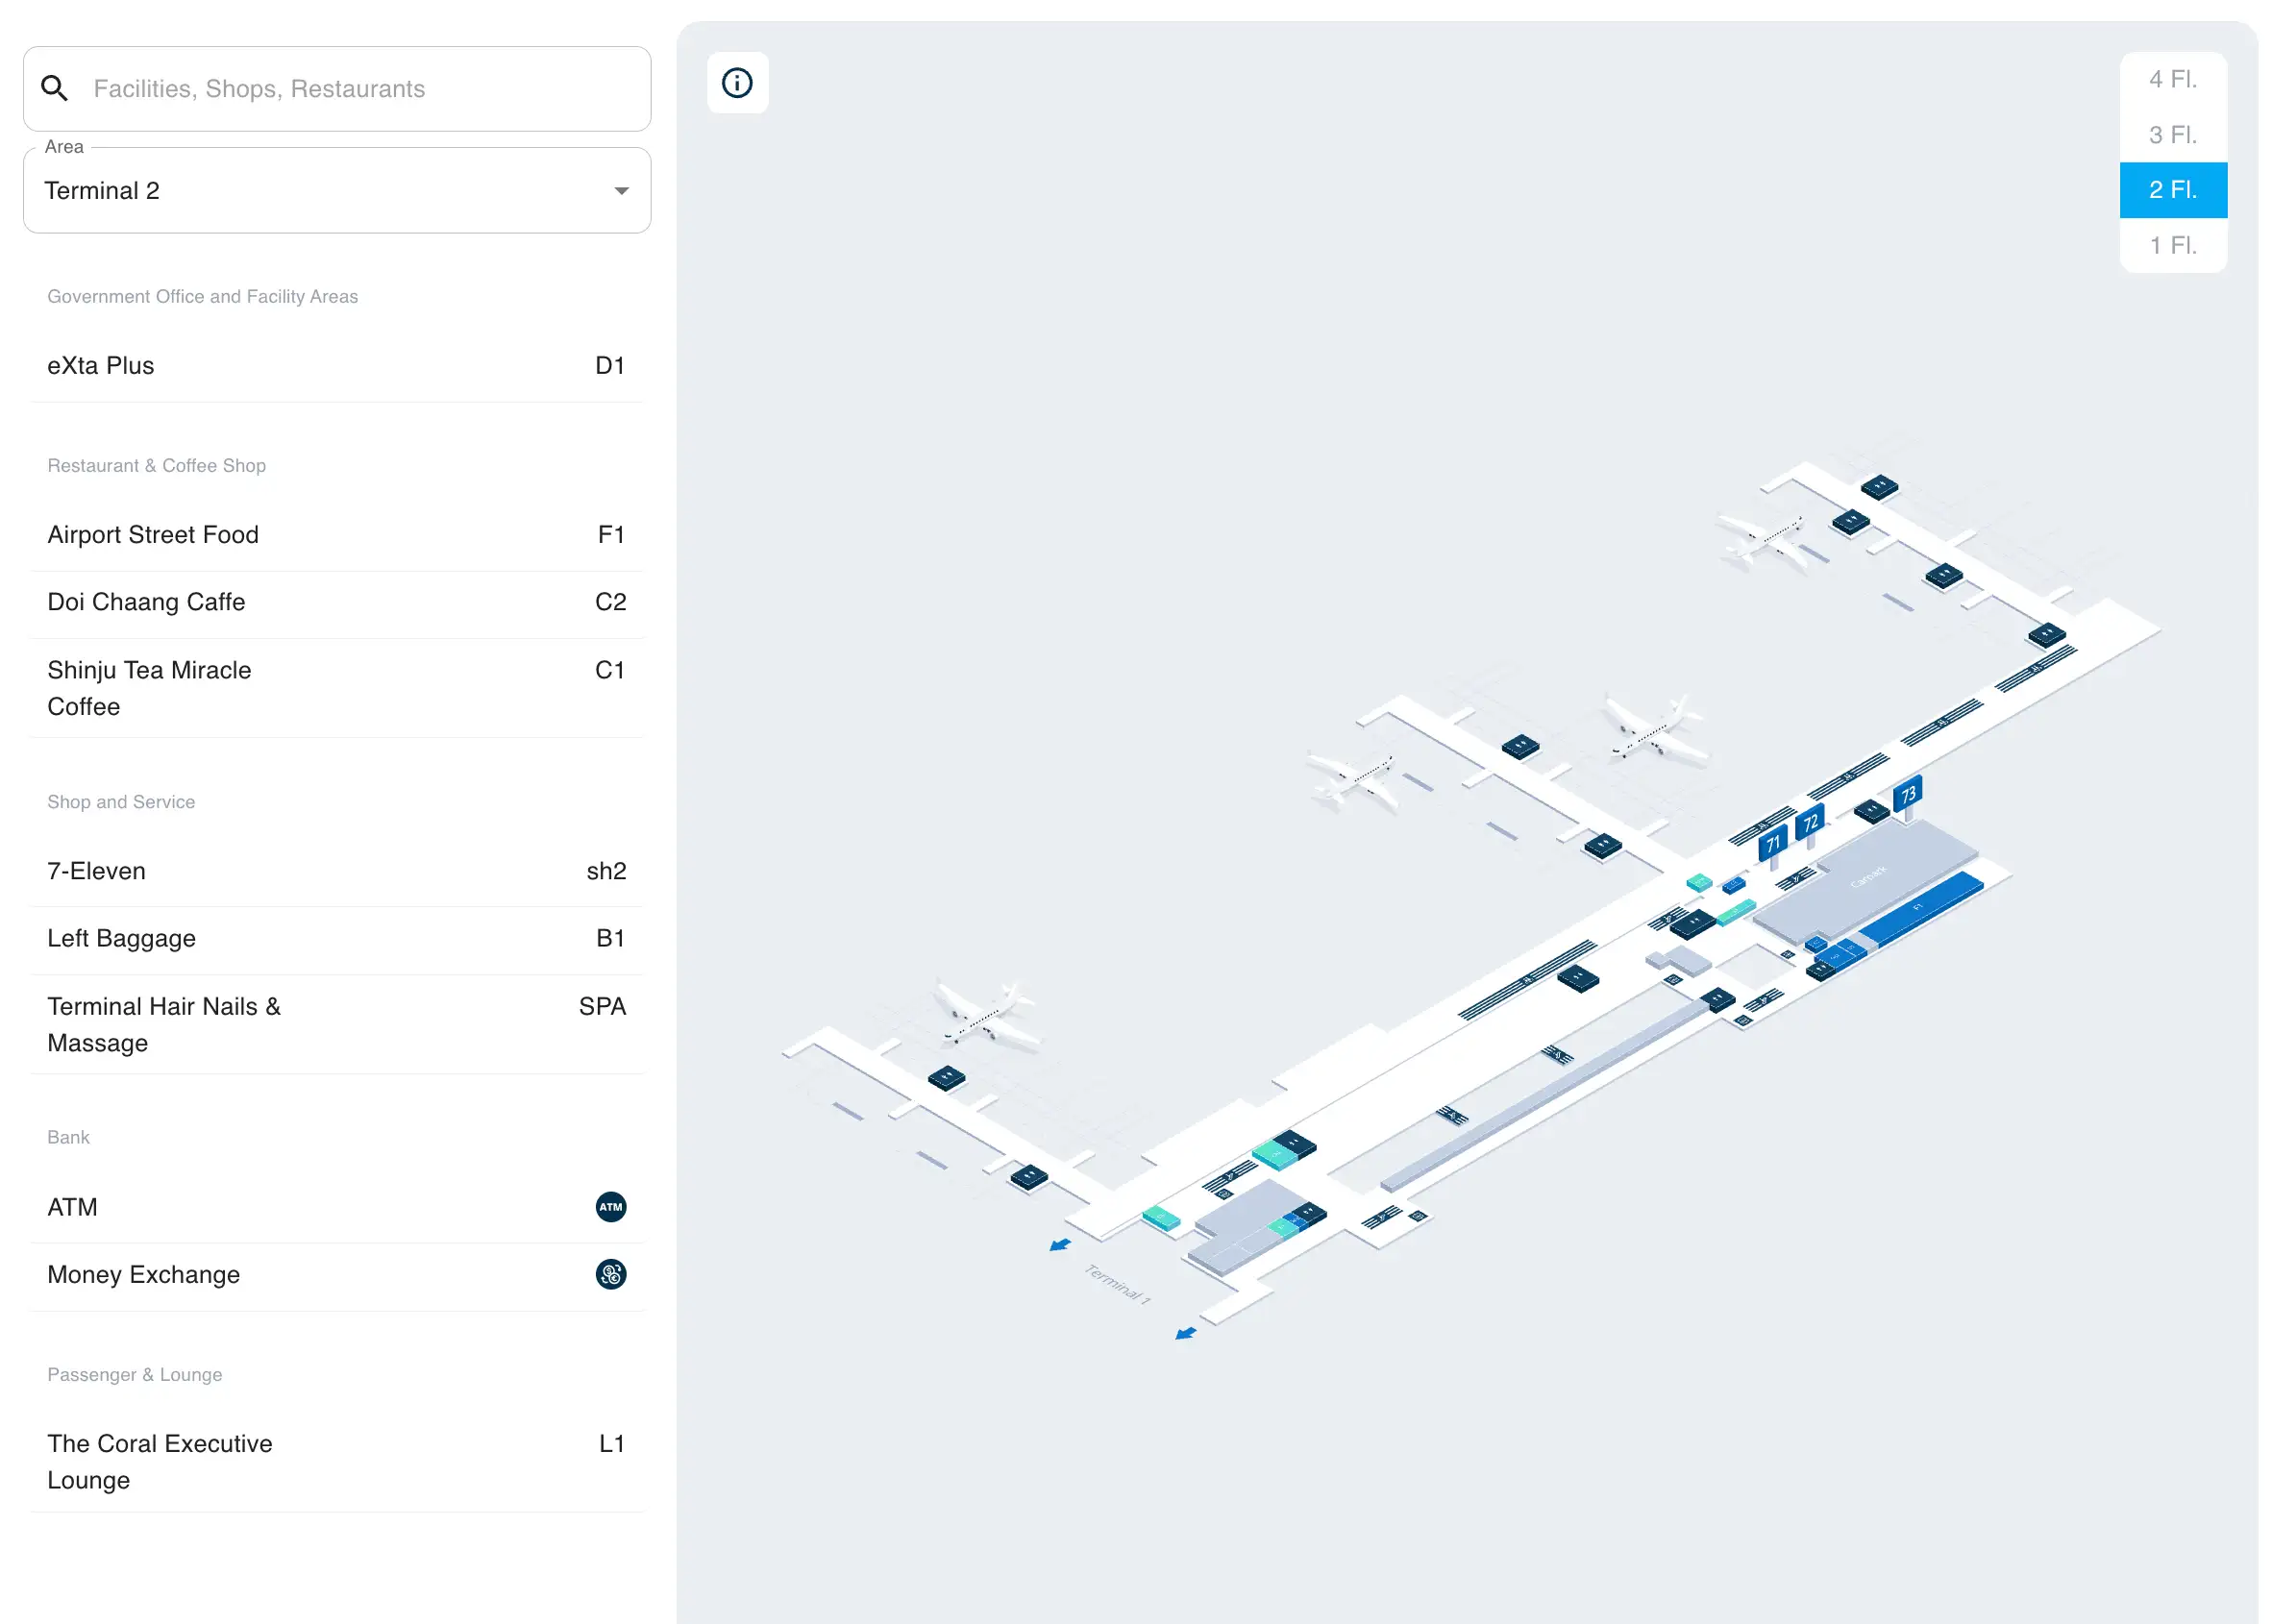
Don Mueang International Airport Terminal 2 Level 2 Map 2026
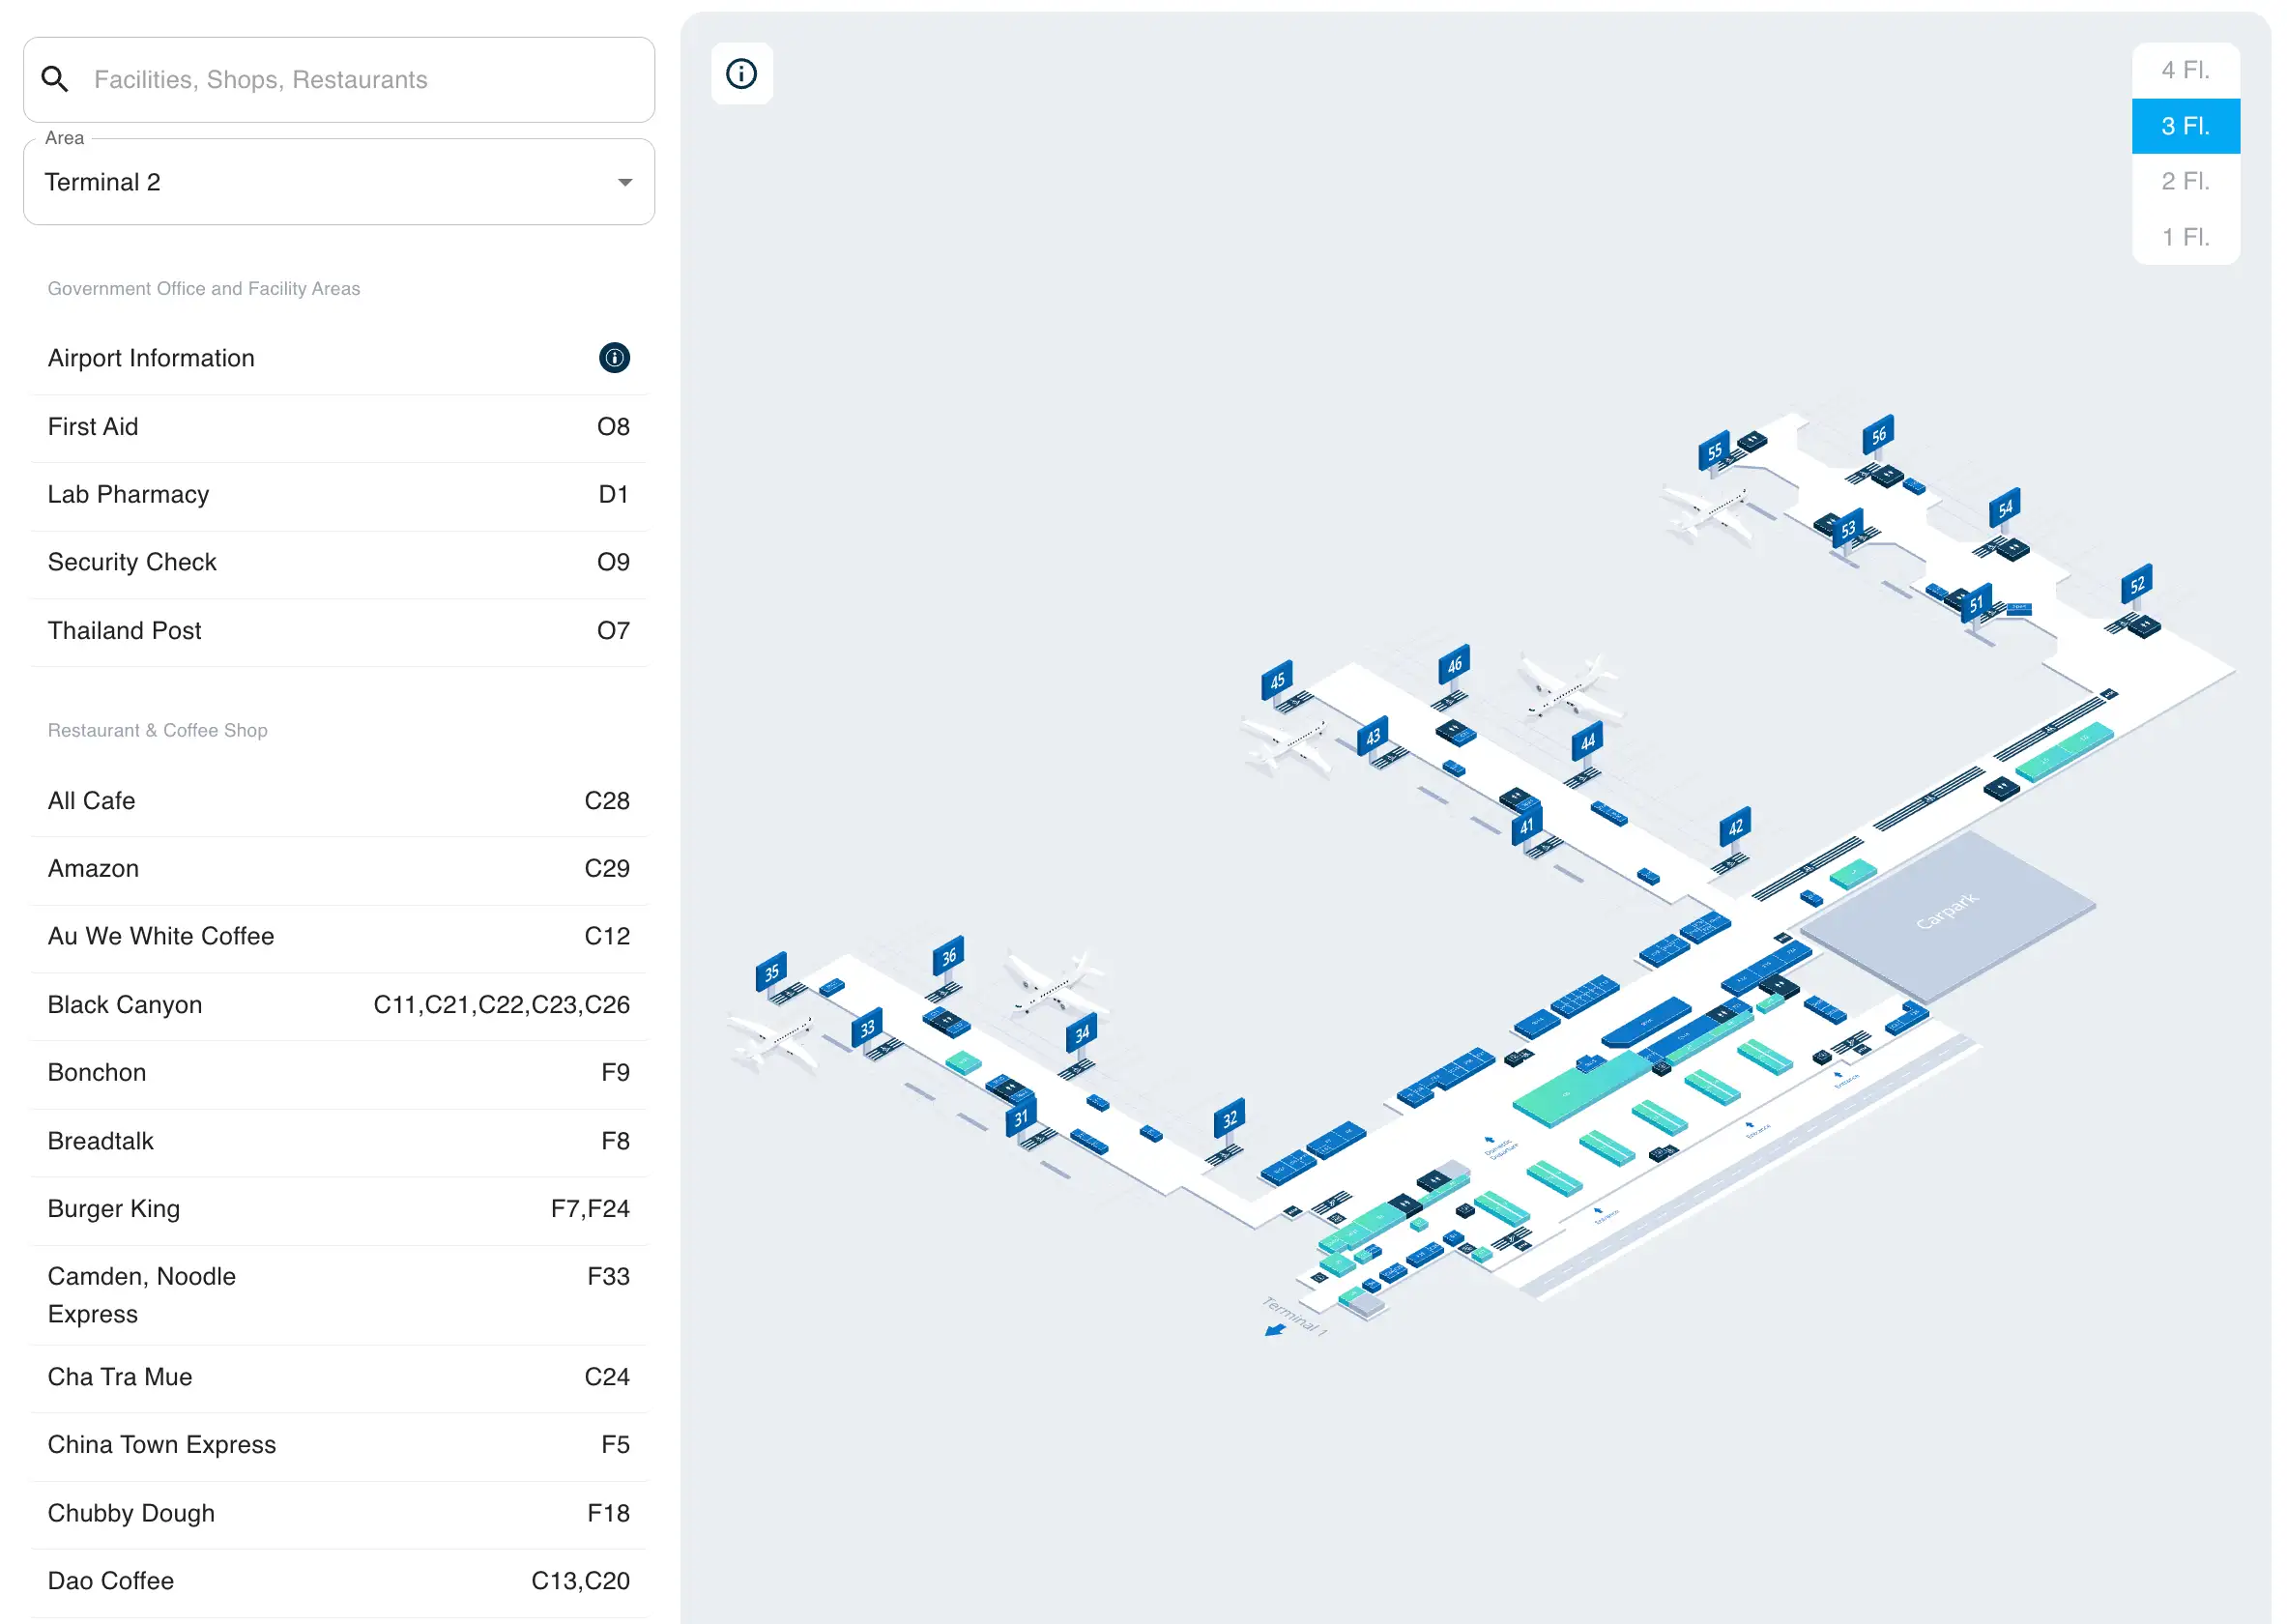
Don Mueang International Airport Terminal 2 Level 3 Map 2026
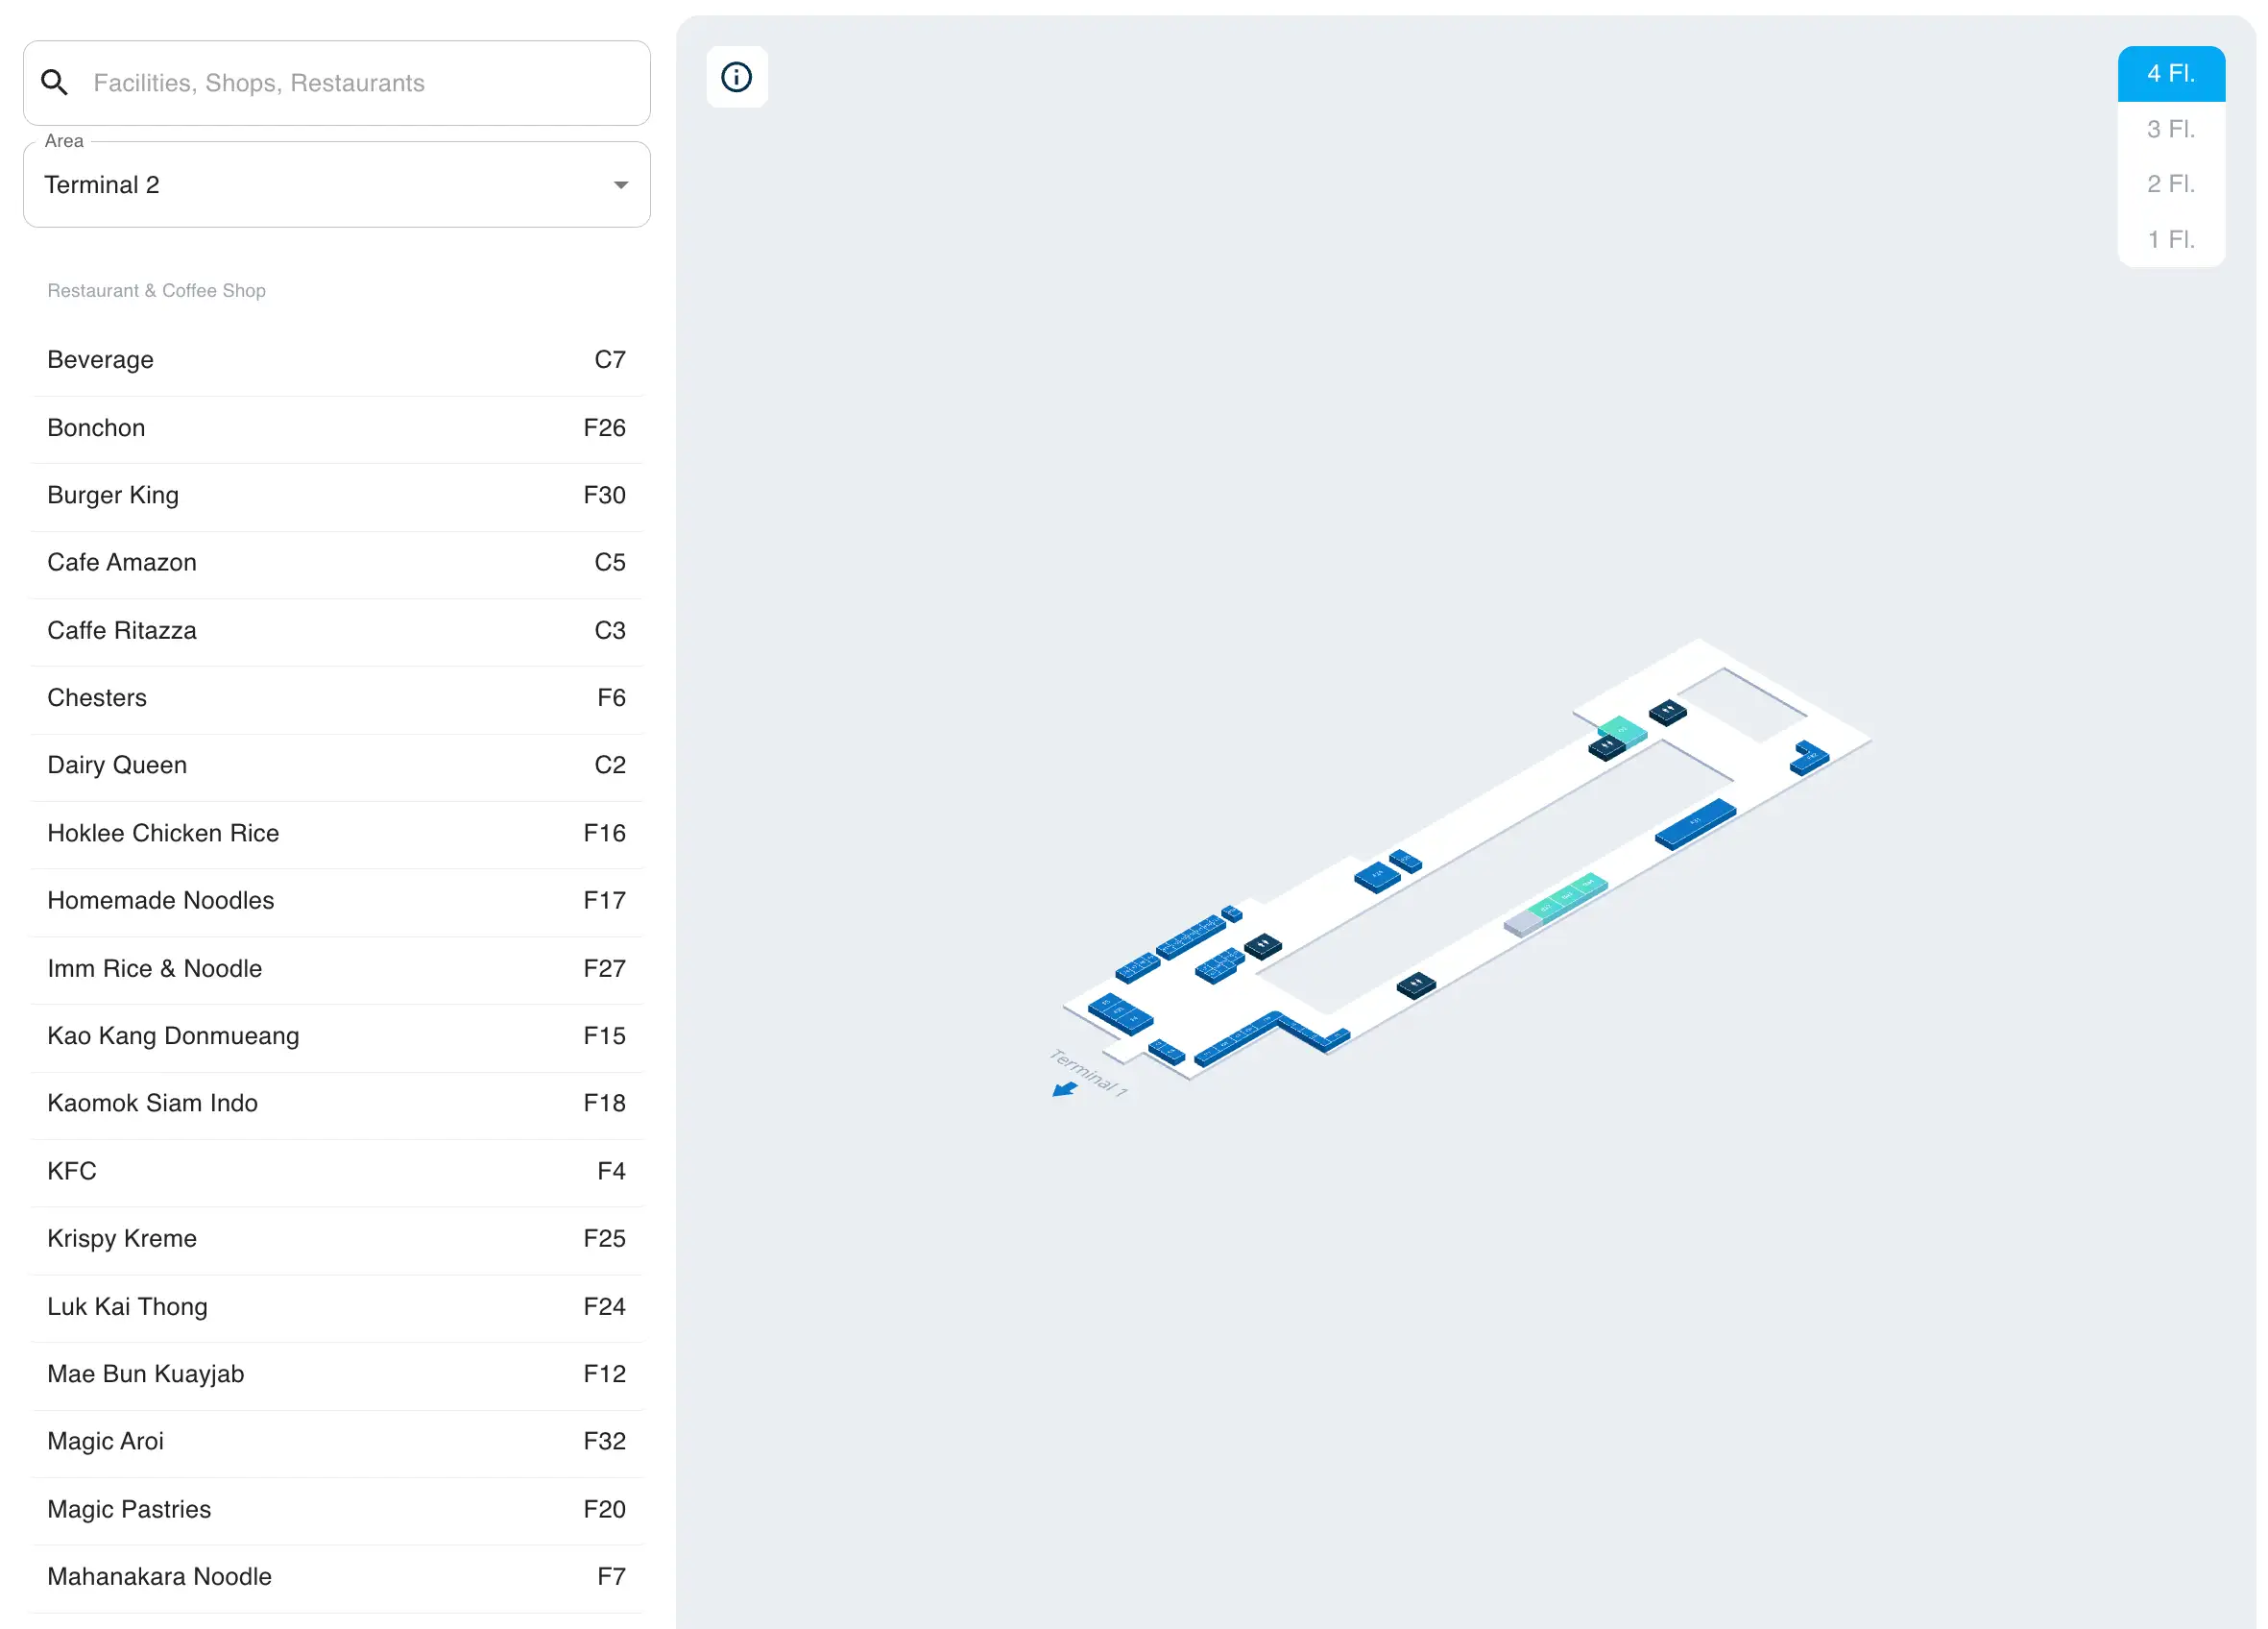
Don Mueang International Airport Terminal 2 Level 4 Map 2026
2026 Don Mueang International Airport Map Guide
What is the exact walking distance (meters) from Terminal 1 International Arrivals exit to the Terminal 2 Domestic check-in hall entrance via the connecting walkway?
The walking distance is about 200–250 meters from Terminal 1 International Arrivals (Level 1) to the Terminal 2 Domestic check-in hall entrance, using the internal connector plus the required approach walk. The usable path is a mix of a southbound walk through the Terminal 1 Arrivals hall toward the T1/T2 seam, the connector corridor itself, then the approach inside Terminal 2 to reach the vertical bank that takes you up to the Domestic check-in level (Level 3, Rows 9–15). In peak periods, crowd “weaving” in the T1 Arrivals hall can push the effective path closer to ~300 meters even though the audited baseline remains 200–250 meters.
Where is the exact entry point (door/escalator/elevator) to the T1↔T2 connecting walkway from Terminal 1 Arrivals level?
The entry to the T1↔T2 landside connector from Terminal 1 Arrivals is at the far south end of the Level 1 Arrival Hall, beside Gate 8. That Gate 8 position is the simplest “walk-in” access point from Arrivals because it stays on the same level and feeds directly into the inter-terminal corridor.
From the Customs exit area (typically around the middle of the hall near Gates 3–4), walk south with the numbered Gates increasing toward 8. Keep moving past the central meeting-point crowd zone until you reach the Gate 8 endcap of the hall; the Terminal 2 direction signage appears as the flooring and corridor geometry narrow into the connector. If you accidentally surface curbside, you’ve gone too far outward; re-enter and aim back to the Gate 8 interior edge where the corridor begins.
Which numbered door is the primary Grab pickup point for Domestic Terminal (T2) Arrivals, and where is it located relative to baggage claim exits?
Gate 12 is the primary Grab pickup point for Terminal 2 (Domestic) Arrivals. The pickup is positioned on Level 1 at Exit/Gate 12, acting as the dedicated “app ride” zone between the central arrivals flow and the farther-south official taxi area.
After you exit the domestic baggage claim into the public arrivals hall, orient to the gate-numbered curbside exits (Gates 9–15). From the typical baggage claim release point near the hall’s center, you walk slightly south toward Gate 12, rather than continuing all the way to the extreme south end (Gate 15) where the official taxi operation concentrates. If you reach the parking-building/taxi-depot end, you’ve passed the Grab zone.
Which numbered door is the primary Grab pickup point for International Terminal (T1) Arrivals, and where is it located relative to customs exit?
Gate 2 and Gate 5 are the primary Grab pickup points for Terminal 1 (International) Arrivals. Both are on Level 1 on the curbside edge of the international arrivals hall, reached after you exit Customs into the public arrivals area.
From the customs sliding doors, use the numbered-gate exits along the hall: Gate 5 sits closer to the central flow and typically serves the bulk of arrivals, while Gate 2 is toward the north end and is usually calmer. If you start walking south toward Gate 8, you’re moving away from the main Grab meeting points and toward the public taxi zone instead, so re-orient back to Gates 2–5 for app pickup.
Where is the exact location of the official taxi queue machine (ticket kiosk) relative to Terminal 1 Arrivals exits (door number + level)?
The official public taxi queue machine (ticket kiosk) is at Terminal 1 Arrivals, Level 1, by Gate 8. This places the regulated taxi operation at the extreme south end of the international arrivals hall, away from the central Grab meeting-point area.
If you exit Customs near the middle of the hall (commonly aligned around Gates 3–4), you must walk south along the indoor arrivals frontage until you reach Gate 8. Gate 8 is also the same south-end anchor used to find the landside T1↔T2 connector, so if you can see signage or flow directing passengers toward Terminal 2, you are in the correct end-zone for the taxi ticket kiosk.
Where is the exact location of the official taxi stand loading bays relative to Terminal 2 Arrivals exits (door number + level)?
The official taxi stand loading bays for Terminal 2 Arrivals are at Level 1 by Gate 15, integrated in/under the parking building at the far south end of the domestic terminal frontage. This is the terminal’s “taxi depot” zone, physically separated from the more central arrivals exits.
From the typical domestic arrivals hall center (around Gates 11–12), follow the curbside exit numbers south toward 15 until the architecture shifts into the parking-structure interface. If you are standing at Gate 12 (the main Grab pickup), you are still north of the taxi loading area; continue south along the same Level 1 frontage until you reach Gate 15, where the taxi queue and car-loading process is concentrated.
Where is the exact shuttle-bus boarding point for the DMK ↔ BKK free airport shuttle on the DMK side (terminal, level, and door reference)?
The DMK ↔ BKK free airport shuttle boards at Terminal 1, Level 1 (Arrivals), Gate 6. This makes Terminal 1 the single shuttle nexus on the DMK side, so domestic arrivals from Terminal 2 must reposition to Terminal 1 before lining up.
From inside Terminal 1 Arrivals, use the numbered curbside exits and move to Gate 6 rather than the terminal ends: Gate 8 is the public taxi end-zone, and Gates 2–5 are the main Grab meeting points. Gate 6 sits between those zones, so if you find yourself drifting toward the far south connector to Terminal 2 or the far north quiet end, correct back toward the mid-hall Gate 6 frontage for the shuttle stop.
What is the exact walking distance (meters) from Terminal 2 baggage claim exit to the DMK ↔ BKK shuttle-bus stop?
The walking distance is about 350–450 meters from Terminal 2 baggage claim exit to the DMK ↔ BKK shuttle stop at Terminal 1 Gate 6. The measured range varies by which baggage belt releases you into the public hall, but the shuttle’s fixed point at T1 Gate 6 forces a full northbound traverse across the seam.
| Segment | Landmark anchors | Approx. distance |
|---|---|---|
| T2 baggage claim exit to T2 north end | T2 public hall near Gates 11–12 → Gate 9 area | ~150 m |
| Across the T2→T1 connector on Level 1 | Gate 9 boundary → into T1 Arrivals hall | ~0–100 m |
| Through T1 Arrivals to shuttle stop | T1 Arrivals hall → Gate 6 frontage | ~200 m |
| Total | T2 baggage exit → T1 Gate 6 | ~350–450 m |
For a self-transfer T2 (Domestic Arrivals) → T1 (International Departures), what is the exact route sequence (walkway + level changes) from T2 Arrivals exit to the T1 departure check-in row?
The optimal route is to go up to Terminal 2 Level 3 immediately, walk north across the Level 3 connector into Terminal 1, then enter the Terminal 1 Level 3 check-in hall at Rows 1–8. This avoids fighting the densest Level 1 arrivals crowd flow and keeps you on the widest, air-conditioned transfer path.
After exiting T2 Domestic baggage claim into the public arrivals hall (Level 1, between Gates 9–15), turn left/north and locate the central escalator bank in the Terminal 2 atrium to reach Level 3 (Departures). On Level 3, walk north along the departures-level corridor, cross the inter-terminal seam via the Level 3 connector, then continue into Terminal 1’s departures hall. You’ll emerge landside on T1 Level 3 facing the international check-in area; Rows 1–8 are the check-in rows for international departures.
From Terminal 1 immigration exit, what is the exact walking path to the nearest re-check / airline check-in area, including the first decision point (left/right/escalator)?
No re-check counters exist on Terminal 1 Arrivals Level 1, so the required path is to exit into the public arrivals hall and immediately go up to Level 3 for airline check-in. The first decision point is choosing the central escalator bank near Gates 3–5 (fastest) versus the elevators near Gate 6.
After you clear Immigration and Customs, you pass through the sliding doors into the T1 Arrival Hall (Level 1). Turn toward the central atrium area aligned with Gates 3–5 and take the main escalators up to Level 3; this deposits you directly into the middle of the departures check-in hall. Once on Level 3, the nearest re-check/check-in area is T1 Rows 1–8 for international departures; if your onward flight is domestic, continue laterally to Terminal 2 Level 3 Rows 9–15 using the departures-level connector rather than dropping back to Level 1.
Where are the security screening checkpoints located for International Departures (T1) (level + nearest landmark), relative to main check-in aisles?
The international security screening checkpoints are on Terminal 1 Level 3, centrally located behind the main check-in aisles around Rows 4–5. This is a centralized security layout, so passengers funnel from the check-in hall into one primary controlled entry to the restricted zone.
From the check-in floor, complete check-in at Rows 1–8, then move inward toward the center-back edge of the hall rather than toward the terminal ends. The security entry sits behind the mid-row area (nearest Rows 4–5), where staff perform boarding-pass checks before the carry-on X-ray and body screening. Immediately after security, the flow continues to Immigration (passport control) before you enter the duty-free and gate area.
What is the fastest vertical route (specific escalator/elevator bank) from Arrivals level to Departures level in Terminal 1?
The central escalator bank aligned roughly with Gates 3–5 is the fastest vertical route from Terminal 1 Arrivals (Level 1) to Departures (Level 3). This bank handles the highest passenger volume and drops you into the center of the Level 3 check-in hall, minimizing lateral backtracking.
From the Level 1 arrivals hall, move toward the central atrium zone between the mid-hall exits rather than walking to the far north/south ends. Elevators near Gate 2 and Gate 6 exist, but they tend to be slower due to queueing and mixed use (staff, wheelchairs, carts). Stairs at the ends are workable but impractical with luggage; the central escalators are the “default fastest” option for most travelers.