Chhatrapati Shivaji International Airport Terminal 1 Map (Most Up-To-Date)
BOM Terminal 1 is a compact, linear domestic terminal where the curbside drop-off feeds straight into a boarding-pass/ID entry check, then a shallow check-in hall, then a single high-pressure security choke that releases into a longer airside connector (T1C) for farther gate clusters. The whole building runs curb → doors → counters → security → gates in a tight, forward-only sequence, within Mumbai’s primary airport complex on the Santacruz/Vile Parle East side.
Map Table
| Zone | Connection | Walk Time |
|---|---|---|
| Departures drop-off curb | Entry checkpoint doors | 10–25 m |
| Entry checkpoint | Check-in counters | 40–60 m |
| Check-in hall | Main security area | short internal push |
| Security exit | Nearest gates | 50–100 m |
| Security exit | Farthest gate cluster (T1C / remote bays) | 250–400 m |
| Arrivals exit | Taxi ecosystem (prepaid / app / rickshaw) | decision point at doors |
Chhatrapati Shivaji International Airport Terminal 1 Map Strategy
- Treat the entry boarding-pass check as the first time sink: step out at the departures curb with your boarding pass already open (name/date visible) and ID already in hand, then move directly to the glass-door checkpoint queue.
- Use a straight-line routing mindset: drop-off curb → entry check → central check-in rows → security, and avoid fighting cross-flows near the entry doors where baggage-drop lines spill backward.
- Buy time where the building can’t: for peak domestic banks, prioritize airline priority/fast-track options because the cramped security footprint (tray recycling + segregated queues) is the most common missed-flight trigger.
- On arrivals, decide your ground transport before you exit the glass doors: the merged forecourt creates instant confusion, so lock your choice (prepaid taxi vs app pickup vs rickshaw) at the doorway decision point and follow the matching signage stream instead of drifting into the crowd.
2026 Chhatrapati Shivaji International Airport Terminal 1 Map + Printable PDF
Terminal 1 (the operational T1B building) continues to run as a high-density domestic facility with a deceptively short curb-to-gate footprint but real-time delays at the entry boarding-pass check and the primary security lanes. A printable 2026 map is most useful when it labels the exact choke points (entry doors and security) and the taxi/pickup splits outside arrivals.
2026 Chhatrapati Shivaji International Airport Terminal 1 Map Guide
What is the walking distance (meters) from the T1 Departures vehicle drop-off curb to the terminal entry checkpoint (CISF/CRPF boarding-pass check)?
Walking is typically 10–25 meters from the departures drop-off curb to the CISF/CRPF boarding-pass/ID check at the glass-door entry. The curb lane runs immediately alongside the terminal façade, so the “distance” is basically the shallow curbside pavement from where you step out of the car to the queue at the doors. The real risk is not the meters—it’s the pileup at the doorway checkpoint when multiple flights bank at once, so have your boarding pass already open (name/date visible) and your ID already in hand before you exit the vehicle.
Where is the fastest pedestrian path from the terminal entry checkpoint to the main check-in hall (which entrance/doorway is the shortest route)?
The fastest path is the straight-through entry door that drops you directly into the central check-in hall, because Terminal 1B is a linear layout with no real shortcut corridors. After the CISF/CRPF check at the glass doors, take the first open doorway feeding into the main hall and immediately follow the overhead airline/aisle signs to your counter block instead of drifting along the façade. If the queue at one doorway is “blobbing,” shift a few meters to the next door with a thinner line, but keep the same target: the central hall where IndiGo/Akasa counters sit behind the entry zone.
What is the walking distance (meters) from the security screening exit to the farthest boarding-gate cluster in T1?
Walking is typically 250–400 meters from the security exit to the farthest boarding-gate cluster, usually reached via the T1C connector or the far end of the bus/remote-bay gates. The nearest gates sit much closer (about 50–100 meters), but the “long walk” happens when your flight is staged deeper into the connector footprint rather than right off the post-security holding area. Budget about 10 minutes for this walk during crowded periods, since the retail/holding zone just after security can slow movement before you reach the longer corridor run.
Where is the primary security checkpoint located relative to check-in rows (before/after which aisle), and what is the shortest route to reach it?
The primary security checkpoint is after the check-in rows, reached by pushing past the counter queues toward the rear/side of the hall where the security approach corridor/escalator begins. From any check-in block, the shortest route is to finish check-in, then immediately angle away from the entry doors and move deeper into the building toward the security signage rather than trying to backtrack along the front edge of the hall. Use the overhead “Security / Departures” markers as your anchor, and stay out of the spillback zone where baggage-drop lines often encroach toward the entry checkpoint.
What is the exact walking route (and distance) from T1A Arrivals exit to the Taxi queue area outside T1B?
Walking is typically about 300–450 meters (4–7 minutes) from the T1A-side arrivals exit area to the main taxi queue outside the operational T1B forecourt. The distance varies mostly by where you pop out on the “old T1A/connector” side versus the active T1B curb line.
Exit the arrivals glass doors on the T1A side and turn toward the active Terminal 1 building frontage, staying on the covered walkway that runs parallel to the curb. Keep moving in the direction of the multi-level car park/pickup signage until you reach the denser forecourt where the taxi ecosystem forms. The taxi queue zone is anchored by the prepaid taxi/cab booth area and the yellow/black taxi stand lines immediately outside the T1B frontage—if you hit the main “Pickup / App-Based Pickup” cluster, you’re at the right forecourt and can choose the taxi line you want.
At T1, where is the first decision point where taxi queues split (Meru/Mega/Gold), and which physical landmark marks it?
The first taxi-queue split happens immediately at the Arrivals glass-door exit, before you drift into the forecourt crowd. The landmark is the doorway threshold itself: the moment you pass the final glass doors into the greeter/forecourt zone, you’ll see the first set of taxi-choice cues—prepaid taxi booth direction, app-pickup signage, and the stream of people peeling off toward the rickshaw side.
If you need a physical “spot,” use the first cluster of taxi signage/booth direction boards just outside the doors as the marker, then commit to one lane of movement: head toward the prepaid/cool cab counters for fixed-fare taxis, follow the marked pickup-point stream for app cabs, or walk away from the luxury car/pickup cluster toward the highway end for rickshaws. The failure mode is hesitating in the doorway scrum and getting pulled into the wrong merged line.
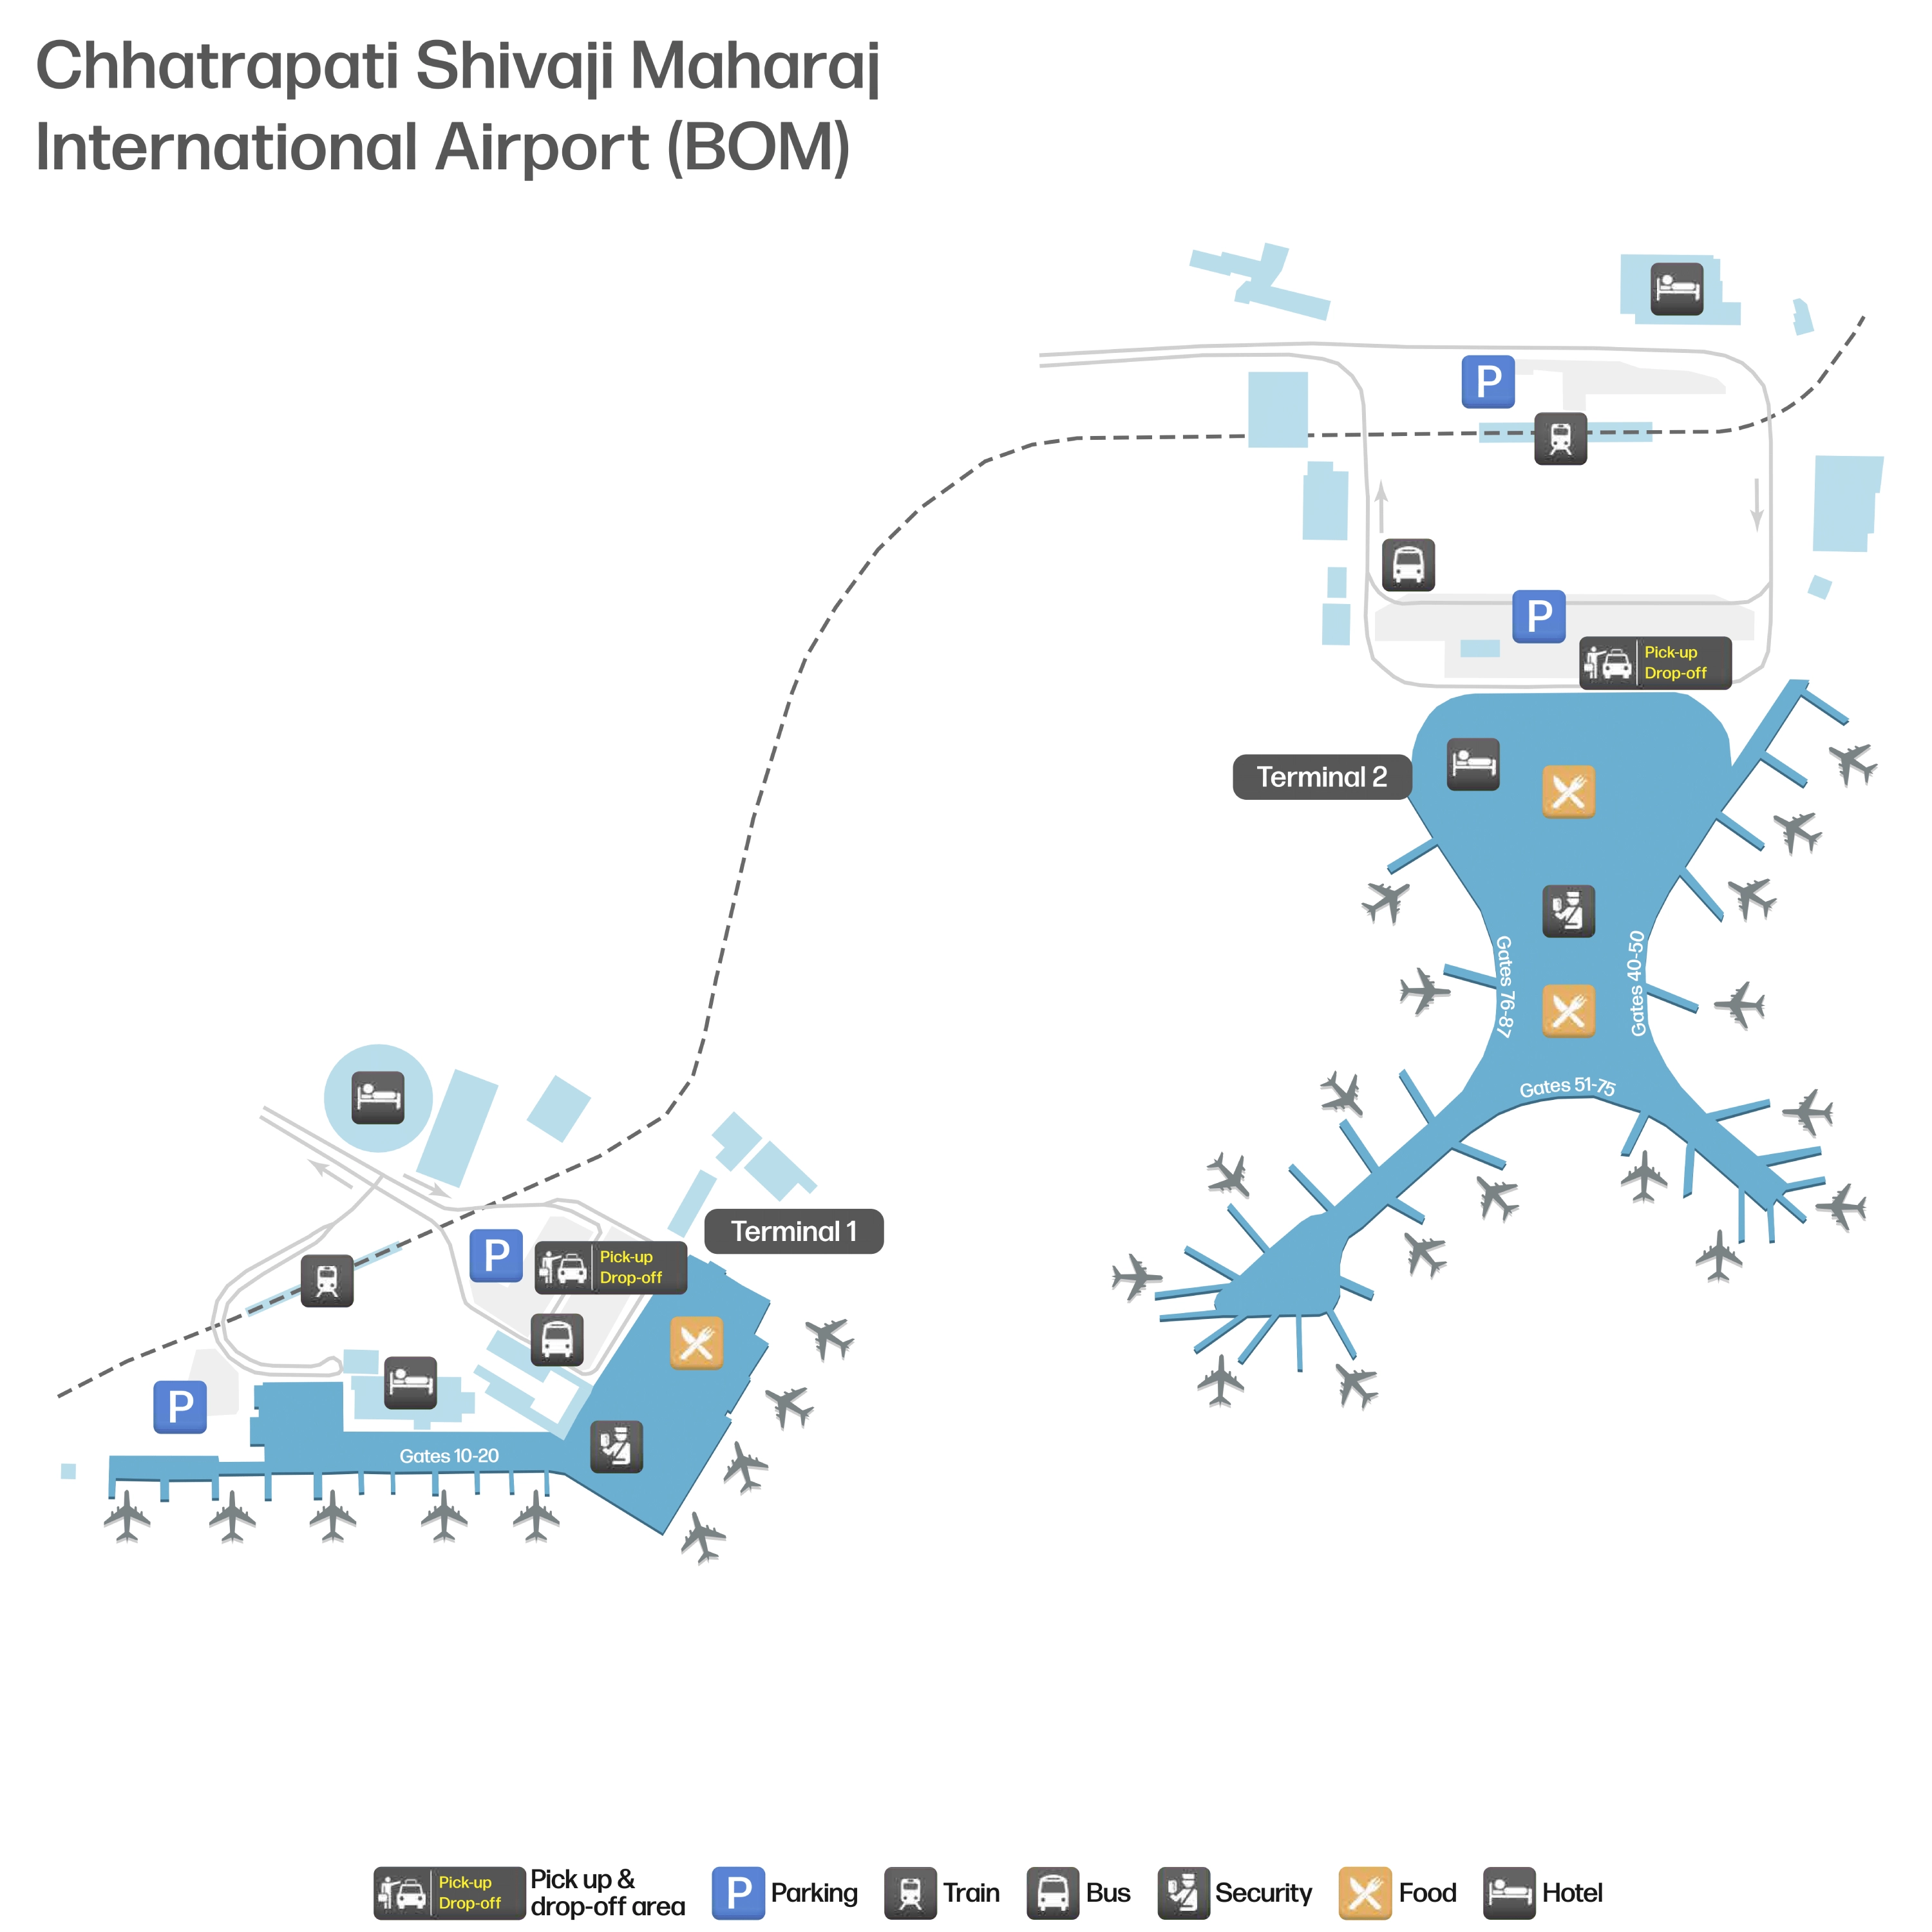
What is the fastest drivable route inside/around the airport from Terminal 2 arrivals to the Terminal 1 departures drop-off, and what is the road distance (km)?
The fastest drivable route is Sahar Elevated Road out of Terminal 2, merging onto Western Express Highway (southbound) and exiting at the Domestic Airport Flyover/Junction to Nehru Road for Terminal 1 departures, for about 5.0 km. This perimeter loop is the reliable “default” because the terminals are separated by runway infrastructure and you can’t cut straight across airside.
| Segment | Waypoint | Distance cue |
|---|---|---|
| T2 exit | Sahar Elevated Road (outbound) | quick ramp out of T2 zone |
| Elevated road merge | Western Express Highway southbound | main speed variable (traffic) |
| Domestic exit | Domestic Airport Flyover/Junction | key off-ramp |
| Final approach | Nehru Road → T1 departures curb | terminal approach road |
Where is the most reliable drop-off zone at T1 for minimizing the walk to Departures entry (which gate/curb segment is closest)?
The most reliable drop-off is the middle of the departures curb, typically around the Gate 2 area, because it minimizes lateral walking to the main entry doors regardless of which check-in aisle your airline uses. The curb frontage is linear and shallow, so being “centered” reduces the chance you’re forced to walk the length of the façade while threading through crowds.
Ask your driver to bypass the first congestion at the initial curb entry and pull forward to the first clear gap in the mid-curb zone, then step out facing the glass-door entry checkpoint. If the driver accidentally heads toward an old “T1A” pin, correct to “Terminal 1B / Terminal 1 Departures” so you don’t inherit the extra 200–300 meter walk from the defunct frontage.
From Vile Parle station side, what is the shortest walking route to the T1 passenger entry, and what is the walk time/distance?
Walking is about 2.0–2.2 km from Vile Parle Station (East) to Terminal 1 passenger entry, taking roughly 20–25 minutes fast or 35–45 minutes with luggage. The shortest route runs from Vile Parle East through the market stretch to the Western Express Highway edge, then past the Sahara Star landmark and across via the mandatory foot overbridge to reach the airport approach road into T1.
Use Hotel Sahara Star as your anchor: if you’re not being funneled past that circular building footprint, you’re likely on a slower, less direct lane. Expect uneven pavement and heavy pedestrian congestion near the station exits, then a more exposed, traffic-adjacent walk once you’re near the highway and airport approach.
From Santacruz station side, what is the shortest walking route to the T1 passenger entry, and what is the walk time/distance?
Walking is roughly 2.9–3.5 km from Santacruz Station (East) to Terminal 1 passenger entry and typically takes 40+ minutes, making it an unreliable option. The shortest on-foot line still forces you toward Vakola Junction and then onto the airport approach roads, but the pedestrian infrastructure and traffic friction there are the failure mode.
If you’re intent on walking, the practical routing is Santacruz East → Vakola Junction approach → continue toward the Western Express Highway/airport signal area → then follow the airport approach road toward Terminal 1. The operational playbook is to avoid this entirely and use Vile Parle East as the walking anchor instead, because its geometry is shorter and its landmarking (Sahara Star + foot overbridge) is more consistent.
Where is the paid parking exit relative to the main terminal exit lanes, and how many exit lanes/booths are there for FastTag vs manual payment?
The paid parking exit is at the end of the parking loop feeding back onto the main airport access road, separate from the immediate terminal curb lanes and positioned where vehicles funnel out toward the approach road. Typical configuration is 2–3 exit lanes/booths total, with only one lane commonly designated for FastTag and the remaining lane(s) for manual/cash/card handling.
The practical failure mode is the single FastTag lane: one unread tag can stall the whole FastTag queue, so visually scan which lane is actually moving before committing. If you paid by FastTag but the barrier doesn’t lift quickly, shifting to a manual lane (and taking a receipt if you pay cash) is often the fastest way to clear the exit pinch point.