Adolfo Suárez Madrid–Barajas Airport Terminal 3 Map (Most Up-To-Date)
Terminal 3 at Madrid–Barajas is the compact “north dock” on the legacy crescent, physically attached to the Terminal 2 spine and oriented along the long north–south arc of the T1–T2–T3 complex. It feels like a standalone building at curb level, but most real processing happens next door in T2. Within Spain’s busiest Madrid hub, the key scale problem is distance-by-assumption: short-looking connectors hide long walks, level changes, and one-way flow traps.
Map Table
| Zone | Connection | Walk Time | Key Landmark |
|---|---|---|---|
| Arrivals (Floor 0) | Inter-terminal shuttle loop | Minimal curb distance | Baggage Reclaim Hall 7 |
| Landside link | T3 → T2 processing core | Long internal walk | T2 central hall |
| Airside hinge | T2 (D gates) → T3 (E gates) | Short corridor | Past Gate D62 |
| Departures security (Floor 0) | Direct to E-gates airside | Short walk | Security “throat” to pier |
Adolfo Suárez Madrid–Barajas Airport Terminal 3 Map Strategy
- Treat T1–T2–T3 as one crescent complex, then treat T4/T4S as a separate airport: no walking routes, no “quick hop” shortcuts between complexes.
- Use stop-level precision for the green shuttle loop: Terminal 3’s key anchor is the curb opposite Baggage Reclaim Hall 7; don’t walk south “to find the bus” and accidentally chase the loop.
- Assume time volatility comes from forced exits: a wrong turn onto yellow “Exit/Baggage” flow can trigger landside routing, re-clearing security, and sometimes passport control before you’re back in the right airside zone.
- Make corridor decisions intentionally: hold for blue “Connecting flights/Gates” signage at hinge points (especially T1→T2/T3 and the D→E transition) because one wrong corridor commits you to long internal walks and queue resets.
2026 Adolfo Suárez Madrid–Barajas Airport Terminal 3 Map + Printable PDF
Terminal 3 remains a high-friction waypoint because departures processing is effectively “T2-first,” while boarding can still route through the T3 pier. A usable 2026 printable map should highlight Hall 7 at Arrivals, the exact curb stop for the free shuttle loop, the airside D→E gate transition, and the Floor 0 security access that only helps carry-on passengers.
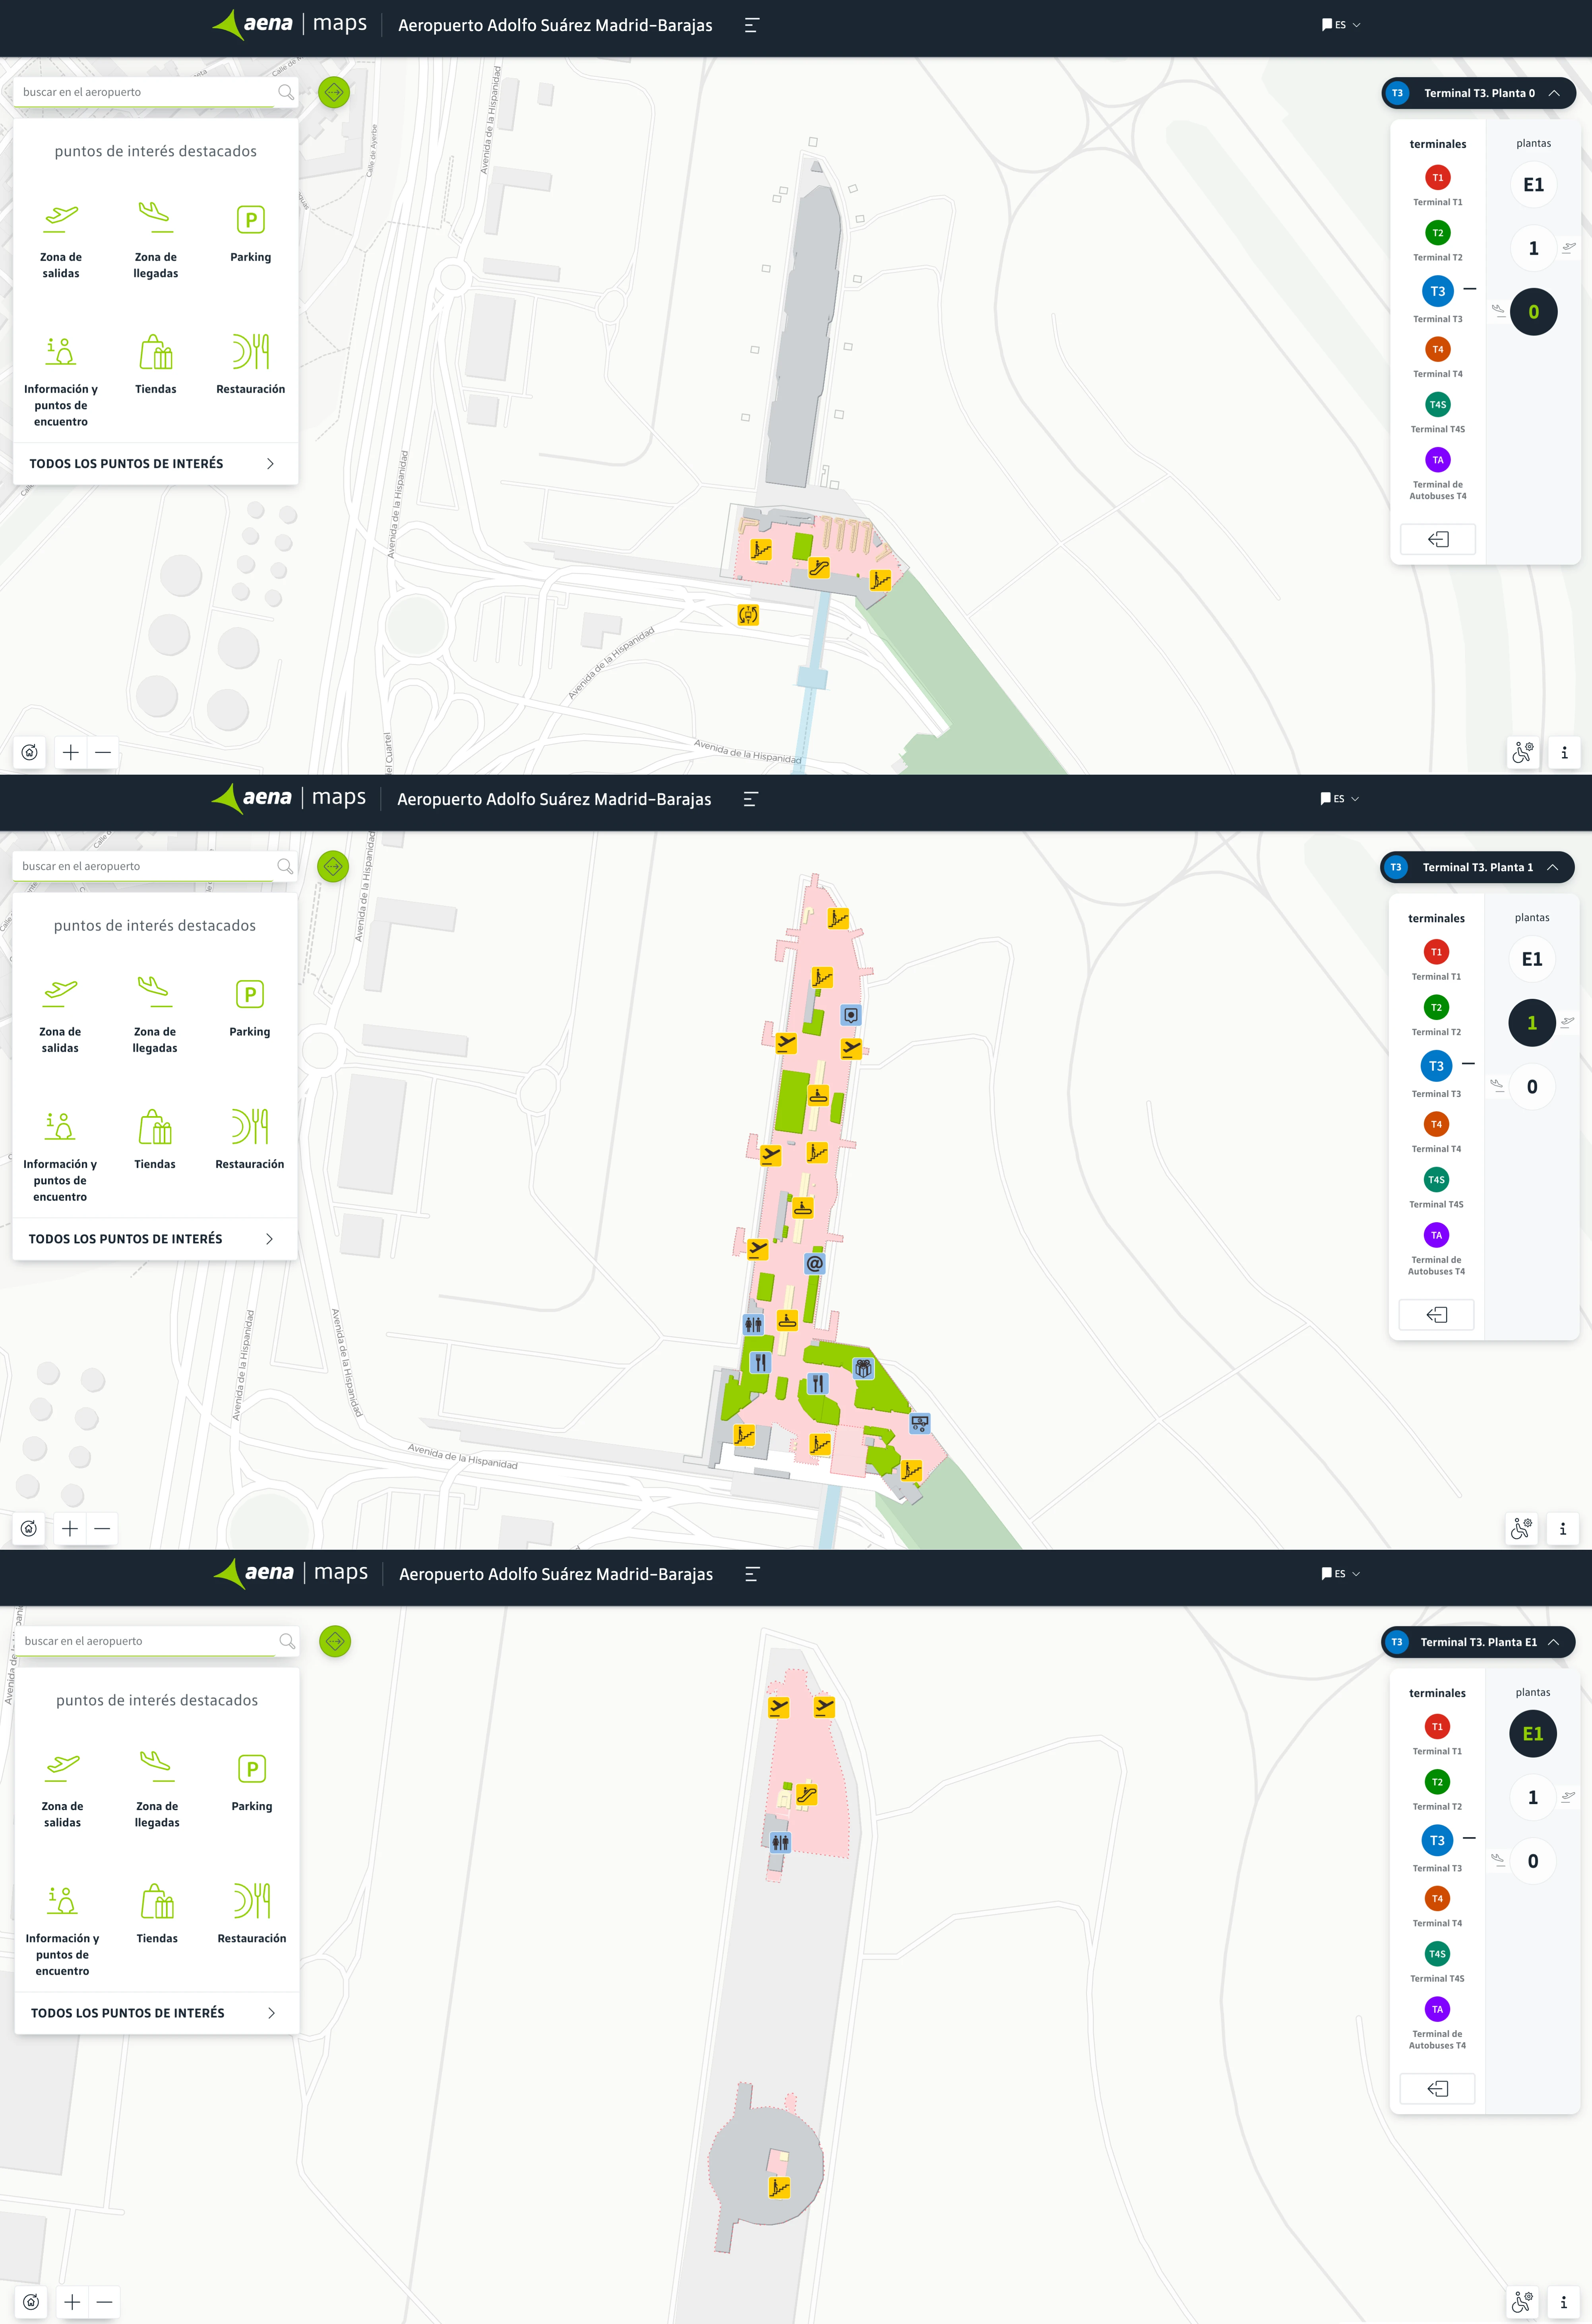
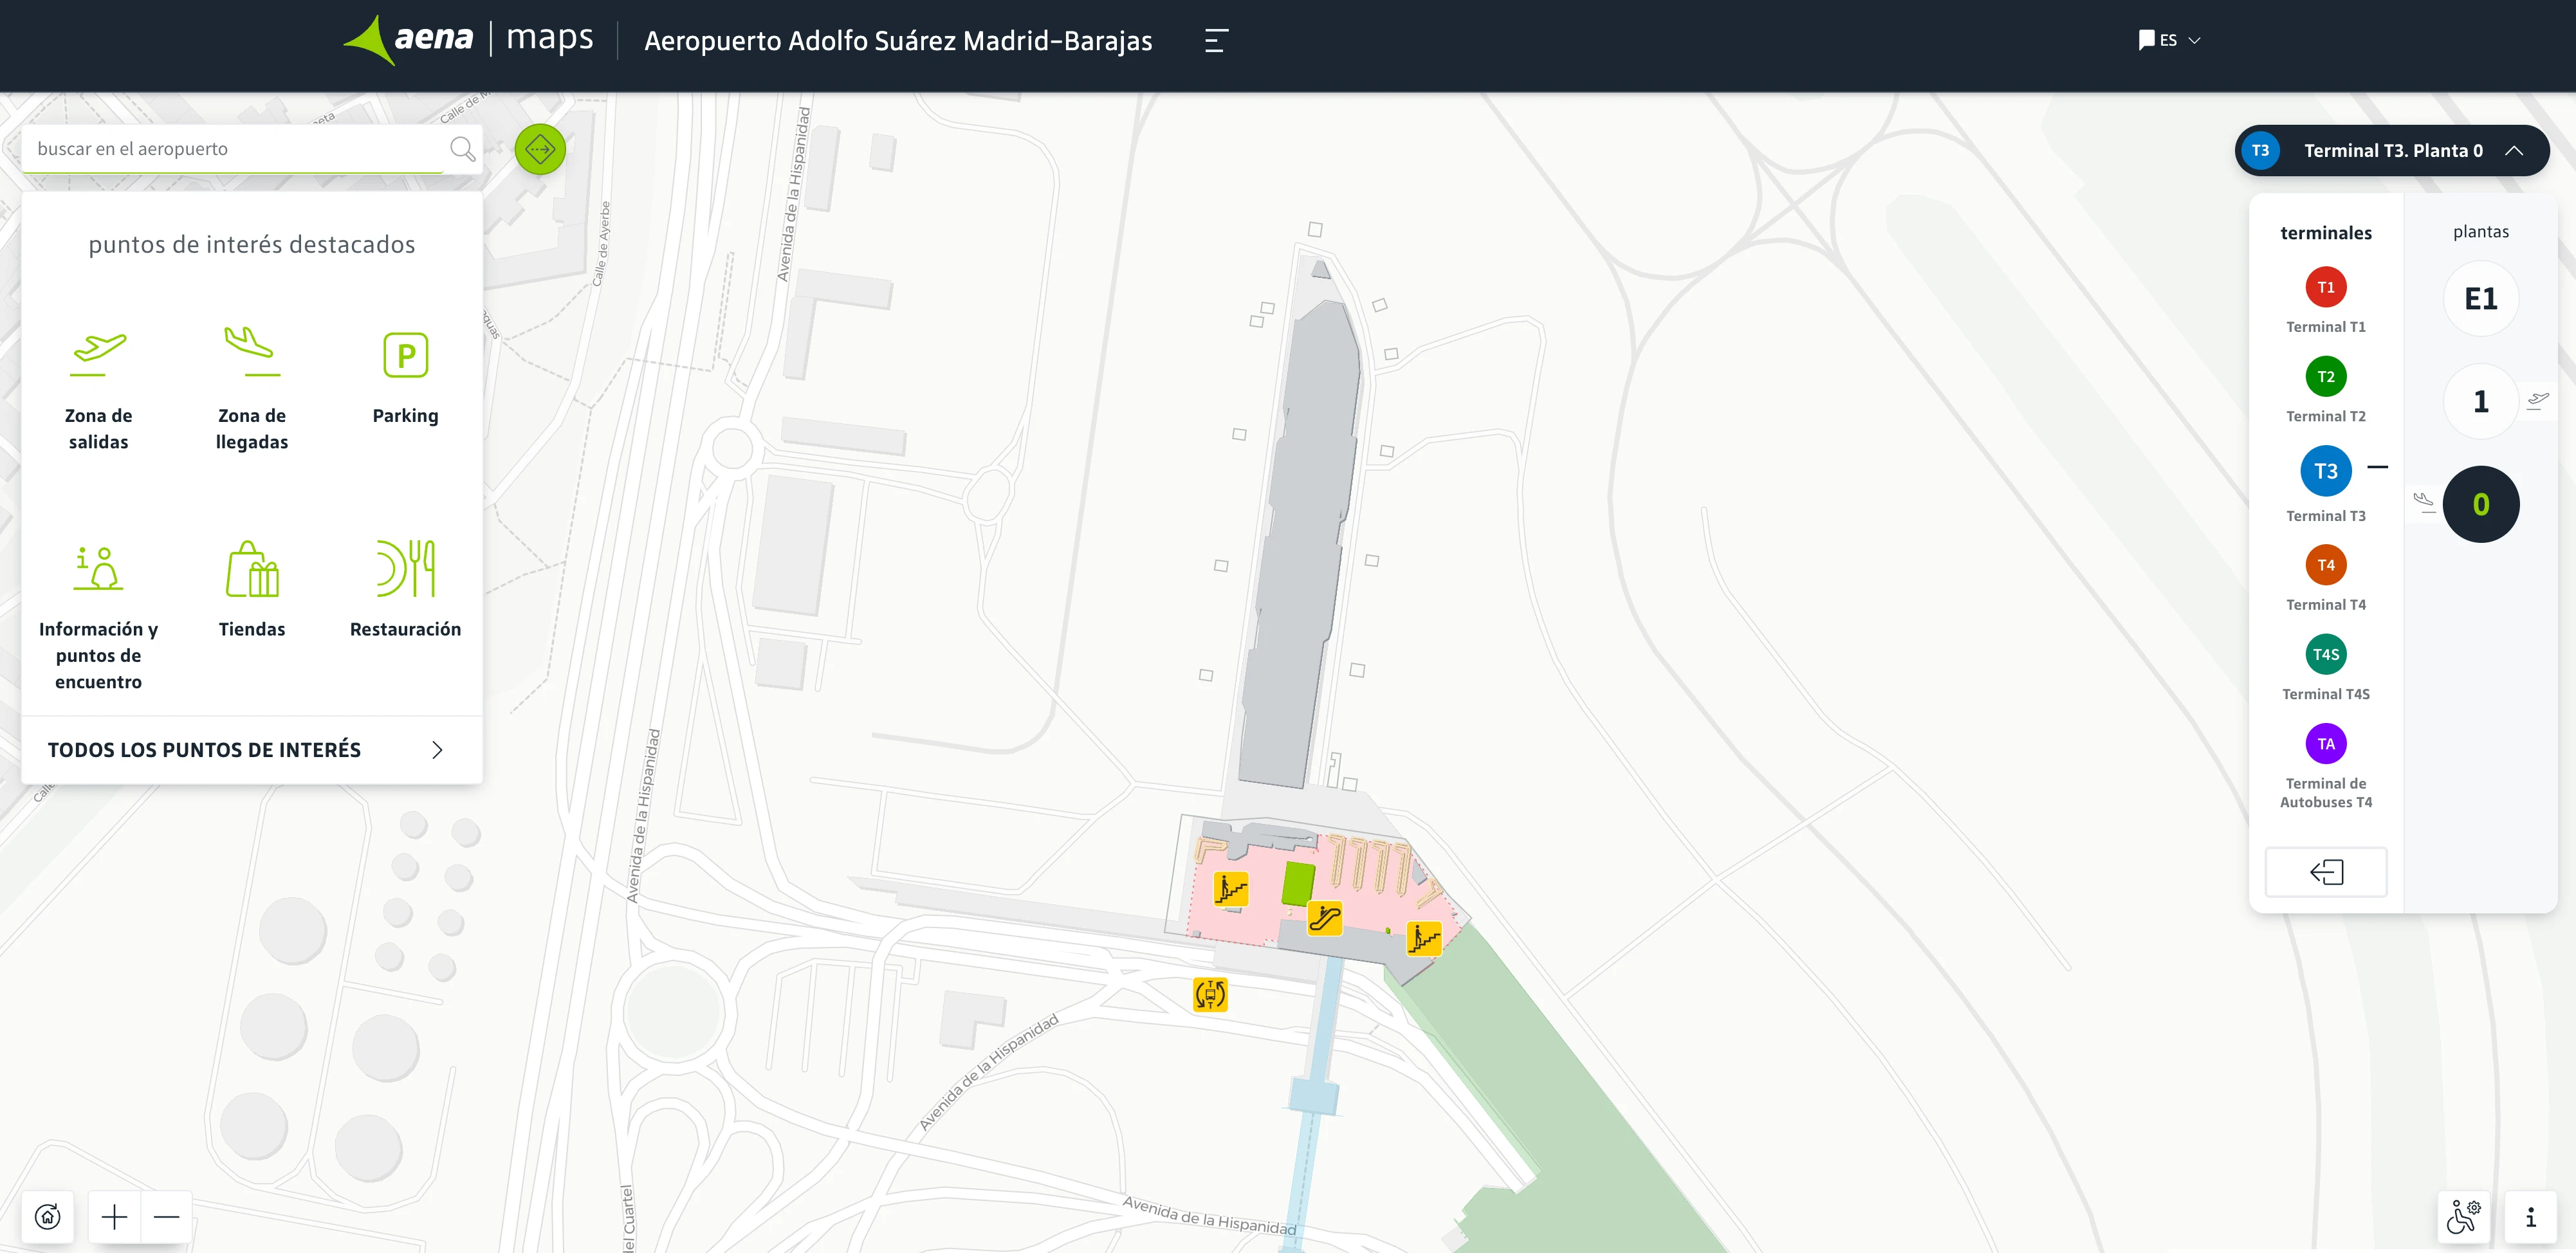
Adolfo Suárez Madrid–Barajas Airport Terminal 3 Level 0 Map 2025
Adolfo Suárez Madrid–Barajas Airport Terminal 3 Level 1 Map 2025

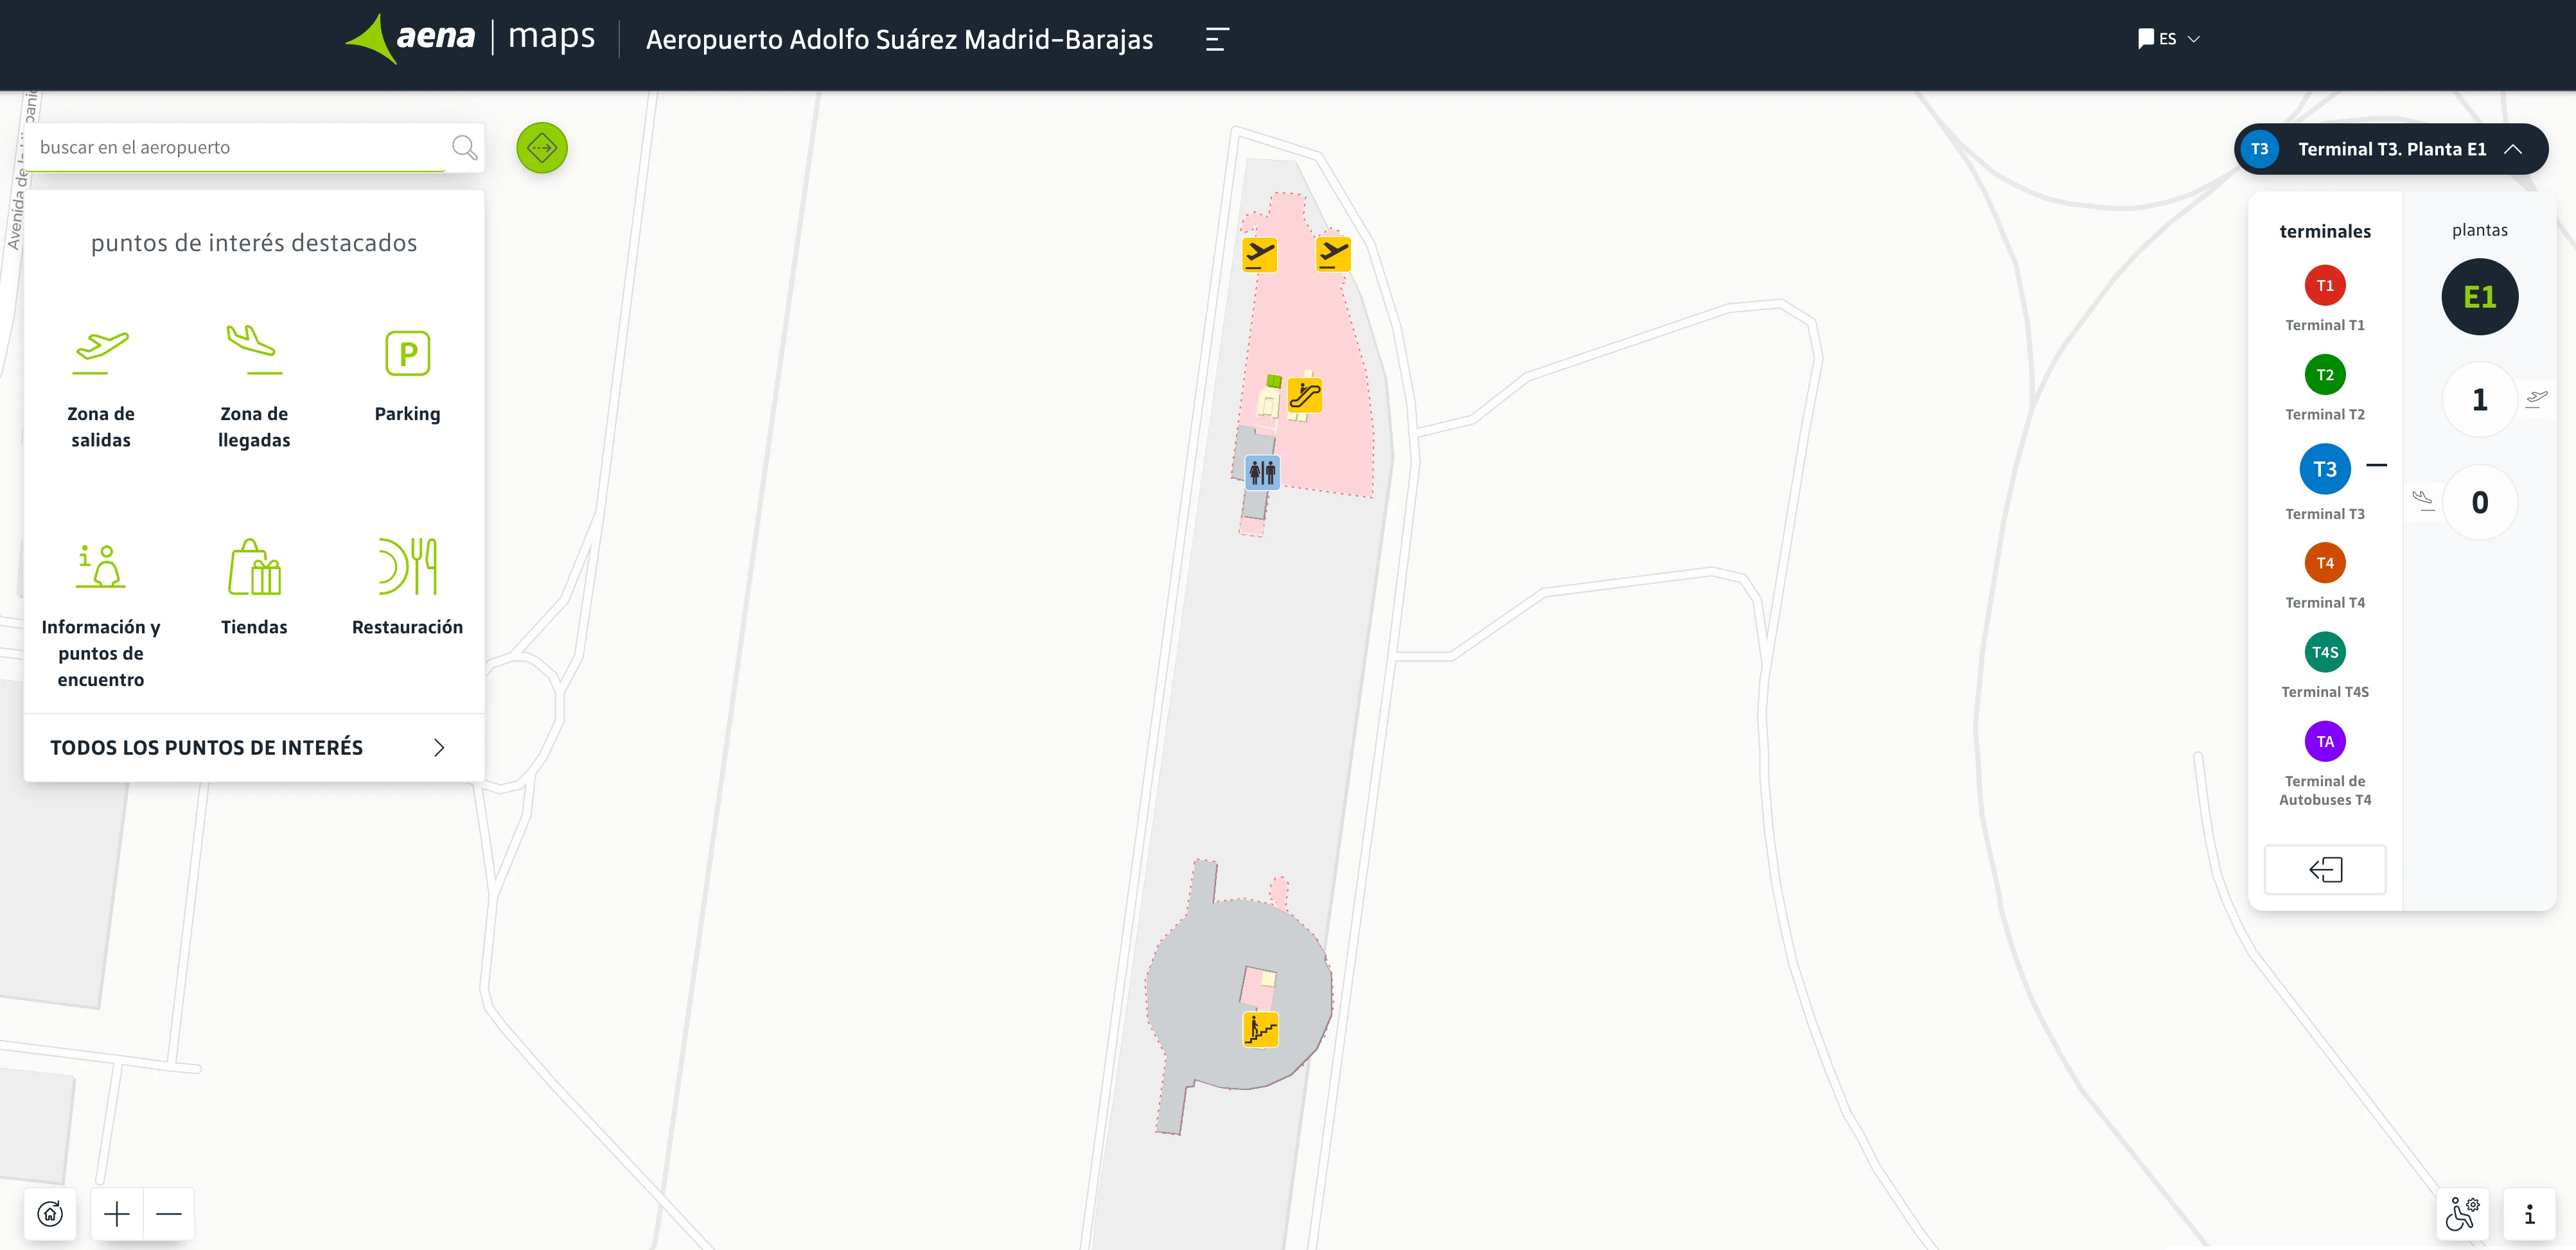
Adolfo Suárez Madrid–Barajas Airport Terminal 3 Level E1 Map 2025
2026 Adolfo Suárez Madrid–Barajas Airport Terminal 3 Map Guide
Which exit door at Terminal 3 Arrivals is closest to the free inter-terminal shuttle bus stop (T1/T2/T4)?
The closest exit is the doors directly aligned with Baggage Reclaim Hall 7, because the free inter-terminal shuttle stop sits curbside opposite “Room 7” baggage claim at Terminal 3 Arrivals (Floor 0).
After you pass through the arrivals glass doors from Hall 7 into the public arrivals area, take the nearest curb exit in front of Hall 7 and stop there. Holding position matters: walking south toward Terminal 2 can make you miss the bus because the loop serves T3 and then continues onward. Look for the green “Shuttle Bus / Bus Tránsito” stop marker at the Hall 7 curb indentation.
What is the exact walking distance (meters) from the Terminal 3 Arrivals shuttle stop to the Terminal 3 departures check-in hall entrance?
There is no usable Terminal 3 departures check-in hall for passengers, because Terminal 3’s check-in counters are closed and check-in is handled in Terminal 2.
From the Terminal 3 shuttle stop opposite Baggage Reclaim Hall 7 (Arrivals, Floor 0), the viable check-in walk is to Terminal 2’s processing core on Floor 2, which is about 600 meters plus a two-level ascent. Staying on the shuttle to the Terminal 2 Arrivals stop removes most of that lateral walk, leaving mainly the vertical move up to T2 check-in.
Where is the exact walkway connection point between Terminal 2 and Terminal 3 (the point where passengers transition from T2 signage/space into T3)?
The walkway “hinge” is immediately past Gate D62, where Terminal 2’s D-gate corridor rolls straight into Terminal 3’s E-gate pier with no checkpoint.
Keep walking north through the D-gates block toward the end of the T2 concourse; the moment you pass the Gate D62 area, overhead wayfinding switches from “D” gates to “E” gates (E67–E83). You’ll know you’ve crossed into the Terminal 3 zone when the E-gate numbering begins and the flow channels toward the Terminal 3 pier; the Puerta del Sol VIP Lounge near Gate E69 sits just inside the Terminal 3 side of this transition.
What is the exact walking distance (meters) from Terminal 3 check-in counters to the security checkpoint entrance used for departures?
Terminal 3 check-in counters are closed, so there isn’t a true check-in-to-security walk for departing passengers who need bag drop.
If you’re carry-on only (mobile boarding pass), the practical distance inside Terminal 3 is from the landside entrance/dormant counter vestibule on Floor 0 to the Terminal 3 security filter that feeds the E-gates pier. That internal walk is roughly 50–80 meters, with the security entrance positioned at the “throat” of the pier (the point where the public hall narrows into the controlled access toward Boarding Area E). The route is short, but it only works if you don’t need to check luggage (because bag drop must be done in Terminal 2).
In Terminal 1 airside, where is the entrance to the corridor signed “Connecting flights T1–T2–T3” (nearest gate/landmark on the map)?
The corridor entrance is near Gate B26 in Terminal 1 airside (Floor 1), where blue “Connecting flights/Transit” signs pull you away from the yellow “Exit/Baggage” flow.
Walk in the B-gates area until you’re in the Gate B26 zone, then look for the blue overhead connector signage that funnels into the transfer corridor. A reliable map anchor is the Cibeles VIP Lounge area (between B26 and B29), which sits in the same cluster and helps you triangulate you’re at the right end of the concourse. The wrong move is following yellow exit signs through one-way doors into arrivals/baggage reclaim, which commits you to landside re-screening.
Where is the exact passport-control checkpoint location that non-Schengen arrivals must pass to reach Terminal 3 Schengen departures within the T1–T2–T3 complex?
The passport-control checkpoint is at the internal Terminal 1 → Terminal 2 boundary near Gates C34 to C38, because that’s the hard border between the non-Schengen A/B zone and the Schengen C/D/E zone.
From Terminal 1 airside, the “Connecting flights T1–T2–T3” corridor (entered near Gate B26) funnels you toward this control point. Once you clear passport control, you emerge into Terminal 2’s secure Schengen side (C-gates area), where you can then walk freely toward D-gates and continue north to Terminal 3’s E-gates without another checkpoint. This border is mandatory; there is no bypass route within the T1–T2–T3 complex.
At Terminal 4 Departures, where is the shuttle bus drop-off relative to the entrance for the T4 → T4S automated train/people-mover (closest junction on the map)?
A direct curb-to-train entrance does not exist, because the shuttle drop-off is landside on T4 Departures (Floor 2) and the T4→T4S APM is only reached after clearing the main security and descending to Floor -2.
| Step | Where you are | What to aim for on the map |
|---|---|---|
| 1 | Shuttle drop-off curb, T4 Departures (Floor 2), landside | Entry doors into the check-in hall |
| 2 | Inside T4 check-in hall (Floor 2), landside | Main security checkpoint zone |
| 3 | Just after security (Floor 2), airside | Junction where overhead signs split toward gates H/J/K vs “T4S / Gates M, R, S, U” |
| 4 | Same junction area | Escalator/elevator bank signed down to APM level (Floor -2) |
| 5 | APM level (Floor -2), airside | Platform entrance for the automated train to T4S |
What is the exact walking distance (meters) from the Aeropuerto T1–T2–T3 metro station exit to the Terminal 3 check-in hall entrance?
The walk is roughly 500–700 meters, because the “Aeropuerto T1–T2–T3” Metro station is physically in Terminal 2 and Terminal 3 sits at the north end of the connected crescent.
Exit the Metro into Terminal 2 (around Floor 1), then follow landside connectors north toward the Terminal 3 zone. The key volatility is that the destination is a trap: Terminal 3 check-in is closed, so walking the full 500–700 meters to “T3 check-in” often forces you to reverse the same distance back to Terminal 2 Floor 2 for bag drop and processing. The practical move is to stop at Terminal 2 for check-in even if your boarding pass lists “T3.”