Suvarnabhumi Airport Map (Most Up-To-Date)
Suvarnabhumi is a single, giant H-shaped main terminal with long concourse legs feeding a central crossbar, plus a detached SAT-1 satellite concourse about 1 km away via an underground Automated People Mover. The terminal is vertically stacked: Departures on Level 4, Arrivals corridors on Level 2, ground transport on Level 1, and the Airport Rail Link on Basement Level B—within Bangkok’s main airport complex.
Map Table
| Terminal | Key Airlines | Primary Function | Transfer Mode |
|---|---|---|---|
| Main Terminal Building (MTB) | mixed international carriers | check-in, immigration, baggage reclaim, landside transport | walk, travelators, lifts/escalators |
| SAT-1 (Gates S101–S128) | mixed international carriers | remote gates, SAT-1 commercial zone | APM people-mover |
Suvarnabhumi Airport Terminal Map Strategy
- Budget the longest arrival walk as a full corridor mission: far gates to Immigration can approach ~1,000 m, and SAT-1 arrivals add a train pulse that dumps crowds at the Level 2 merge near Concourse D.
- Aim for the centerline on Level 2: at the SAT-1/concourses convergence, keep moving straight toward Immigration 2 (central) instead of drifting into Hall 1 (west) or Hall 3 (east) herd queues.
- Treat SAT-1 as a separate airport: on Level 4, make the decision at the central “Milk Ocean” sculpture and go behind it for “Gates S101–S128” and the APM; missing this forces long backtracking.
- Fix ground transport by floor, not vibes: after Customs, go down immediately—Grab pickup at Level 1 Gate 4, public taxi kiosks outside Level 1 Gates 4 & 7, and Airport Rail Link via internal connectors to Basement Level B (fastest via central glass elevators).
2026 Suvarnabhumi Airport Map + Printable PDF
Current 2026 terminal maps should clearly show SAT-1 (Gates S101–S128) as a separate node accessed only by the APM from the center of the main terminal. Expect the most consequential updates to appear around wayfinding for “S” gates, the Level 2 arrivals merge into Immigration, and the Level 1 ground-transport exits (Grab/taxi) plus the Basement (Level B) Airport Rail Link connector.
Suvarnabhumi Airport B1 Map 2025
Suvarnabhumi Airport Level 1 Map 2025
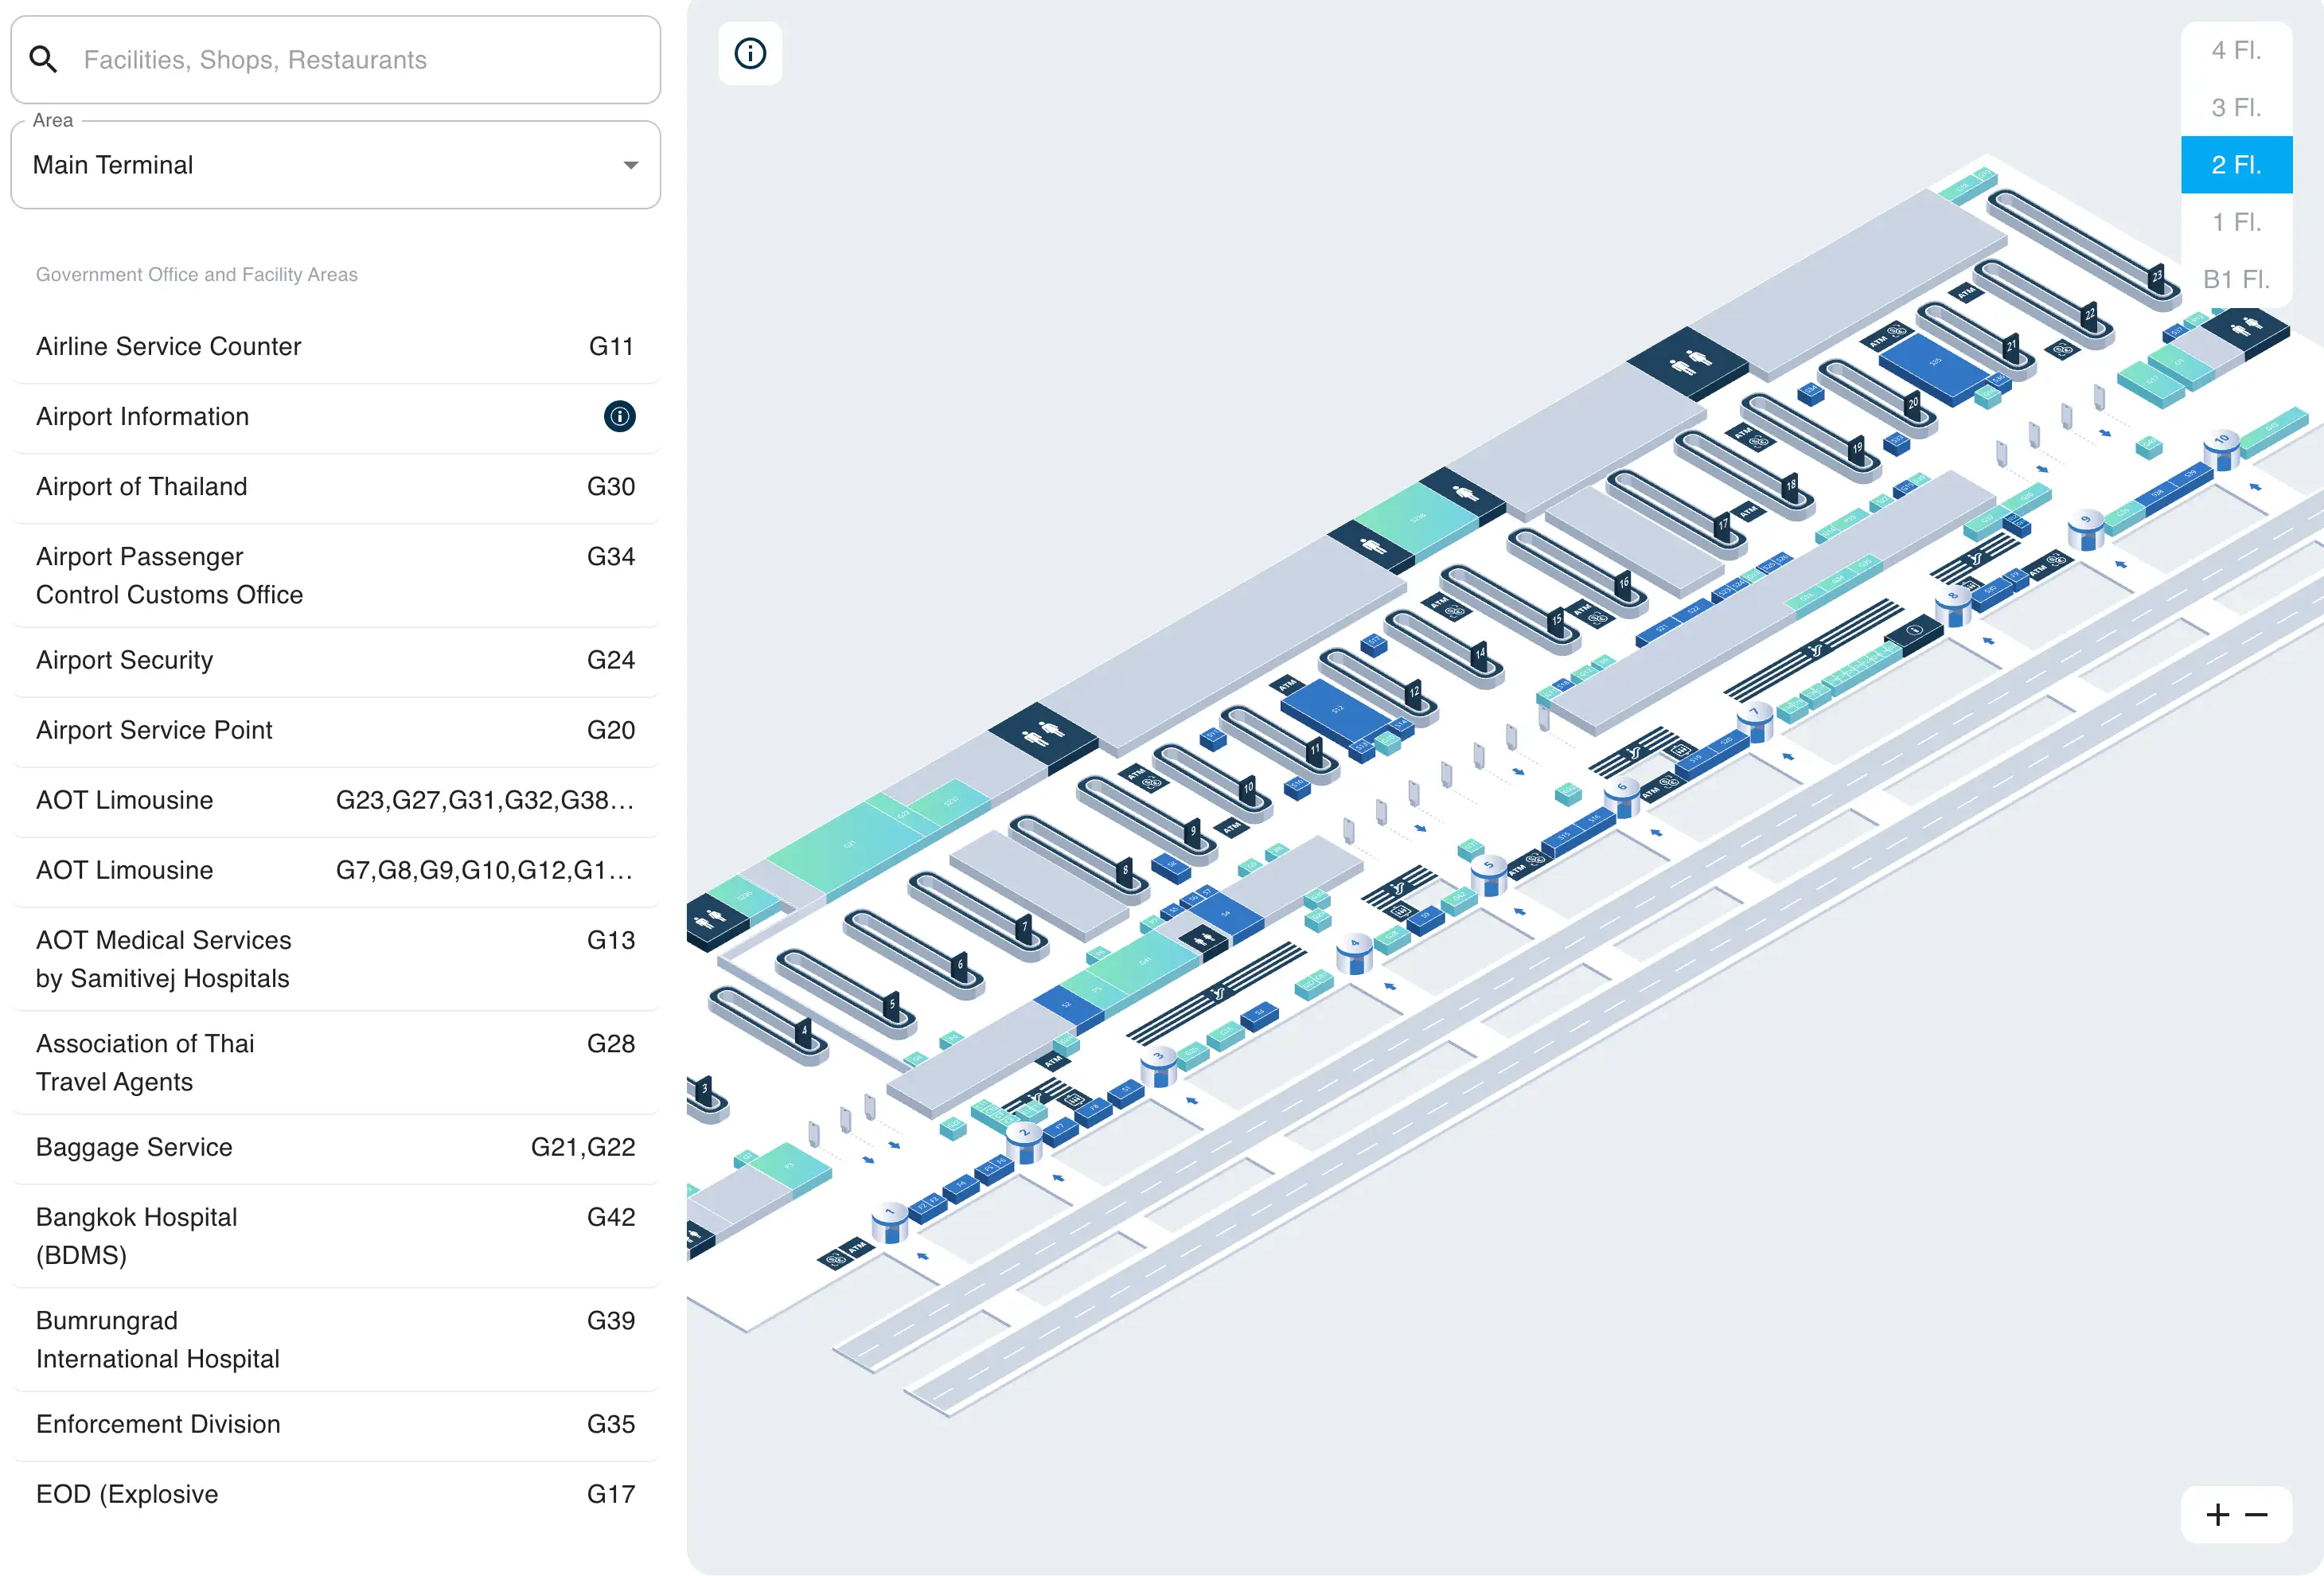
Suvarnabhumi Airport Level 2 Map 2025
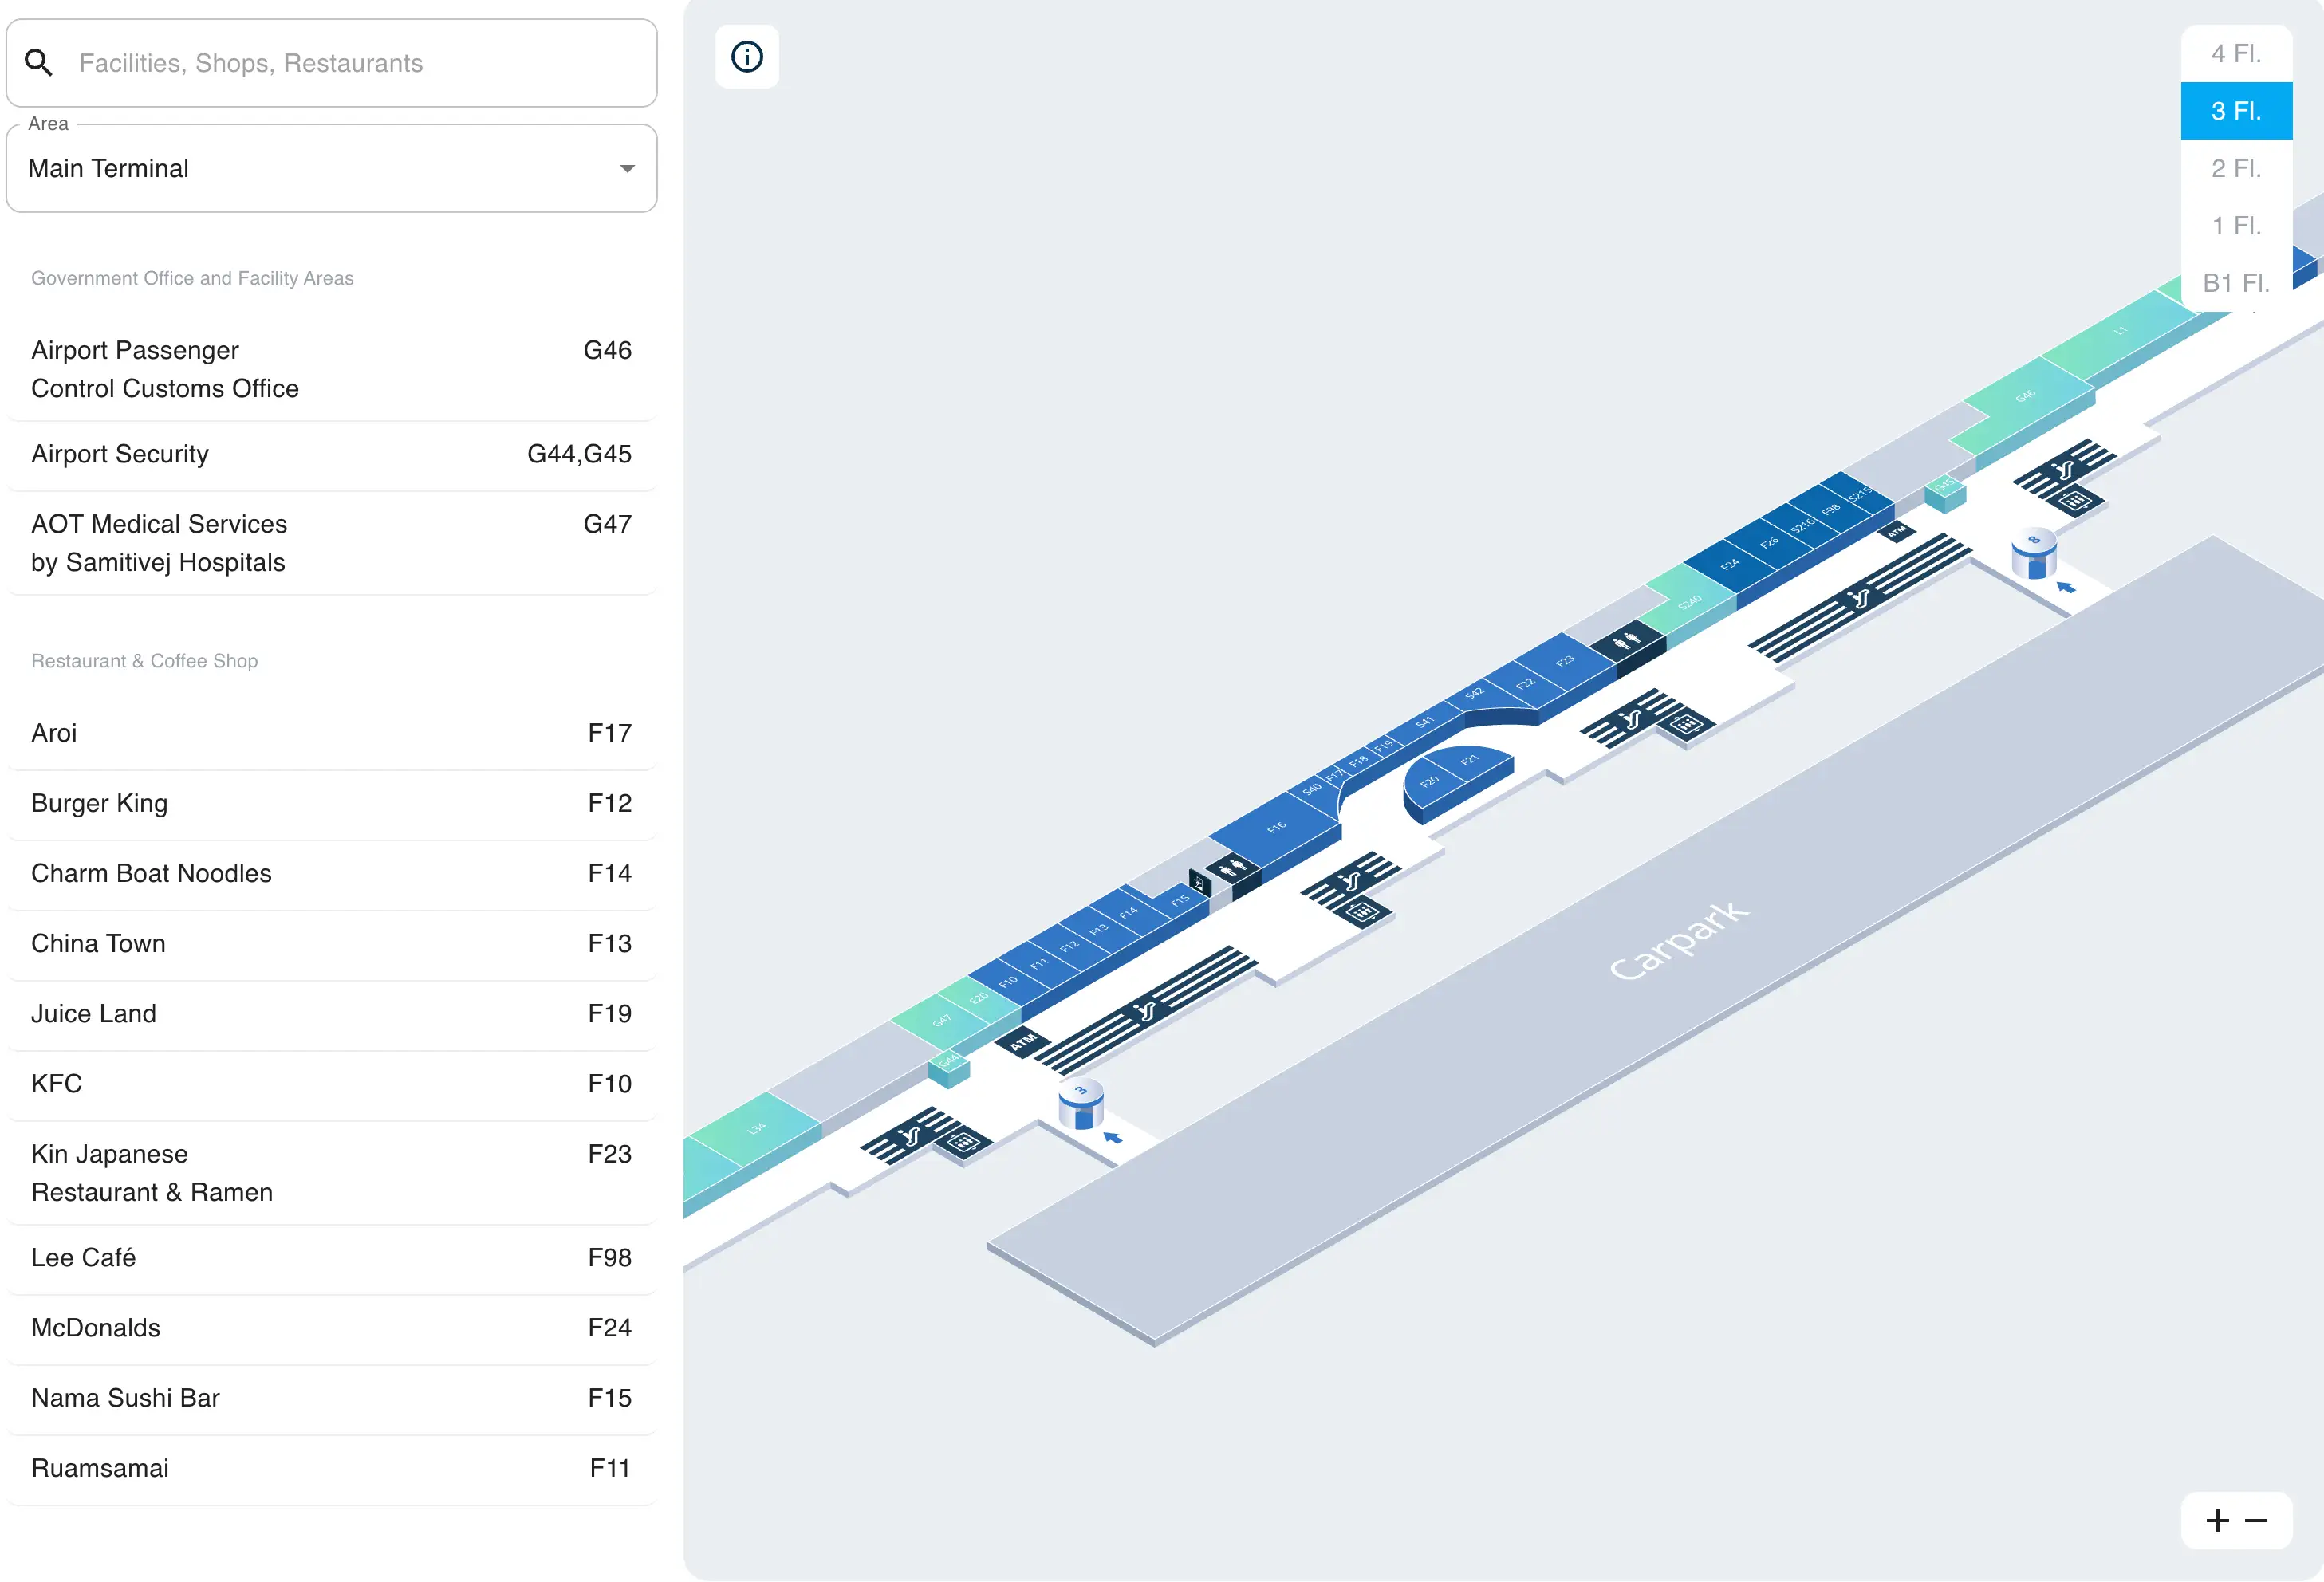
Suvarnabhumi Airport Level 3 Map 2025
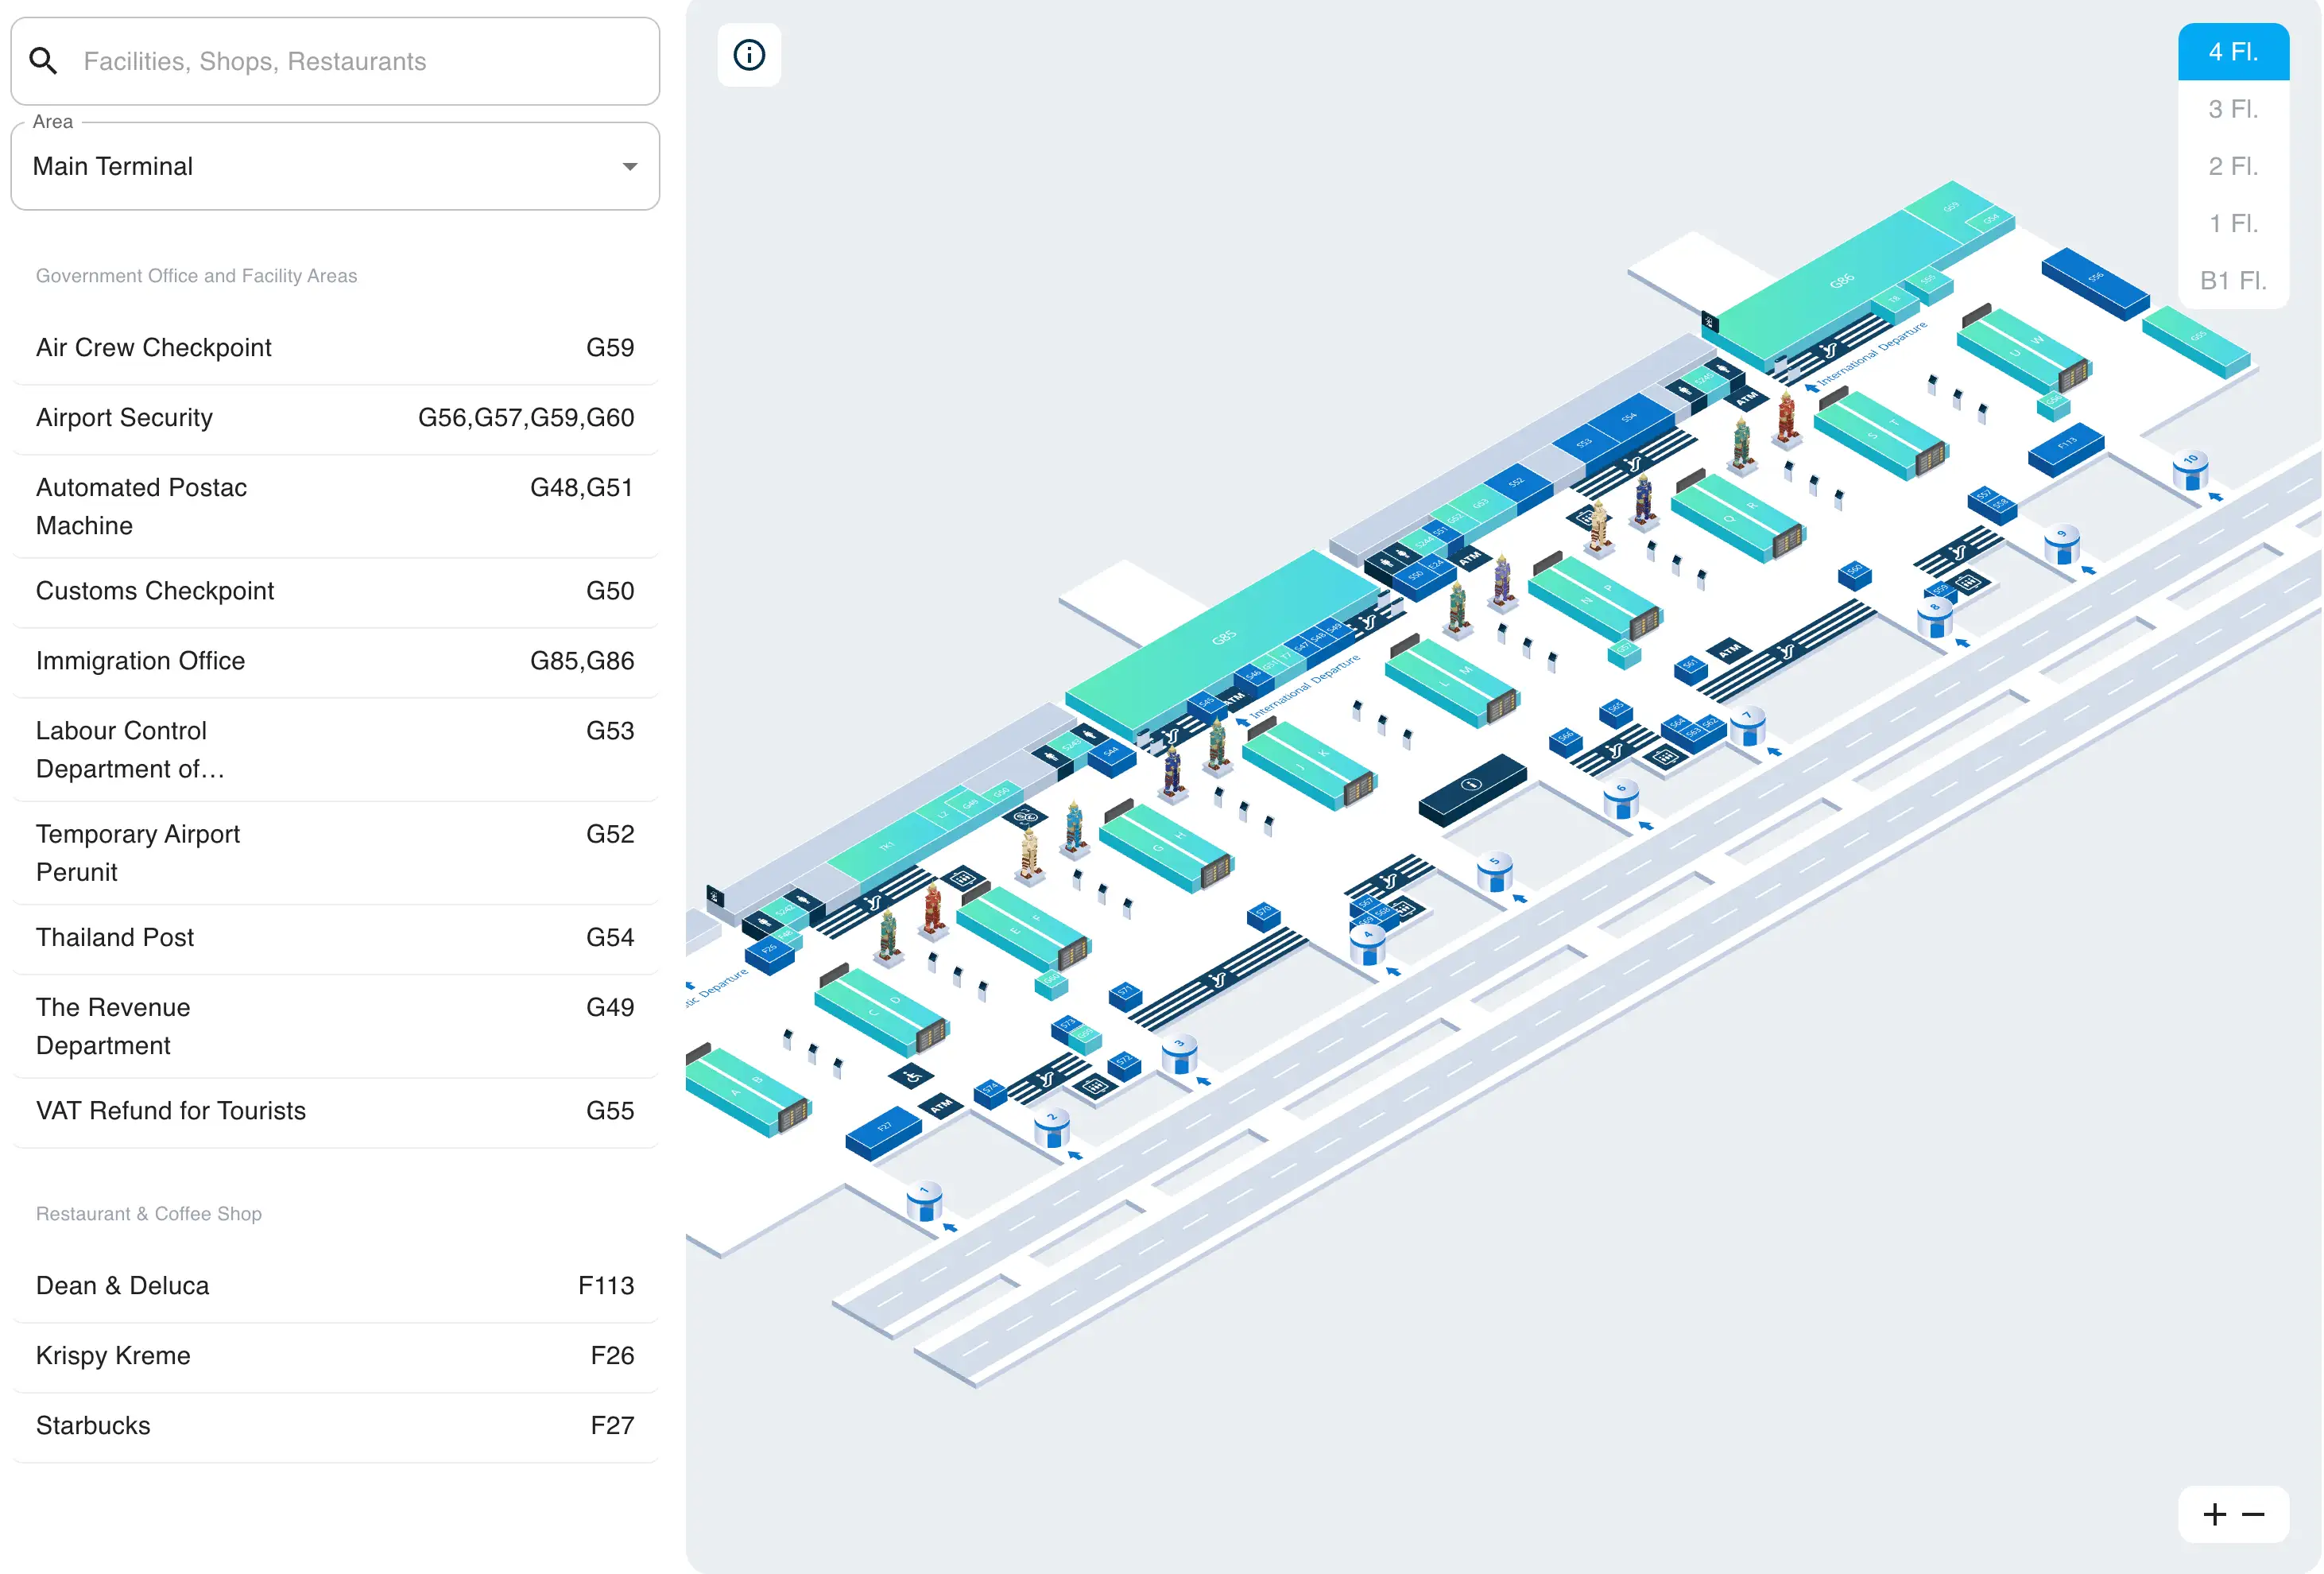
Suvarnabhumi Airport Level 4 Map 2025
2026 Suvarnabhumi Airport Map Guide
What is the exact walking distance (meters) from the furthest international arrival gates to the main Immigration Hall at BKK?
Walking distance is approximately 1,000 meters from the furthest international arrival gates to the main Immigration Hall in the main terminal. This maximum-length approach is most typical from the extreme ends of the H-shaped concourses (far tips on the outer “legs”) where the arrivals corridor feeds back toward the central Concourse D immigration complex.
The far-walk routing runs along the Level 2 sterile arrivals corridor using travelators where available, then funnels into the central spine at Concourse D for Immigration Halls 1–3. Real-world time is usually longer than the raw distance because the corridor narrows at merges and passengers slow at sign clusters, restroom nodes, and queue visibility points near the hall entrances.
Where exactly does the Arrivals route from SAT-1 merge into the main terminal corridor for Immigration (identify the precise junction point on the map)?
The SAT-1 Arrivals route merges at the Level 2 Arrivals Hall junction at Concourse D in the Main Terminal Building. This is the first point where passengers ascending from the underground APM escalators enter the main Level 2 arrivals spine that feeds directly into the Immigration hall entrances.
On the map, the merge is the central convergence where three streams meet: SAT-1 passengers coming up from the APM core, west-side concourse arrivals (A/B/C side) feeding in from one direction, and east-side concourse arrivals (E/F/G side) feeding in from the opposite direction. Use the “Immigration” overhead signs immediately at the escalator top; drifting left or right here pushes you into the Hall 1 or Hall 3 crowd flow instead of the center approach toward Immigration 2.
What is the exact walking distance (meters) from the SAT-1 people-mover platform to the first Immigration queue start point?
Stopping at the SAT-1 people-mover exit is the dealbreaker: the next Immigration queue can jump by hundreds within seconds. Walking distance is approximately 200–300 meters from the Main Terminal Building APM platform (after you ascend) to the first Immigration queue start point on Level 2.
| Segment | Map anchor | Approx. distance (m) |
|---|---|---|
| APM platform (SAT-1 line) to escalator/elevator bank | underground APM station core | 40–80 |
| Top of escalators to Level 2 Arrivals merge | Concourse D arrivals spine junction | 80–140 |
| Merge point to first Immigration queue start | Immigration hall entry lanes (Level 2) | 60–100 |
Where is the International Transfer Security checkpoint located on the terminal map (exact floor + nearest concourse/gate-letter landmark)?
International Transfer Security is on Level 2 at the concourse-to-main-building junctions, not up in the Level 4 departures hall. These are the airside screening points you hit while staying in the arrivals-level transfer flow before you move upward toward gates.
| Checkpoint | Floor | Nearest concourse landmark |
|---|---|---|
| International-to-International (West) | Level 2 | junction of Concourses A / B / C (proximal end) |
| International-to-International (East) | Level 2 | junction of Concourses E / F / G (proximal end) |
| Domestic-to-International | Level 2 | Concourse B (transfer screening zone) |
What is the exact walking distance (meters) from the International Transfer Security checkpoint to the SAT-1 people-mover entrance?
Walking distance is approximately 300–500 meters from the International Transfer Security checkpoint to the SAT-1 people-mover entrance. The distance varies depending on whether you clear the west (A/B/C) or east (E/F/G) Level 2 checkpoint and how far you must backtrack to the terminal’s center.
After screening on Level 2, the workable route is to go up to Level 4 and then walk inward to the central Concourse D core, where the “Gates S101–S128” access and APM entry sit behind the main central landmark. The key map logic is that there is no direct side-door from the transfer checkpoints into SAT-1; the routing forces you back through the central node before you can descend into the people-mover.
Where is the official Grab pickup point located (exact level + door/exit label + pickup bay zone as shown on the map)?
Grab pickup is on Level 1 at Gate 4, not on the Level 2 Arrivals curb. On the terminal map, it’s outside the building at the ground transportation frontage labeled Gate 4, split into two signed staging areas.
The pickup bay zones are marked as Grab Pickup Point A and Grab Pickup Point B in the Gate 4 area. The practical routing is to exit Customs, go down one level to Level 1 immediately, then follow “Grab” and “Gate 4” signage to the designated bays; waiting at Level 2 will fail because drivers are not permitted to use that lane.
What is the exact walking distance (meters) from the Customs exit to the taxi queue/taxi ticket machine area (pin the route on the map)?
Walking distance is approximately 150–200 meters from the Customs exit to the taxi queue and taxi ticket machine area. Most of that “distance” is the vertical move from Level 2 (Arrivals/Customs) down to Level 1 (public transport), plus the short outdoor walk to the kiosk lanes.
From the Level 2 Customs exit, follow “Public Taxi” signs, take the escalator or elevator down to Level 1, then walk outside toward Gates 4 or 7 where the taxi kiosks are positioned. The map-pinned endpoint is the touch-screen ticket machines that print a lane number, followed by a short walk along the numbered lanes to meet the driver.
Where is the Airport Rail Link station access located from Arrivals (exact level + corridor/connector path shown on the map)?
Airport Rail Link access is at Basement Level B via the internal connector path from the Level 2 Arrivals hall. The route stays inside the terminal and bypasses the curbside transport frontage on Level 1.
From Arrivals (Level 2), follow “Airport Rail Link” signs to the central core and descend two levels to Level B using the central elevator/escalator banks (the fastest map-anchored option is the central glass elevators). On Level B, the corridor feeds directly into the Rail Link station entry area with ticket machines and gate line ahead.
What is the exact walking distance (meters) from the Arrivals exit doors to the Airport Rail Link entrance gates?
Walking distance is approximately 250–300 meters from the Arrivals exit doors to the Airport Rail Link entrance gates. The distance is dominated by the internal descent to Basement Level B and the short connector corridor to the station entry.
After you commit to the “Airport Rail Link” route from Level 2, stay inside and use the central down-links (fastest when the central glass elevators are available). Once on Level B, the remaining walk to the ticketing and entry gates is typically under 50 meters, with most delay coming from elevator/escalator congestion and ticket machine queues rather than the corridor length.
Where are the first clear SAT-1 wayfinding signs located inside the Departures (Level 4) hall (identify the earliest decision point on the map)?
The first clear SAT-1 wayfinding signs are at the Level 4 central core decision point by the “Scene of the Churning of the Milk Ocean” sculpture. This is the earliest reliable place in the departures airside flow where “Gates S101–S128” signage consistently appears as a distinct routing choice.
On the map, treat this as the pivot node after you reach the central airside area: the correct move is to route behind the sculpture toward the APM descent for SAT-1. Continuing straight down the main spine or turning into the east/west concourses without confirming “S” gates can lock you into a long wrong-way walk and force a full backtrack to this same central landmark.
Where are the post-security food options located relative to departure gates (pin the nearest clusters on the airside map)?
Post-security food clusters are concentrated on Level 4 around Concourse D (central spine) and Concourse F (east-side hub), with additional nodes on Concourse B and inside SAT-1’s own commercial zone. These are the most reliable “eat without detouring” areas once you’re airside.
- Concourse D (Level 4) central spine, near the main airside core and gate branching.
- Concourse F (Level 4) food-dense stretch, closest to multiple quick-service chains.
- Concourse B (Level 4) smaller cluster near the concourse entry section.
- SAT-1 commercial zone (Level 3) near the SAT-1 gate area for passengers routed to Gates S101–S128.
Where is the Fast Track Immigration entrance located relative to the main Arrivals corridor (identify the exact side/approach path on the map)?
Fast Track Immigration is on Level 2 at the central immigration zone adjacent to Immigration 2, approached straight down the main Arrivals spine rather than by drifting into the outer hall entrances. This placement makes it effectively “middle lane” access off the primary arrivals corridor.
From the Level 2 Arrivals corridor (including the SAT-1 APM escalator exit merge), hold the centerline and follow signs for “Priority Lane” / “Fast Track” as you near the immigration inputs. The map logic is that Fast Track sits centrally between the larger, more visually dominant Immigration Hall 1 (west side) and Immigration Hall 3 (east side), so the correct approach is a direct center approach, not a left/right peel-off into the herd.
What is the exact walking distance (meters) from Immigration exit to the nearest baggage claim carousels (shortest realistic path on the map)?
Walking distance is approximately 0–50 meters from Immigration exit to the nearest baggage claim carousels. The baggage reclaim hall sits immediately behind the immigration booths on the same level, so the shortest path is essentially straight ahead through the exit partition into the carousel area.
The practical map anchor is the first flight/carousel display screens positioned just after the exit: check your assigned carousel there before committing to a long lateral walk across the reclaim hall. The distance to “a carousel” is minimal, but the distance to your specific carousel can become large if you head the wrong direction along the hall’s length.
Where is the transfer desk area located for passengers who need a boarding pass during connections (exact position on the map relative to “Transfer/Connecting Flights” routing)?
Transfer desks are on Level 2 in the same pre-security transfer zones as the connecting-flight routing, positioned before the International Transfer Security checkpoints at the concourse junctions. This is where you solve “no boarding pass” before you attempt screening.
- West transfer desk cluster: Level 2 at the junction of Concourses A / B / C, on the “Transfer/Connecting Flights” approach before the screening lanes.
- East transfer desk cluster: Level 2 at the junction of Concourses E / F / G, on the same transfer approach before screening.
- SAT-1-specific desks: Level 2 transfer area signage pointing to “Connecting Flights Gates S101–S128,” used to fix documents before committing to the SAT-1 routing.