Dubai International Airport Terminal 1 Map (Most Up-To-Date)
Dubai International Airport Terminal 1 uses a processor–satellite layout: a landside “processor” building for check-in, immigration, and security, paired with the long Concourse D satellite where most gates sit. The whole system runs on a single central spine that funnels you to the APM/train node, then splits left/right into the two concourse wings. Within Dubai’s main aviation hub, most “lost time” comes from choosing the wrong airside vs landside transfer path at the APM and connections checkpoints.
Map Table
| Zone | Connection | Walk Time |
|---|---|---|
| T1 Departures processor | Immigration → Security → APM/train | Variable (queue-led) |
| APM/train node | T1 ↔ Concourse D | 2–3 min ride + short walk |
| Concourse D central atrium | Left wing (D1–D10) / Right wing (D11–D32) | 5–12 min to ends |
| T1 Arrivals hall | Immigration (Smart Gates right) → Baggage/exit | Variable (queue-led) |
Dubai International Airport Terminal 1 Map Strategy
- Treat the APM/train node as your primary landmark: confirm you’re heading to “Concourse D / Gates D” before you pass deep into retail or down the wrong corridor.
- Lock in airside vs landside early for Terminal 3 transfers: airside keeps you inside connections flow; landside forces arrivals immigration + re-screening risk.
- Expect volatility at transfer security and arrivals immigration: identify the transfer-security entry before you branch toward gates, and use the right-side Smart Gates lane if eligible.
- Use “decision nodes” before distance: stop at the first major flight information screens after the APM exit in Concourse D, then commit to the correct wing.
2026 Dubai International Airport Terminal 1 Map + Printable PDF
Terminal 1 remains defined by the Concourse D APM/train step and the single post-security funnel that forces every departing passenger through the same “one way out” node. Concourse D’s central atrium still acts as the decision point where you commit to the left/right gate wings, while transfers are shaped by chokepoints at transfer security and arrivals immigration (Smart Gates vs manual counters).
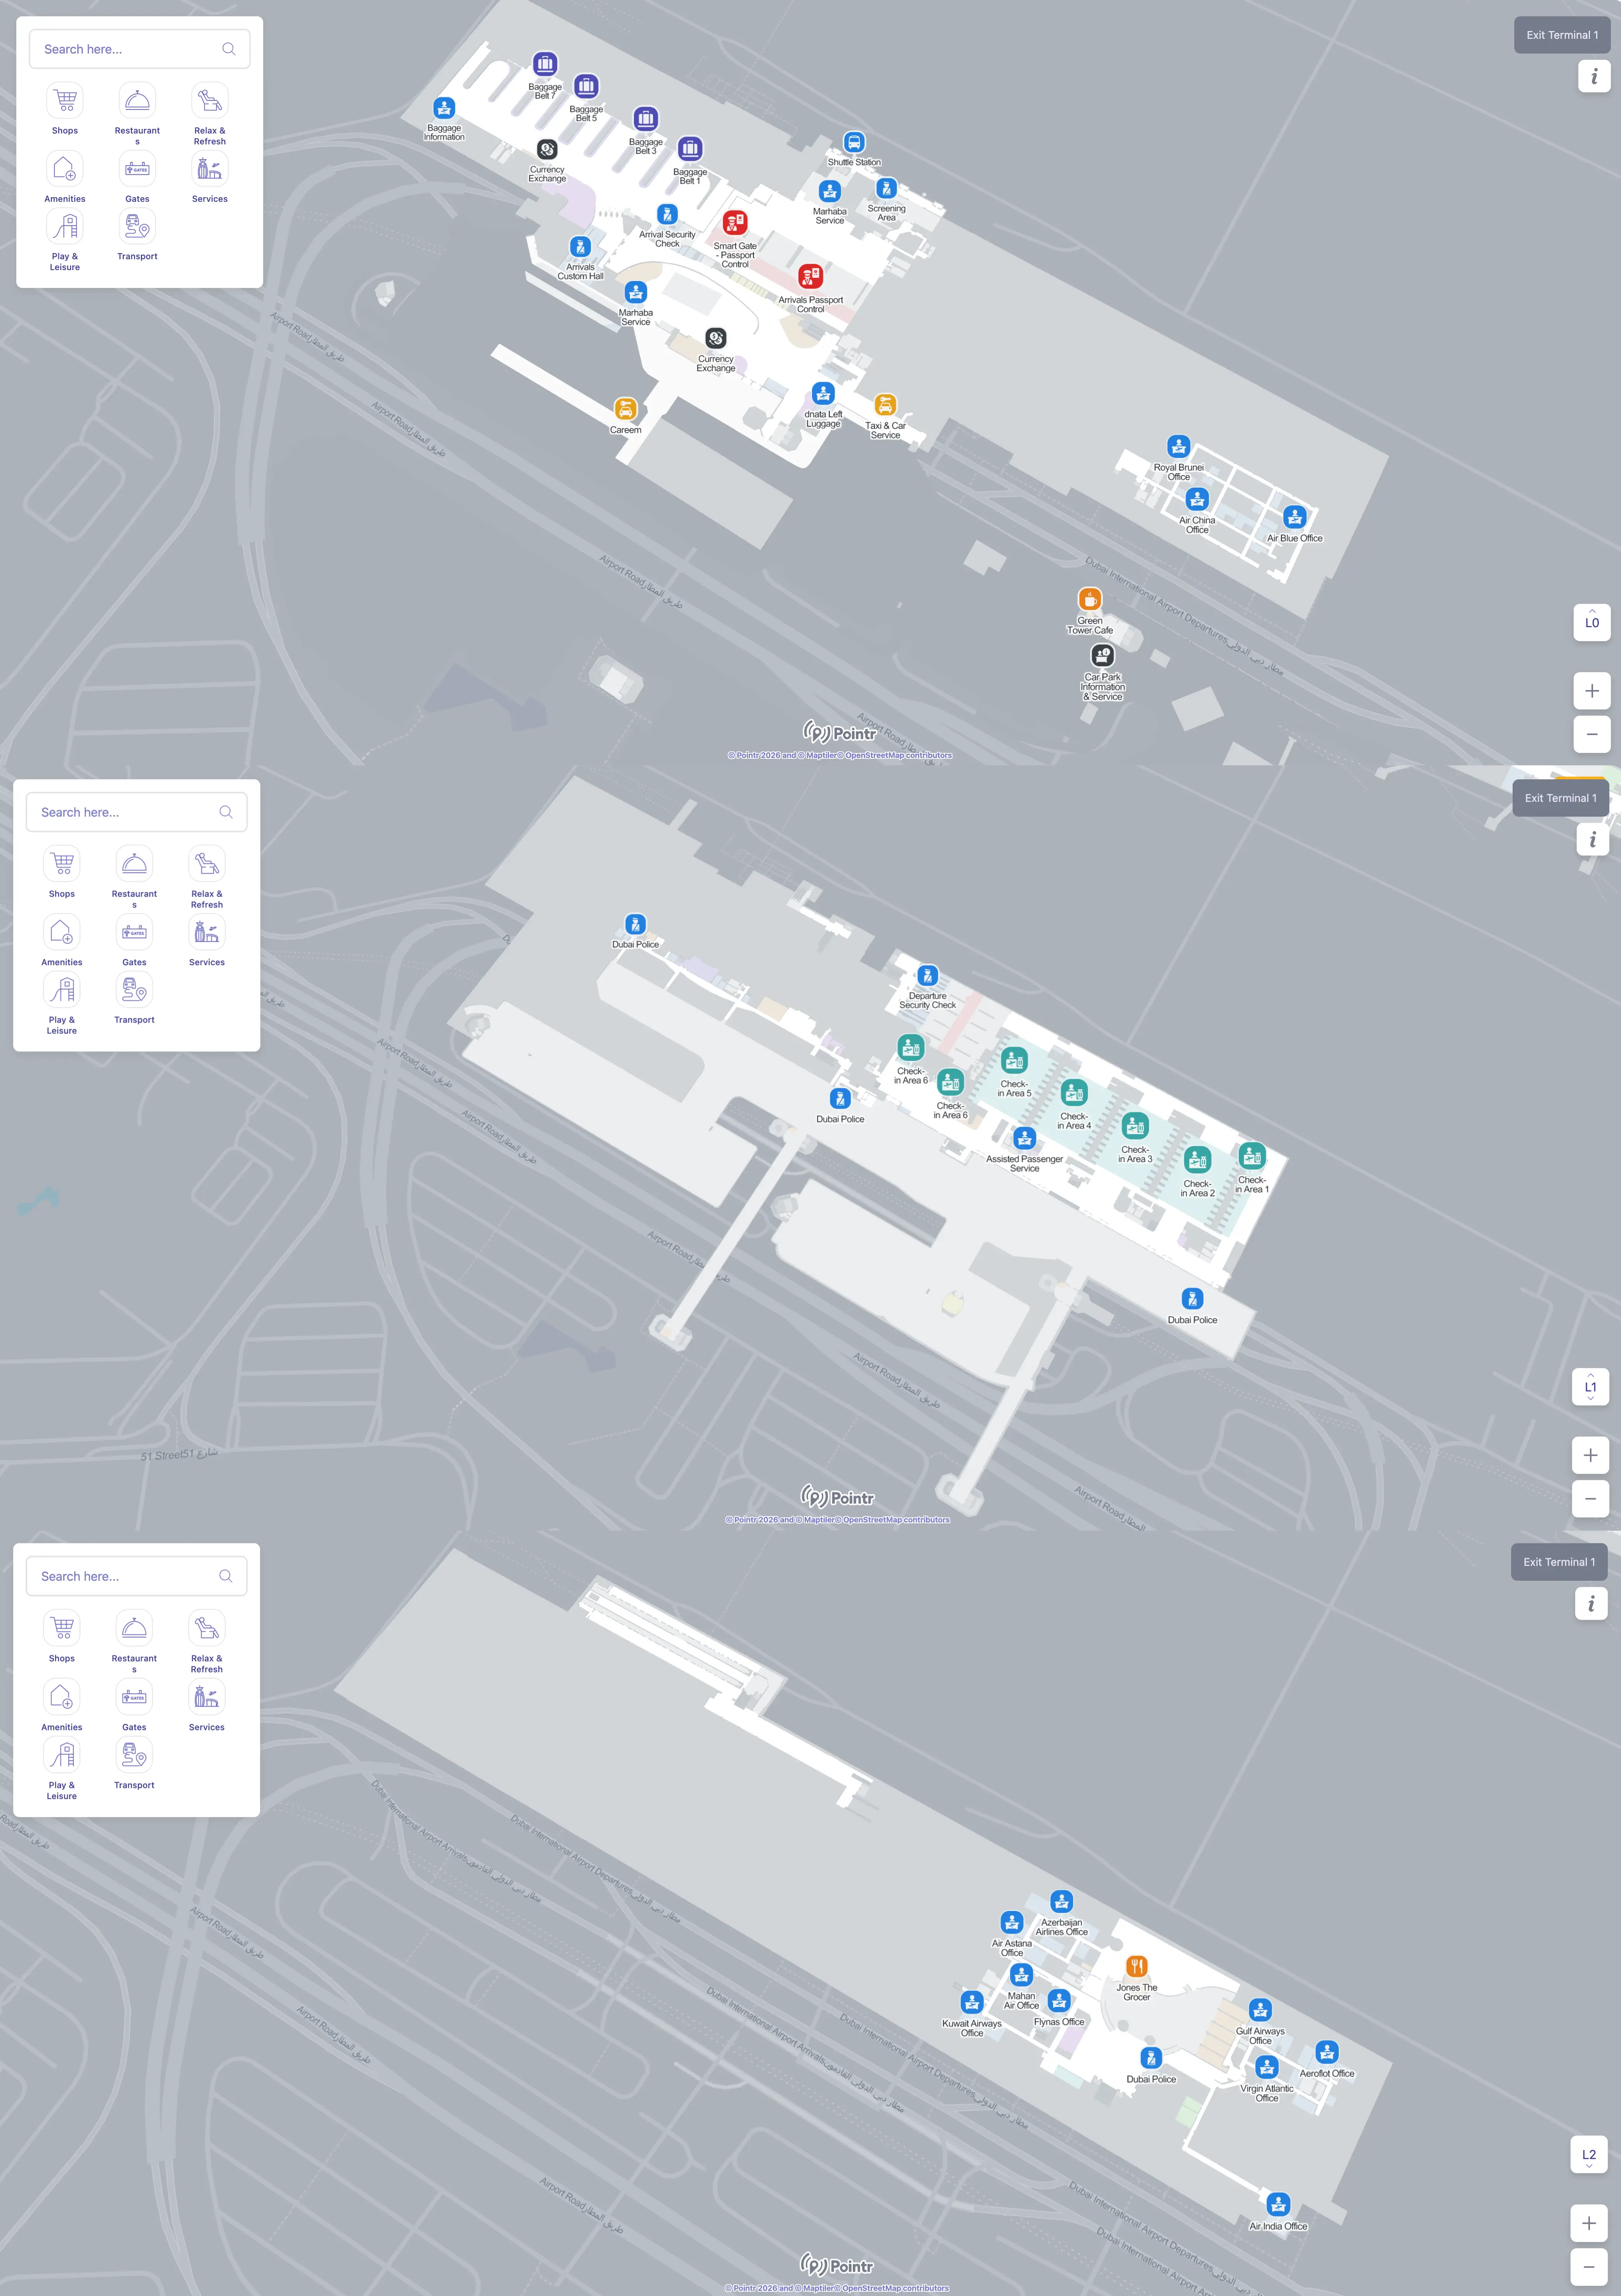
Dubai International Airport Terminal 1 Level 0 Arrivals Map 2025
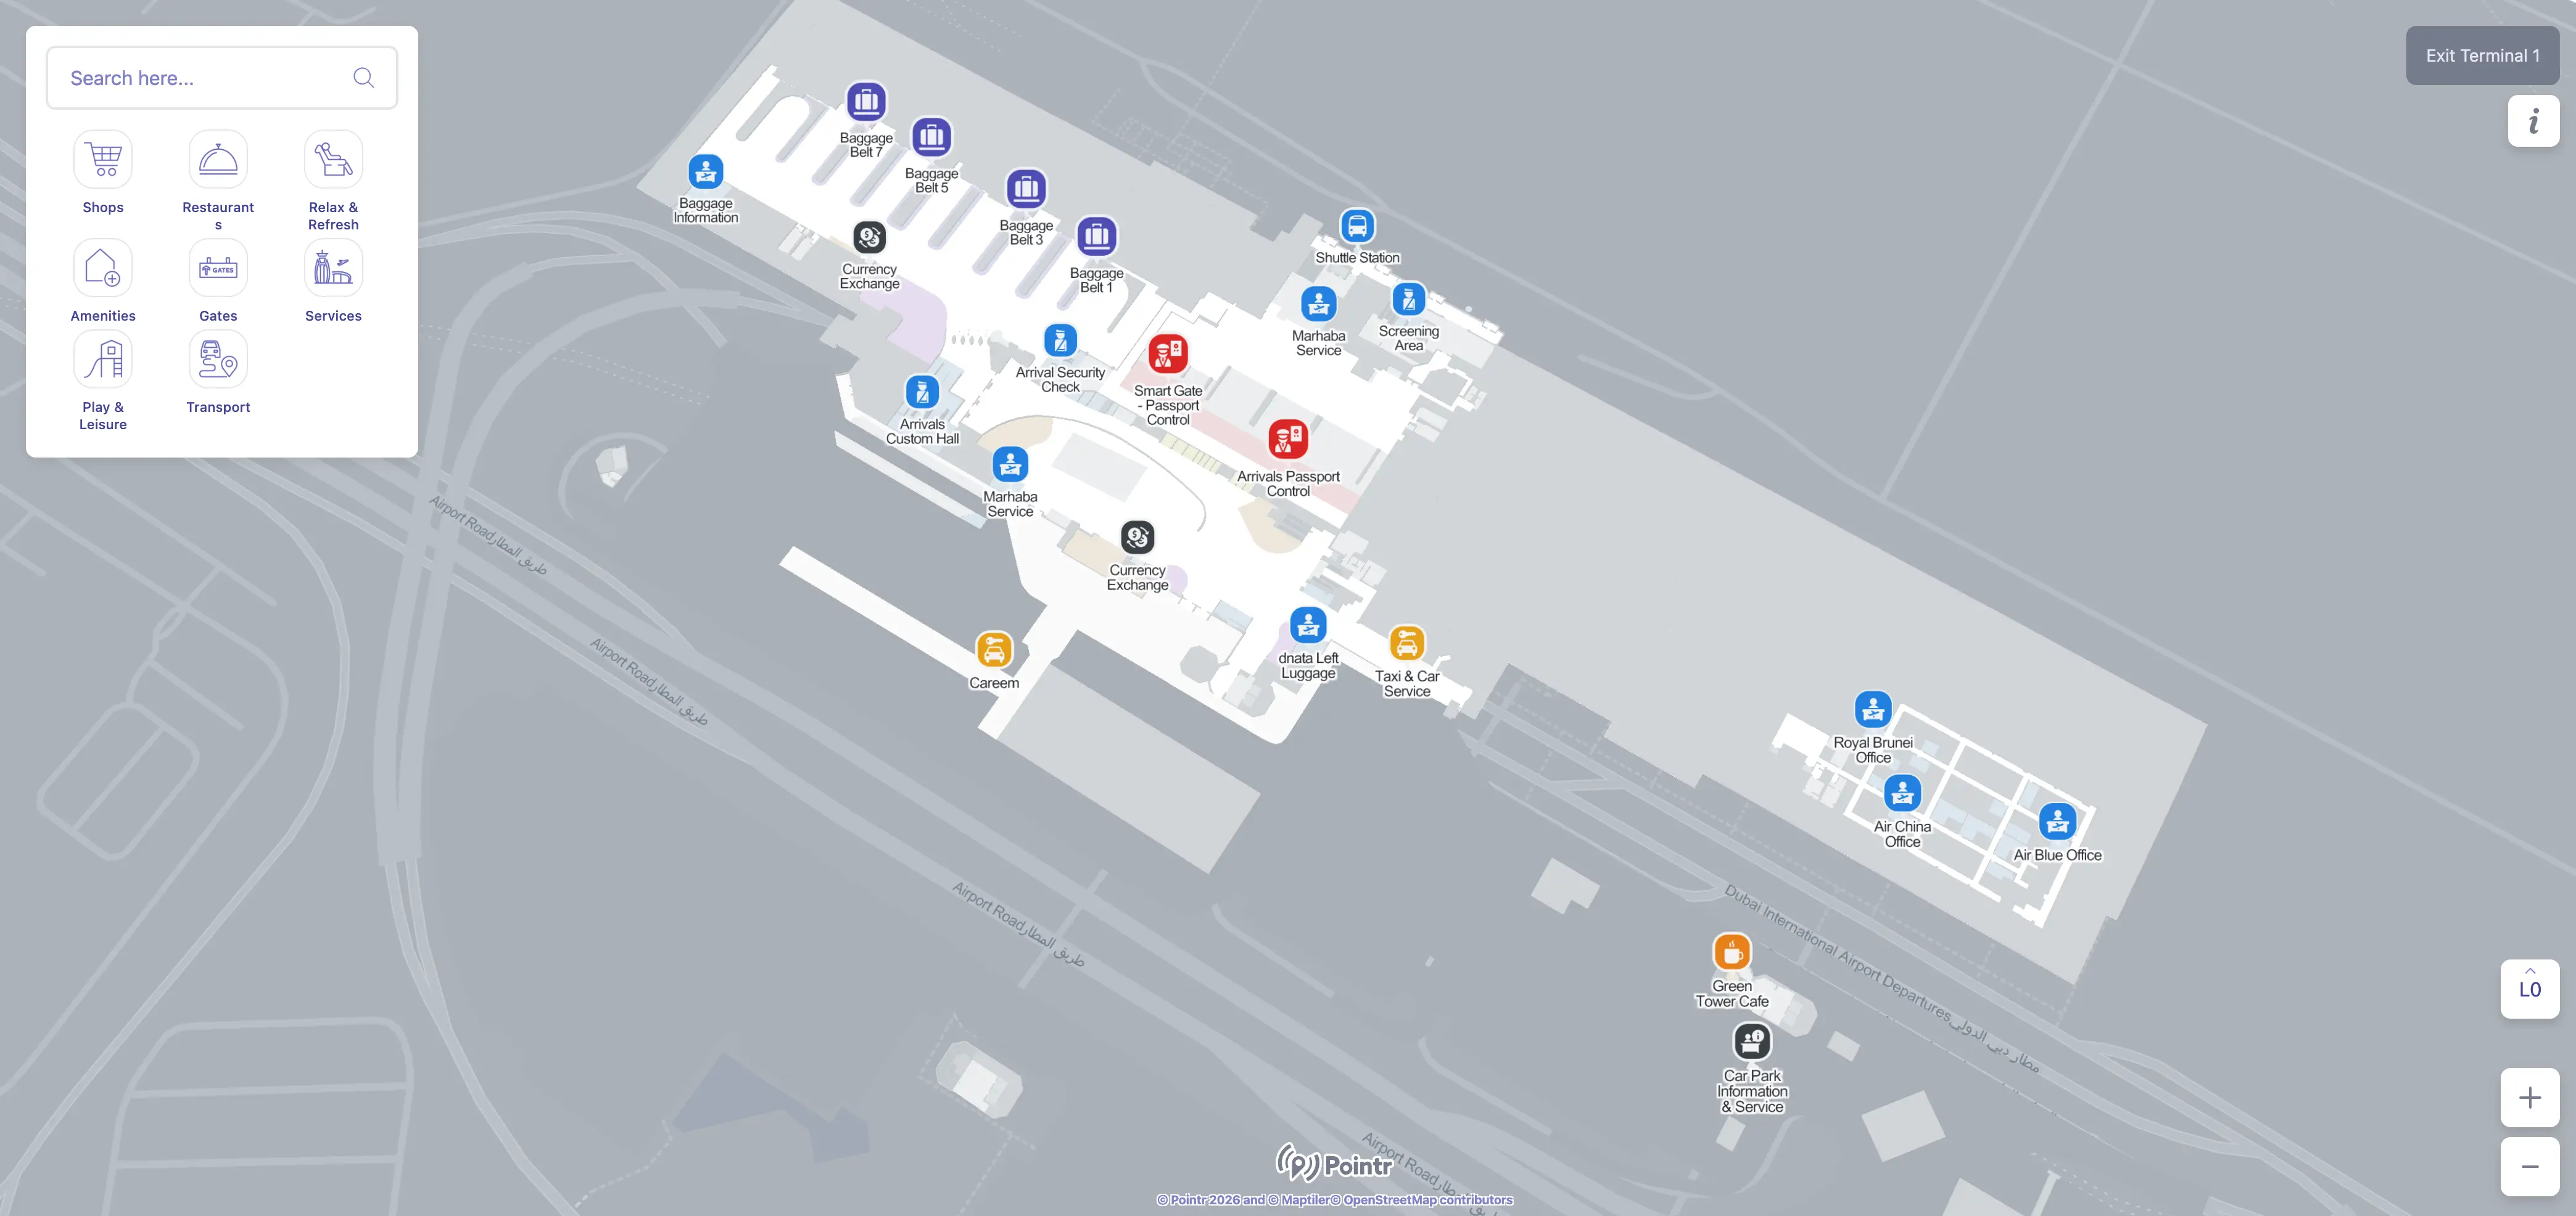
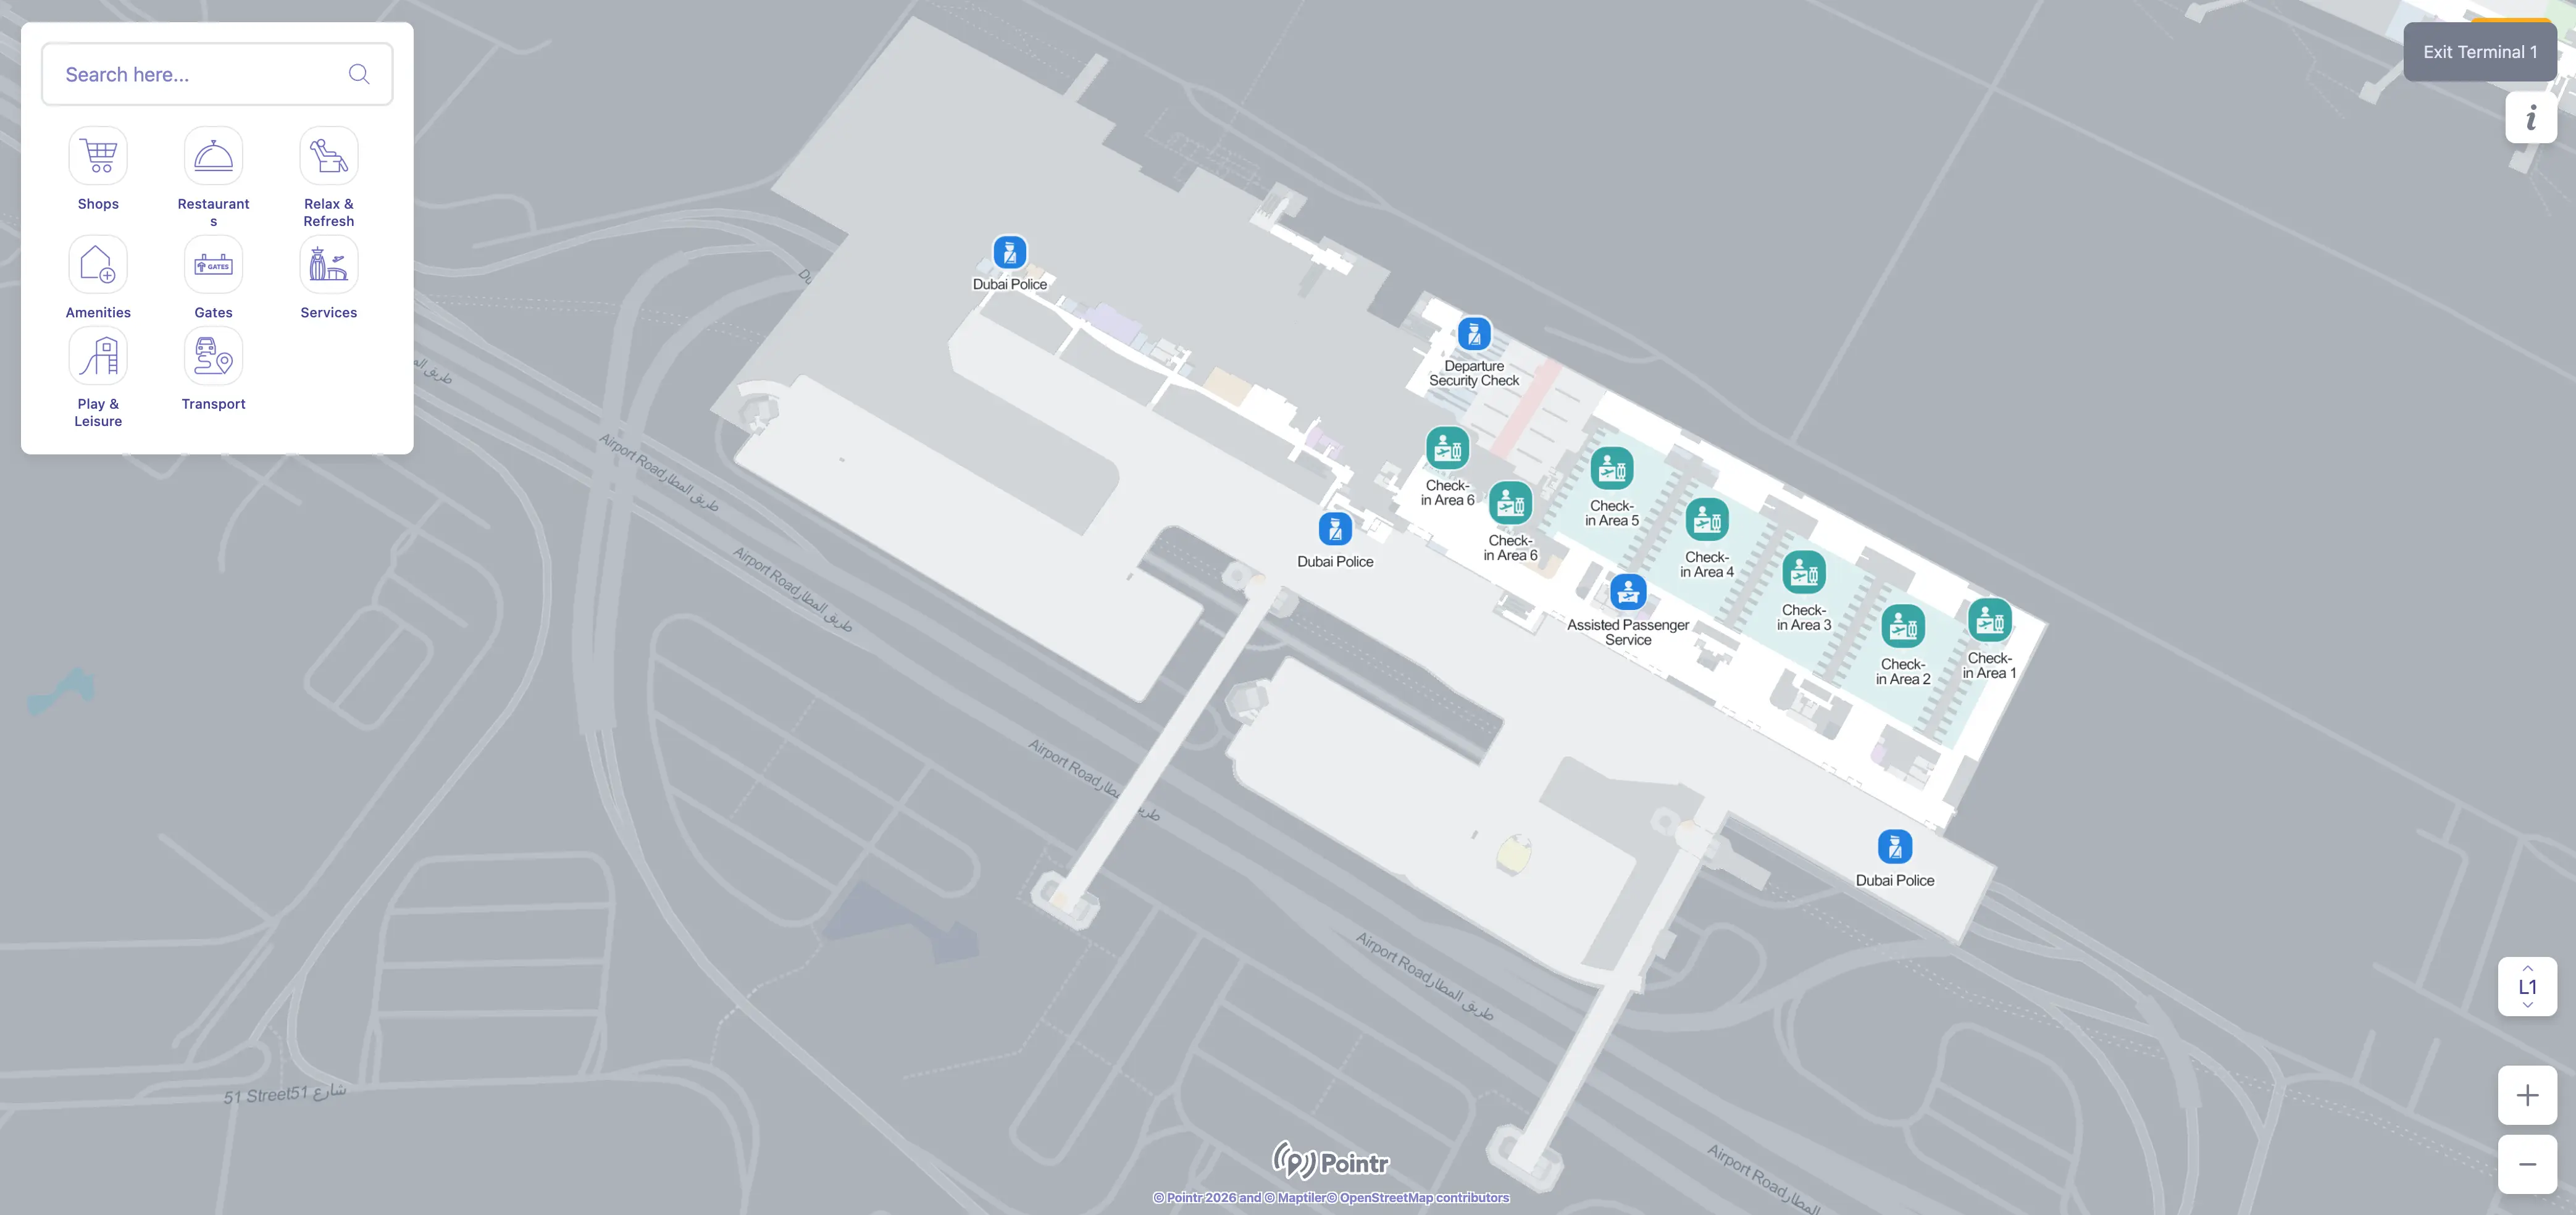
Dubai International Airport Terminal 1 Level 1 Departures Map 2025
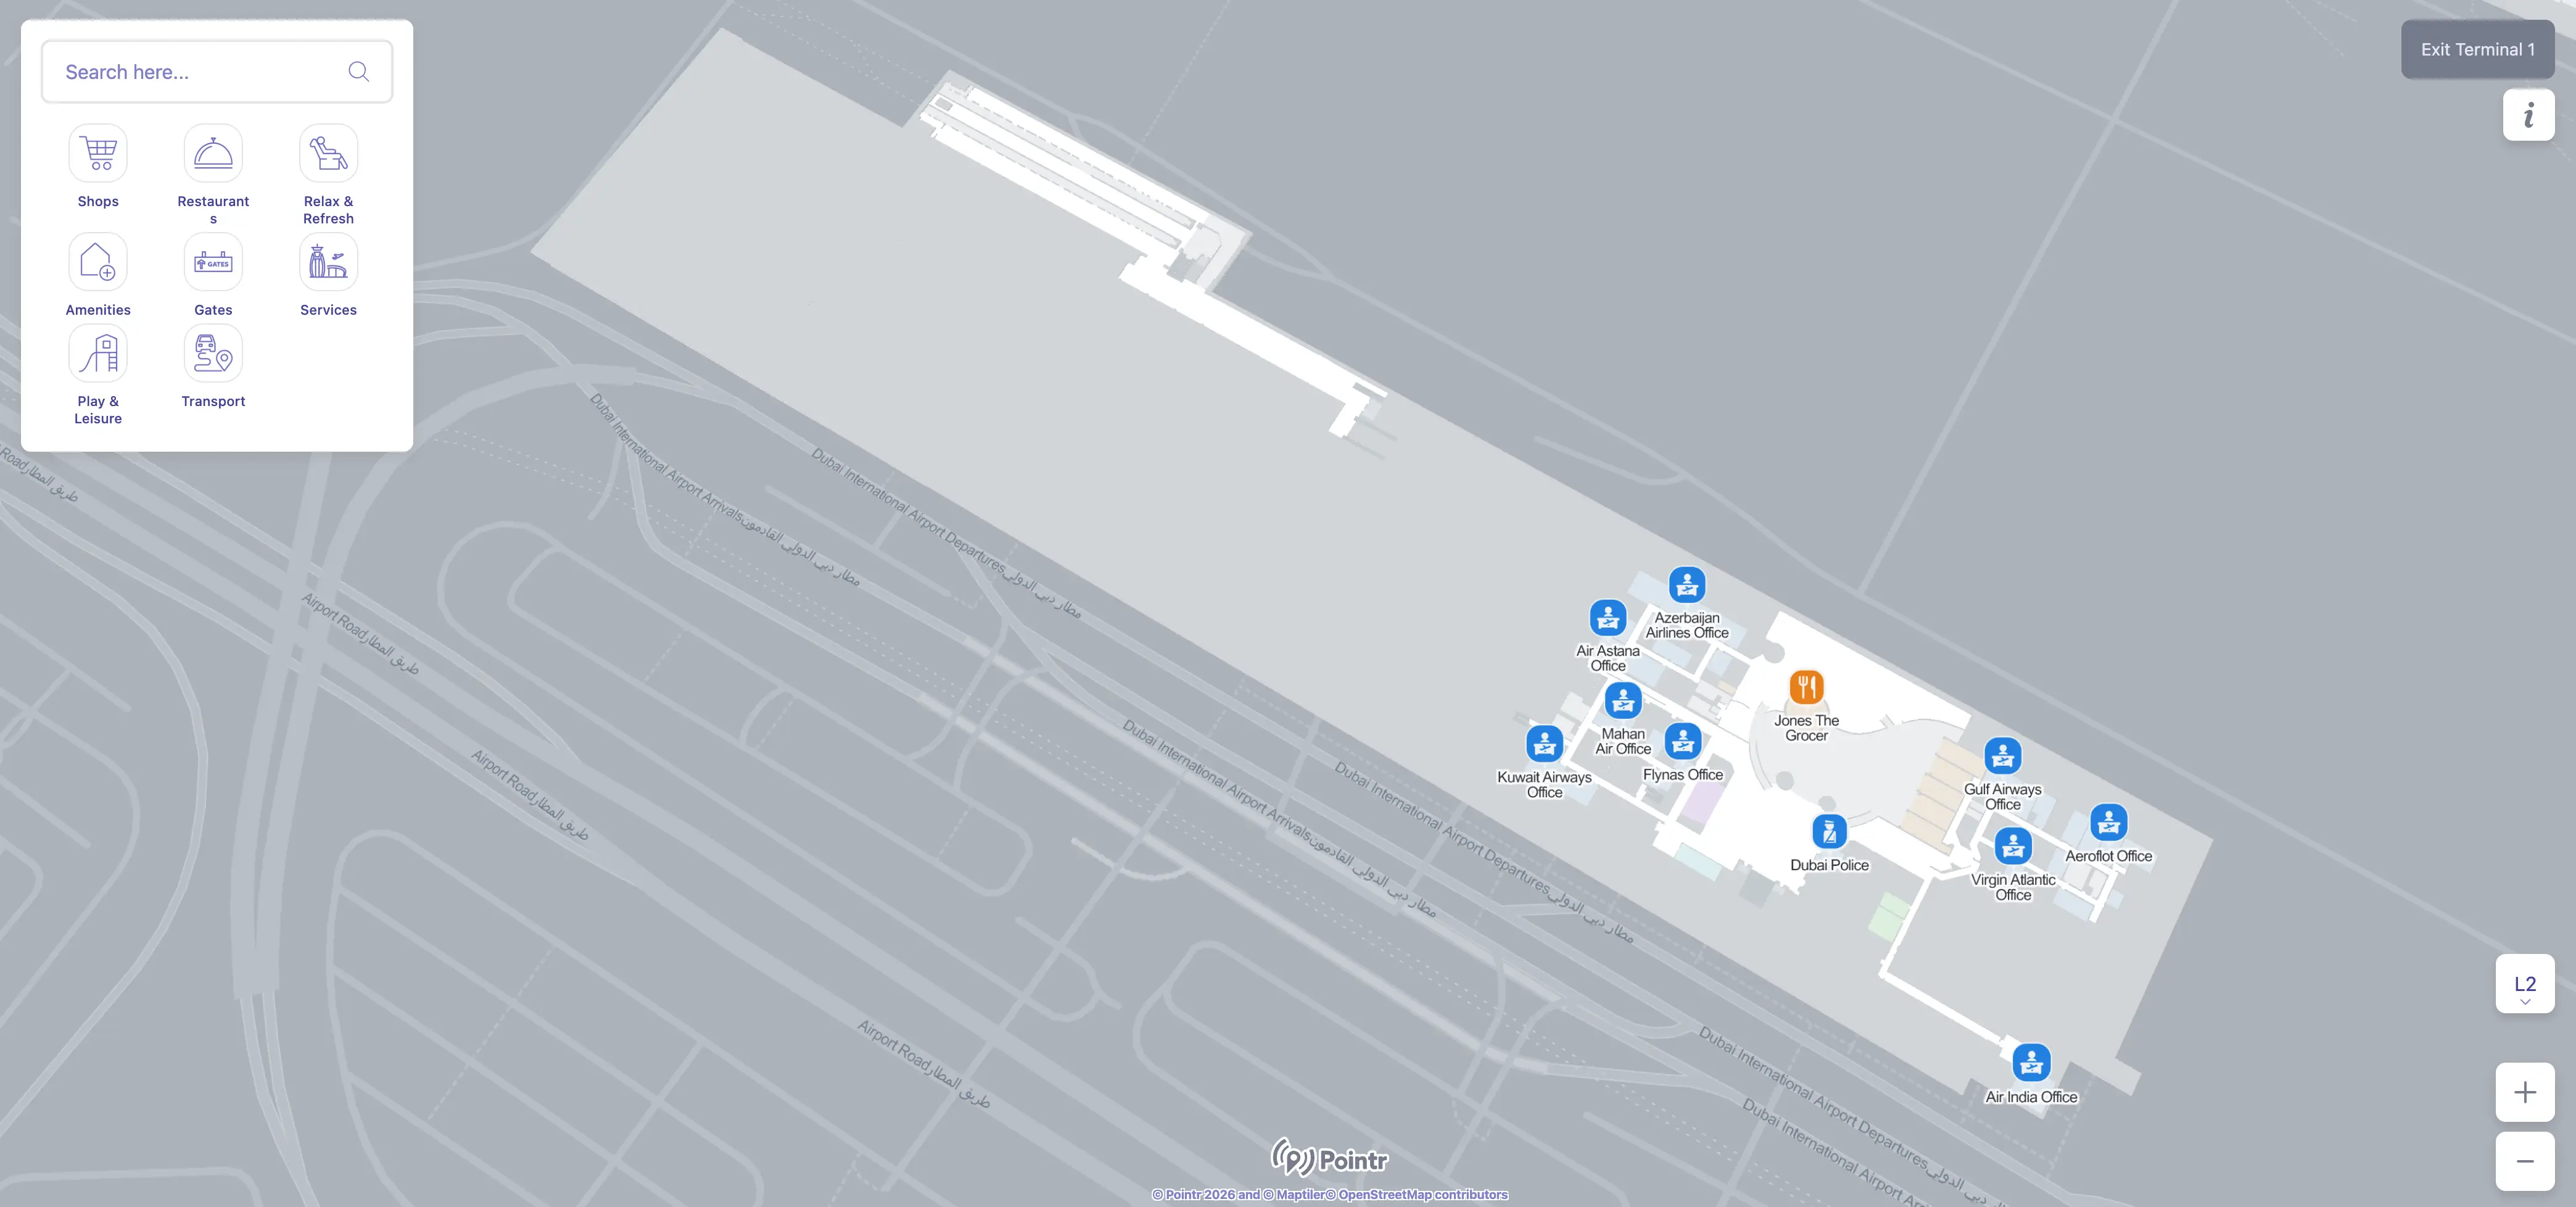
Dubai International Airport Terminal 1 Level 2 Food Court Map 2025
2026 Dubai International Airport Terminal 1 Map Guide
What is the exact mapped location of the Terminal 1 ↔ Concourse D airport train/APM station entrance, relative to the main post-security duty-free exit?
The APM/train station entrance sits at the immediate edge of the post-security flow, directly adjacent to the Concourse D central duty-free threshold. In practice, the station doors are the “hinge” between the funnelled post-security exit path and the Concourse D atrium.
After Terminal 1 security, the passenger stream runs into a short buffer corridor that feeds straight into the APM platform entrance with no alternative branch. On the Concourse D side, the APM exit opens into the central atrium where the duty-free core begins; the main duty-free exit is effectively the same central node where you also see the first major FIDS bank and the left/right split toward the gate wings.
Where is the closest inter-terminal transfer help point in Concourse D (connections/transfer desk area), and what is the nearest fixed landmark shown on the terminal map?
The closest inter-terminal transfer help point in Concourse D is the central Connections/Transfer Desk array in the transit node beside the APM station entrance. The nearest fixed landmark is the Marhaba counters, positioned at the far-left end of that connections desk bank.
In Concourse D, follow overhead “Connections” signs on the arrivals/transit flow to reach the central transit area rather than the “Arrivals/Baggage” route that pulls you toward the APM back to Terminal 1. The desk cluster sits at the same central atrium zone that anchors Concourse D wayfinding, so the quickest triangulation is “Connections desks near the APM” and then visually confirm by locating Marhaba on the left edge of the counter line.
What is the mapped shortest route from Concourse D arrivals flow to Transfer Security, and where does that checkpoint sit before you branch toward gates?
Transfer Security is reached by staying on the Concourse D “Connections” route and not taking the APM toward “Arrivals/Baggage.” The checkpoint sits in the central transit node of Concourse D, before you re-enter the departures lounge that splits left/right toward the gate wings.
From an arriving gate, follow overhead “Connections” signs into the arrivals-level transit channel that bypasses the APM down-ramp. This corridor feeds into the central connections desk area (with the Marhaba counters as a reliable landmark on the left side), and the transfer security screening point is positioned right after that central node. Once you clear transfer security, you emerge back into the main Concourse D departures space where the retail atrium and wing junction determine whether you head toward the north or south gate pier.
What is the walking distance (meters) from the Concourse D train/APM drop-off to the furthest D-gate cluster on the map (end-of-concourse), following the passenger pathway?
The walking distance from the Concourse D APM drop-off to the furthest end-of-concourse D-gate cluster is about 400 meters along the passenger pathway. This is the center-to-tip distance from the APM/central atrium node to the end of either pier.
Concourse D is an approximately 800-meter-long inverted “T” layout, with the APM exit in the central atrium and long linear wings extending in both directions. The “furthest gate cluster” is effectively the tip of the north wing (often around D1/D2) or the tip of the south wing (often around D32), and both are roughly the same distance from the central atrium. Moving walkways can reduce time, but they do not change the mapped walking distance.
On the Terminal 1 arrivals map, where are the Smart Gates placed relative to the standard immigration counters (which comes first, and what are the nearest landmarks)?
The Smart Gates are positioned on the right-hand side of the Terminal 1 Arrivals immigration hall, with the standard staffed immigration counters occupying the center and left sectors. The Smart Gates present as a distinct right-side lane choice as you enter the hall from the APM arrival escalators.
After you ride the APM from Concourse D back to Terminal 1, you exit the train and descend via the main escalator bank into the Arrivals immigration hall. At the base of that descent, the natural crowd flow tends to drift toward the central manual counter area, while the Smart Gates are the right-side “peel off” option marked by their dedicated gate array and signage. The key landmark sequence is APM exit → down escalators → immigration hall split, with Smart Gates immediately to the right of that first hall entry line.
If you must go landside for a re-check, where is the shortest mapped route from Arrivals (T1) to Departures check-in hall, including the correct vertical transitions (escalator/elevator banks)?
The shortest mapped landside route is an internal vertical move from the public Arrivals greeter hall up one level to the Departures check-in hall, using the main escalator/elevator banks near the meeting-point and car-rental area. This avoids exiting to the curb and re-entering.
After arrivals immigration and baggage claim, clear customs and walk into the public Arrivals hall (greeters). Stay inside the building and follow signs toward the central elevators/escalators clustered by the meeting point and car-rental desks. Take the escalator up (or the elevator if you have a cart) one level to Departures, where you emerge into the main check-in hall with counter rows labeled A–F. Typical walking time is about 3–5 minutes, with the main variable being elevator wait time.
For a Terminal 3 connection, what are the exact map positions of the shuttle bus access points (e.g., Concourse B “connections desk K” reference), and what is the nearest navigational anchor at each pickup?
The shuttle bus access points are anchored at named connections nodes: in Terminal 1 they start from the Concourse D Connections Area, and in Terminal 3 they align to Concourse A Bus Connection Area A6, Concourse B Connections Desk K, and Concourse C Connections Desk E. These anchors are the fastest way to verify you’re at the correct pickup/drop-off zone.
| Transfer leg | Shuttle access point (map ID) | Nearest navigational anchor |
|---|---|---|
| T1 → T3 | Concourse D Connections Area | Connections/Transfer Desk bank near the APM node |
| T3 Concourse A | Bus Connection Area A6 | A6 bus connection staging area |
| T3 Concourse B | Connections Desk K | Desk “K” in the central Concourse B connections hub |
| T3 Concourse C | Connections Desk E | Desk “E” in the Concourse C connections zone |
Where are the paid lounge entrances in Terminal 1 / Concourse D located on the map, and which entrance is closest to the central passenger spine (lowest detour distance)?
The paid lounge entrances are concentrated on Concourse D Level 2 above the central retail atrium, with the shortest detour belonging to the Marhaba Lounge because it is accessed right off the APM/central atrium spine. Sleep ’n Fly is a paid rest facility with a separate entrance on the main level near Gates D6–D7.
Use the APM drop-off as your “zero point” in Concourse D, then look for vertical access (escalators/elevators) up to the mezzanine lounge level directly above the duty-free atrium. Marhaba Lounge and other contract lounges (including Ahlan Business Class Lounge and the SkyTeam Lounge) sit on that Level 2 band, reached without committing far down either gate wing. If your goal is the lowest detour distance from the central passenger spine, prioritize Marhaba via the central atrium vertical core; if you are already positioned near mid-wing gates, Sleep ’n Fly is easiest to triangulate by the “opposite Gates D6/D7” landmark.
On the Concourse D map, where are the largest seating concentrations / rest zones located relative to the gates (to avoid “few seats” gate pockets)?
The largest seating concentrations are in the individual gate hold rooms along the Concourse D wings, with the quietest “more available” seating typically at the far ends of the piers near the end-gate clusters. The most reliable rest zones are paid facilities rather than free public lounges.
- Gate hold rooms along both wings provide the main blocks of free seating, but availability varies by flight banks and gate changes.
- The central atrium has limited free seating because most seating is tied to food and retail concessions, so it often feels “full” even when gates have space.
- The extreme ends of the wings (near the end clusters such as around D1/D2 on one side or around D32 on the other) tend to be less trafficked and are where travelers commonly find calmer seating.
- Sleep ’n Fly sits opposite Gates D6–D7 and functions as the most map-stable “rest” anchor if you need a guaranteed option.
Is there a mapped airside walking connector between Concourse D (T1) and the T3 concourses, and what are the exact start/end nodes (named junctions) shown on airport diagrams?
A continuous airside walking connector exists between Terminal 1’s Concourse D transit area and Terminal 3, so you can transfer without going landside if your itinerary permits airside connection rules. The mapped endpoints are the Terminal 1 airside transit corridor leaving the Concourse D/T1 transit node and the Terminal 3 Concourse B junction area where Connections Desk K is the primary named anchor.
Airport diagrams typically represent this as an airside transit corridor rather than a “gate-to-gate” hallway, so the useful named nodes are the places where passengers can reliably confirm they’re still in connections flow. On the T1 side, that is the Concourse D connections/transit node reached by following “Connections” signage (not the APM to arrivals). On the T3 side, the corridor feeds into the Concourse B central connections hub, where “Connections Desk K” is the clearest fixed identifier for wayfinding before you continue onward to Concourses A or C.
Where is the first reliable bank of flight information displays (FIDS) positioned after you enter Concourse D, before you commit to the wrong direction—according to the map?
The first reliable FIDS bank is positioned immediately outside the Concourse D APM exit in the central atrium, before the left/right split into the two gate wings. This is the earliest decision-point screen that prevents a wrong-wing commitment.
When you step off the APM into Concourse D, you emerge into the main atrium where duty-free and retail begin, and the concourse geometry forces an early directional choice. The FIDS array is placed right at that transition so passengers can stop, confirm gate number, and then turn toward the correct wing without walking deep into the retail stream. Use the APM exit boundary as the anchor: if you can still see the APM doors behind you, you’re at the correct “first FIDS” position.
From Terminal 1 check-in, where is the exact entry point to departures security on the map (the “decision doorway” that determines whether you end up routed to the Concourse D train/APM)?
The departures security entry point is the central, main “Departures / All Gates” funnel on the Terminal 1 departures level, roughly equidistant from the ends of the check-in hall. This doorway commits you into the linear sequence that ends at the Concourse D APM/train node.
From the check-in hall with counter banks A–F, passenger flow converges on the middle of the hall toward the secured processing zone. Large overhead “Departures” signage marks the entry, which feeds first into immigration (manual counters and e-gates) and then directly into the central security search area with no alternate general-passenger checkpoint. Once you pass this central entry, the layout becomes unidirectional: immigration → security → short buffer corridor → APM station entrance, so the key landmark is the hall’s central axis rather than any specific counter row.