Heraklion International Airport Map (Most Up-To-Date)
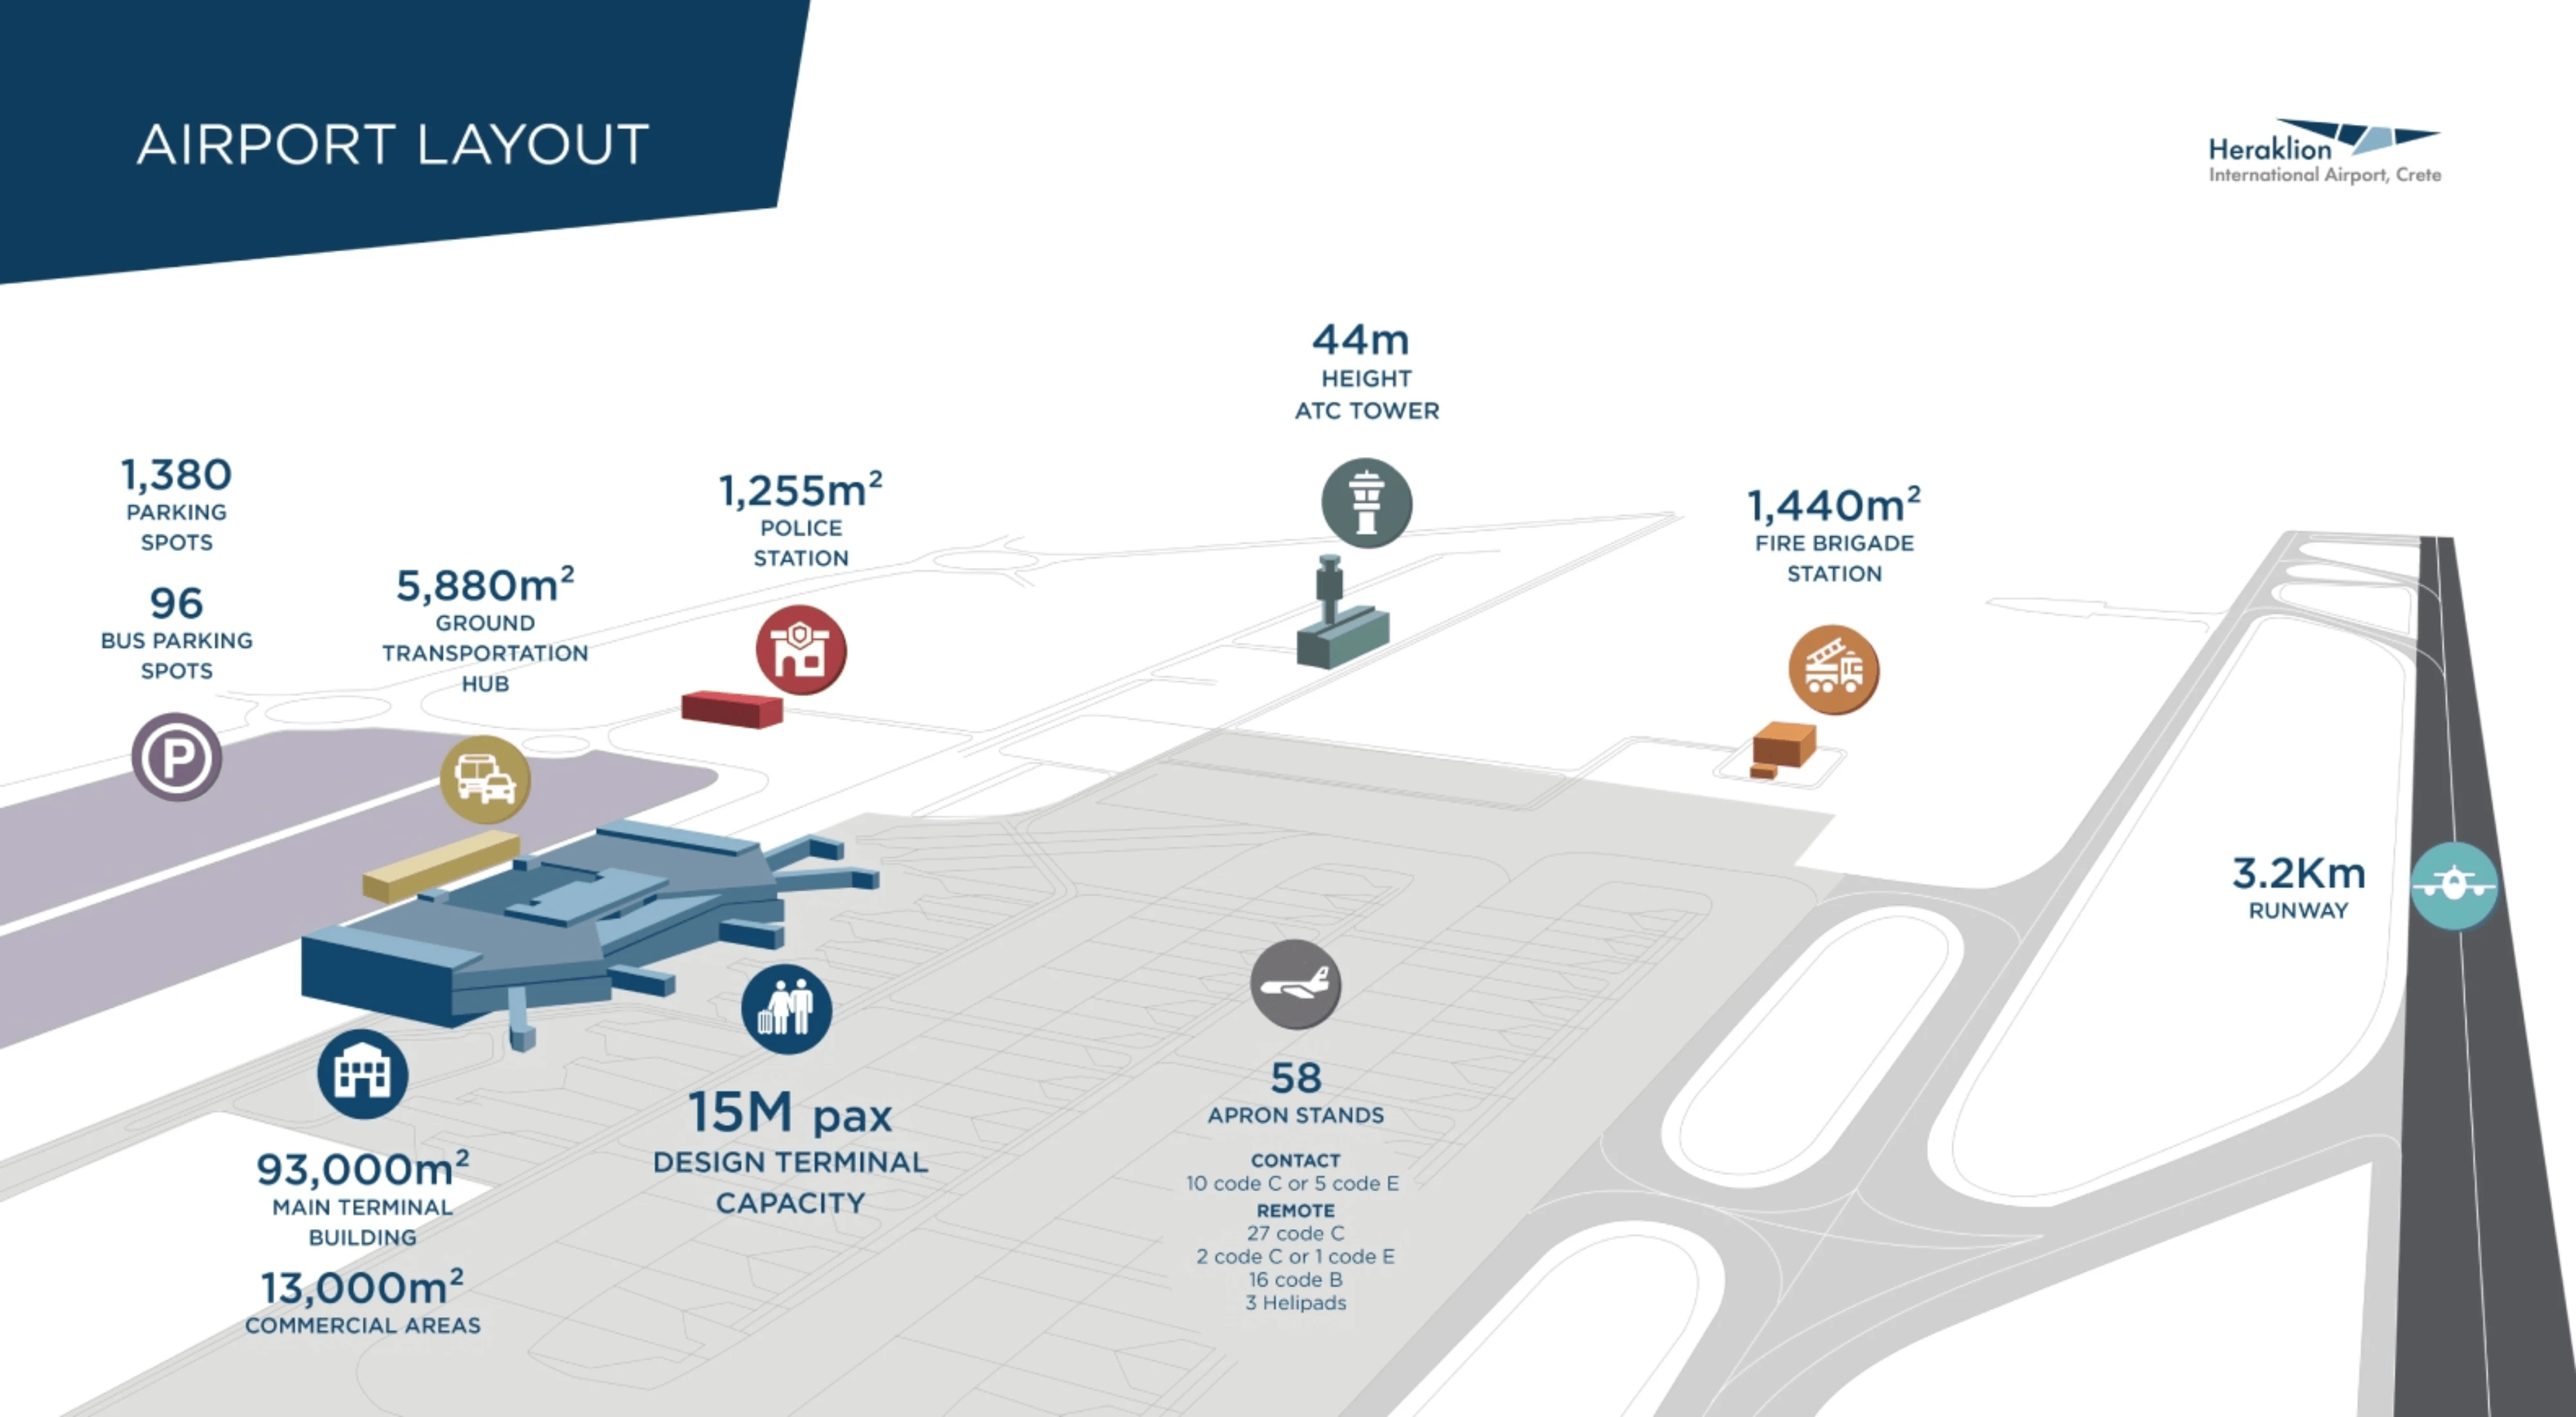
Heraklion International Airport is a compact, linear terminal that runs like a single spine from check-in to Security to a forced walk-through duty-free, then fans into two gate sectors (A and B). The entire airside footprint is short in meters but slow in minutes during peak crush density. Within Crete’s main Heraklion hub, navigation success comes from knowing the one-way choke points and the few “relief valves” (upstairs mezzanine, Sector B).
Map Table
| Zone | Gates / Anchor | Core Use | Note |
|---|---|---|---|
| Landside Ground | Check-in hall | Bag drop, counters | Queue spill to doors/curb |
| Security Node | Mezzanine top of stairs | Screening | Queue backs down stairs |
| Airside Core | Duty-free exit + FIDS bank | Distribution | Single nozzle choke |
| Gate Sectors | A (1–6) / B (7–14) | Holding + boarding | A = densest, B = quieter |
Heraklion International Airport Map Strategy
- Treat Gate A as a last-minute waiting area: clear duty-free, verify the FIDS cluster, then relocate to a less dense holding zone until boarding ramps up.
- Use vertical relief: the upstairs mezzanine (Everest/lounges zone) is the default plan for cooler air, overflow standing, and a calmer gate-check loop.
- Run a gate-change protocol: stop at the duty-free-exit FIDS every 15–20 minutes, because announcements and local screens near seats are unreliable.
- Plan for forced bottlenecks: the duty-free exit is the single nozzle, so pick a lane, keep moving, and only stop after you clear the portal and corridor split.
2026 Heraklion International Airport Map + Printable PDF
Peak departures still turn Heraklion International Airport into a tight, heat-amplified holding pen, so the 2026 map is built to minimize time spent in the duty-free maze and the Gate A crush. It pins down the “Point of Truth” FIDS screens at the duty-free exit, the fastest Security-to-seat routes, and the upstairs mezzanine escape hatch for cooler air and overflow waiting.

2026 Heraklion International Airport Map Guide
What is the fastest walking route from the main Security exit to the nearest gate seating cluster (not duty-free browsing areas)?
The forced walk-through duty-free path is the fastest route, ending at the seating cluster directly in front of the duty-free exit. After Security, stay on the main aisle through the Hellenic Duty-Free shop without detouring into perfume or alcohol islands, then exit into the main departures lounge and take the first available seats immediately ahead.
The nearest seating is at the central waiting area that sits as the first “landing zone” after the duty-free portal, before the corridor splits left toward Gates 1–6 and right toward Gates 7–14. Walking time is typically 2–3 minutes at a brisk pace, but the duty-free maze slows sharply when crowds compress around the exit and the nearby flight-information screens.
Where is the primary choke point where passengers exit duty free into the gate areas, and what alternate bypass path (if any) avoids opposing foot traffic?
No alternate bypass path exists for general passengers, because the walk-through duty-free is the corridor. The primary choke point is the single duty-free exit portal where all passengers spill into the main departures lounge and immediately collide with people stopping for the nearby flight-information screens.
The pinch happens right at the doorway threshold between retail and the airside lounge, especially when passengers stop dead to read the screen bank positioned immediately above/adjacent to the exit. Opposing foot traffic forms when people backtrack inside duty free to regroup or retrieve items. The only workable tactic is lane discipline: stay on the central aisle through retail, keep moving past the exit, then step aside only after you clear the portal and reach the wider area before the gate-corridor split.
What is the maximum walking distance (meters) from Security to the farthest gate/boarding area used for typical international departures?
The maximum walking distance from Security to the farthest boarding point is about 250–300 meters. The farthest endpoint is typically the end of the B-gate pier (around Gate 14) or the remote bus-boarding doors used for some departures.
That distance is physically short because the terminal footprint is compact, but it becomes a “slow walk” during peak banks. The duty-free maze immediately after Security reduces walking speed, and congestion spikes again at the duty-free exit and the gate-corridor split. Budget 15–20 minutes from Security to any far gate in summer peaks, even though the straight-line distance suggests under 5 minutes when unobstructed.
Where are the coolest/most ventilated waiting zones airside (specific corridor/section), based on proximity to vents/doors/windows?
The upstairs airside mezzanine near the Everest restaurant and the SkyServ/Filoxenia lounge area is the coolest, most ventilated waiting zone. That level sits above the densest crowd layer and stays more open, so vents and general airflow aren’t blocked by shoulder-to-shoulder standing passengers.
A strong secondary option is the Sector B extension wing, especially the far end near Goody’s Burger House around Gates B9/B10. Lower density there reduces “body-heat loading,” and the newer-feeling wing layout tends to breathe better than the older Gate A core. If your gate is in Sector A, the practical play is to wait upstairs or in Sector B (when accessible), then walk back down or across only when boarding is imminent.
What is the closest restroom to the densest gate holding area, and what is the shortest path that avoids backtracking through duty free?
The closest restroom to the densest Gate A holding area is along the main airside corridor wall just beyond the duty-free exit, serving the Gates A1–A6 zone. From the central gate seating near Gates A1–A5, move into the corridor spine and follow the wall-side flow toward the nearest restroom doors without attempting to re-enter duty free.
Because duty-free is effectively one-way, the shortest “no backtracking” option when gate-level toilets are overwhelmed is to go upstairs to the mezzanine by Everest. Take the stair/escalator near Gate A1, then use the mezzanine restrooms that serve the food court/lounge overflow. This route trades a brief vertical move for a less chaotic approach than fighting through the densest floor-level cross-flows.
Where is the largest overflow standing zone near gates that doesn’t block flows (measurable width/landmark-based), when seating is full?
The upstairs airside mezzanine landing by the Everest restaurant is the largest overflow standing zone that doesn’t block boarding flows. That space functions as an open buffer above the gate floor, so standing passengers don’t pinch the corridor lanes used for queue formation at the gates.
The best “non-blocking” placement is to stand on the mezzanine near the Everest seating perimeter, keeping the central walkway clear and using the edge zones by tables/railings rather than the stairs. A workable secondary overflow area is in Sector B around Gates B10–B12, where the corridor widens and simultaneous boarding pressure is often lower than Gate A. When Gate A is saturated, the mezzanine is the most predictable relief valve.
What is the exact location of working power outlets/charging stations airside (by shop/gate landmark), and how many plugs are typically available there?
Working public outlets are concentrated in the corridor wall between the luggage drop-off area and the Gates A1–A7 stretch, with a high-value pocket beside Luggage Drop-off #36 where nearby seats/outlets are repeatedly reported as usable. A secondary, conditional option is upstairs near the Everest area, where wall sockets or workstation areas may provide power if accessible and functioning.
| Area | Exact landmark | What to look for | Typical availability |
|---|---|---|---|
| Gate A corridor | Wall section between luggage drop-off and Gates A1–A7 | Wall-mounted sockets | Very limited, often occupied |
| High-value spot | Next to Luggage Drop-off #36 | Seats adjacent to power | Few plugs, fast turnover |
| Upstairs mezzanine | Everest restaurant / workstation zone | Wall sockets near tables | Variable, may require purchase |
Expect scarcity rather than abundance: reports suggest fewer than ~20 functioning public outlets across the general airside areas, with the most reliable demand concentrated at the Luggage Drop-off #36 spot.
What is the shortest route from bag drop/check-in hall to the Security queue entrance, and where do lines physically spill when the hall hits critical mass?
The shortest route runs from the center of the ground-floor check-in hall to the central stairs/escalator up to the mezzanine, with the Security queue entrance immediately at the top. The walking distance is typically under 100 meters because the terminal is compact and the vertical ascent is the main transition.
When the hall hits critical mass, lines spill backward from the Security access point down the stairs/escalators and into the central circulation space of the check-in hall. As density rises further, queues lose shape and merge with cross-flows to the counters, and the tail end can extend through the main doors onto the curbside sidewalk, creating an inside-to-outside congestion continuum.
Where is the best landside waiting spot (pre-security) with any indoor seating, and what is the walking distance from there to the check-in counters?
The best landside waiting spot with indoor seating is the second-floor landside lounge area accessed before Security. That upstairs zone is the only consistent refuge from the ground-floor processing crush and includes couches for short waits.
It sits directly above the check-in counters, so the walk back down to the ground-floor desks is short and simple. Using the stairs or lift, typical walking time to reach the check-in counter area is under 2 minutes once you decide to descend. Reports note staff may discourage sleeping or prolonged loitering, but for active waiting it is the most viable landside seating zone.
Where are the clearest flight information screens positioned after Security (exact landmarks), so travelers can verify gate changes without relying on announcements?
The clearest, most reliable flight information screens are the main FIDS bank positioned immediately at the duty-free exit into the departures lounge. This screen cluster is the “Point of Truth” because it’s placed where every passenger is forced to pass after Security and before dispersing to the gate corridors.
After exiting duty free, stop just beyond the portal and look above/adjacent to the exit where passengers naturally pause before the corridor splits left toward Gates 1–6 and right toward Gates 7–14. Don’t assume you’ll have a visible or working monitor near your seat in Sector A or deep in the B corridor. If gate-change risk is high, loop back to this duty-free-exit screen bank every 15–20 minutes.
What is the shortest path from the main gate lounge/restaurant cluster to the most commonly used boarding gates, minimizing time lost in retail bottlenecks?
The direct path runs from the upstairs Everest mezzanine (or the central lounge/seating cluster) down the stairs to the duty-free exit node, then left for Gates 1–6 or right/straight for Gates 7–14. Because you are already past the walk-through duty-free once you’re in the lounge/restaurant cluster, the retail bottleneck is no longer on your route.
From the Everest area, descend the nearest stair/escalator and you’ll land at the central distribution point where the departures lounge feeds both gate sectors. Turn left to reach the Gate A corridor (most common “cattle-pen” gates) or continue right to push into Sector B. This route stays on the corridor spine, avoiding any need to re-enter duty free or fight counter-flows inside the retail maze.
If a passenger is told to “wait upstairs,” where is the stair/escalator access point nearest the main gate areas, and what gates does it serve best?
The stair/escalator access point is just beyond the duty-free exit near Gate A1, and it serves Gates 1–6 best. It functions as the closest vertical escape hatch from the densest Gate A holding zone and is visible shortly after passengers clear the retail portal into the departures lounge.
From the central seating immediately outside duty free, move toward the Gate A side of the corridor split and look for the stairs/escalator rising to the mezzanine level (Everest and lounge area). This access point is strategically placed so passengers waiting for Gates A1–A6 can remain upstairs in cooler, less congested space, then return downstairs only when boarding activity becomes clear.
Archive Heraklion International Airport Map
Below are all historical map versions for Heraklion International Airport. Each year includes the official map available for that period, presented as both WebP and PDF.
2025-2026 Heraklion International Airport Map (Official 2025 Edition)


